The Ultimate Guide to Baking Adorable Valentine’s Day Slice and Bake Heart Cookies
Valentine’s Day is synonymous with sweet gestures, and what better way to express love than with homemade treats? As someone who has spent countless holidays perfecting confectionery in professional bakeries, I understand the irresistible allure of festive desserts. These homemade slice-and-bake heart cookies are a testament to that magic. Crafted from a soft, rich, and perfectly sweet sugar cookie dough, they boast the most charming red heart centers and are beautifully adorned with an array of flirty, festive sprinkles.
Imagine spotting these delightful cookies in a bustling bakery window – their vibrant colors and intricate design catching your eye. That’s precisely the kind of charm these cookies exude! But here’s the best part: after extensive testing, an impressive eight times to be exact, I’ve perfected a recipe that makes them even more enjoyable to create in your own kitchen. You can trust that they will bake up beautifully and consistently, delivering a taste and look that rivals any professional confection.

As you plan your ultimate Valentine’s dessert spread, remember that these heart-shaped wonders are just the beginning! For those who crave something a little more decadent yet equally festive, consider adding a slice of rich moist red velvet cake, a batch of chewy red velvet brownies, or even some irresistible gooey red velvet rolls. Each of these recipes perfectly complements the theme of love and celebration, ensuring your Valentine’s Day is filled with delightful flavors and heartfelt moments.
Table of Contents
Why You’ll Love These Cookies
Beyond their undeniable cuteness, these Valentine’s Day slice and bake heart cookies offer a multitude of reasons to fall in love with them. They perfectly combine ease of preparation with a stunning, professional finish, making them ideal for both novice and experienced bakers. Here’s why these cookies will become your go-to festive treat:
- Effortlessly Elegant: The slice-and-bake method simplifies the baking process, allowing you to create intricate designs without the fuss of individual cookie cutting. The result is a uniformly beautiful cookie every time.
- Perfectly Sweet & Buttery: Made with a superior homemade sugar cookie dough, these cookies strike the ideal balance of sweetness and rich, buttery flavor. The vanilla bean paste adds an extra layer of gourmet taste that truly elevates them.
- Nostalgic Appeal: There’s something inherently comforting and nostalgic about a perfectly baked sugar cookie. These cookies tap into that feeling, reminding us of childhood joy and homemade goodness.
- Customizable Fun: From the color of the heart center to the type of sprinkles on the edge, these cookies offer endless possibilities for personalization. You can tailor them to any holiday or celebration beyond Valentine’s Day.
- Freezer-Friendly: The dough log can be prepared in advance and frozen, making these cookies perfect for spontaneous baking sessions or preparing for future events. Freshly baked cookies are always just a slice and a bake away!
Each bite delivers a delightful blend of soft, chewy texture and rich vanilla flavor, making them an absolute joy to share with loved ones or savor yourself. Get ready to impress with these charming and delicious heart cookies!
How to Make Them
Crafting these adorable heart-centered slice-and-bake cookies is a fun and rewarding process. Follow these detailed steps to ensure your cookies turn out perfectly, ready to charm everyone who tastes them.
1
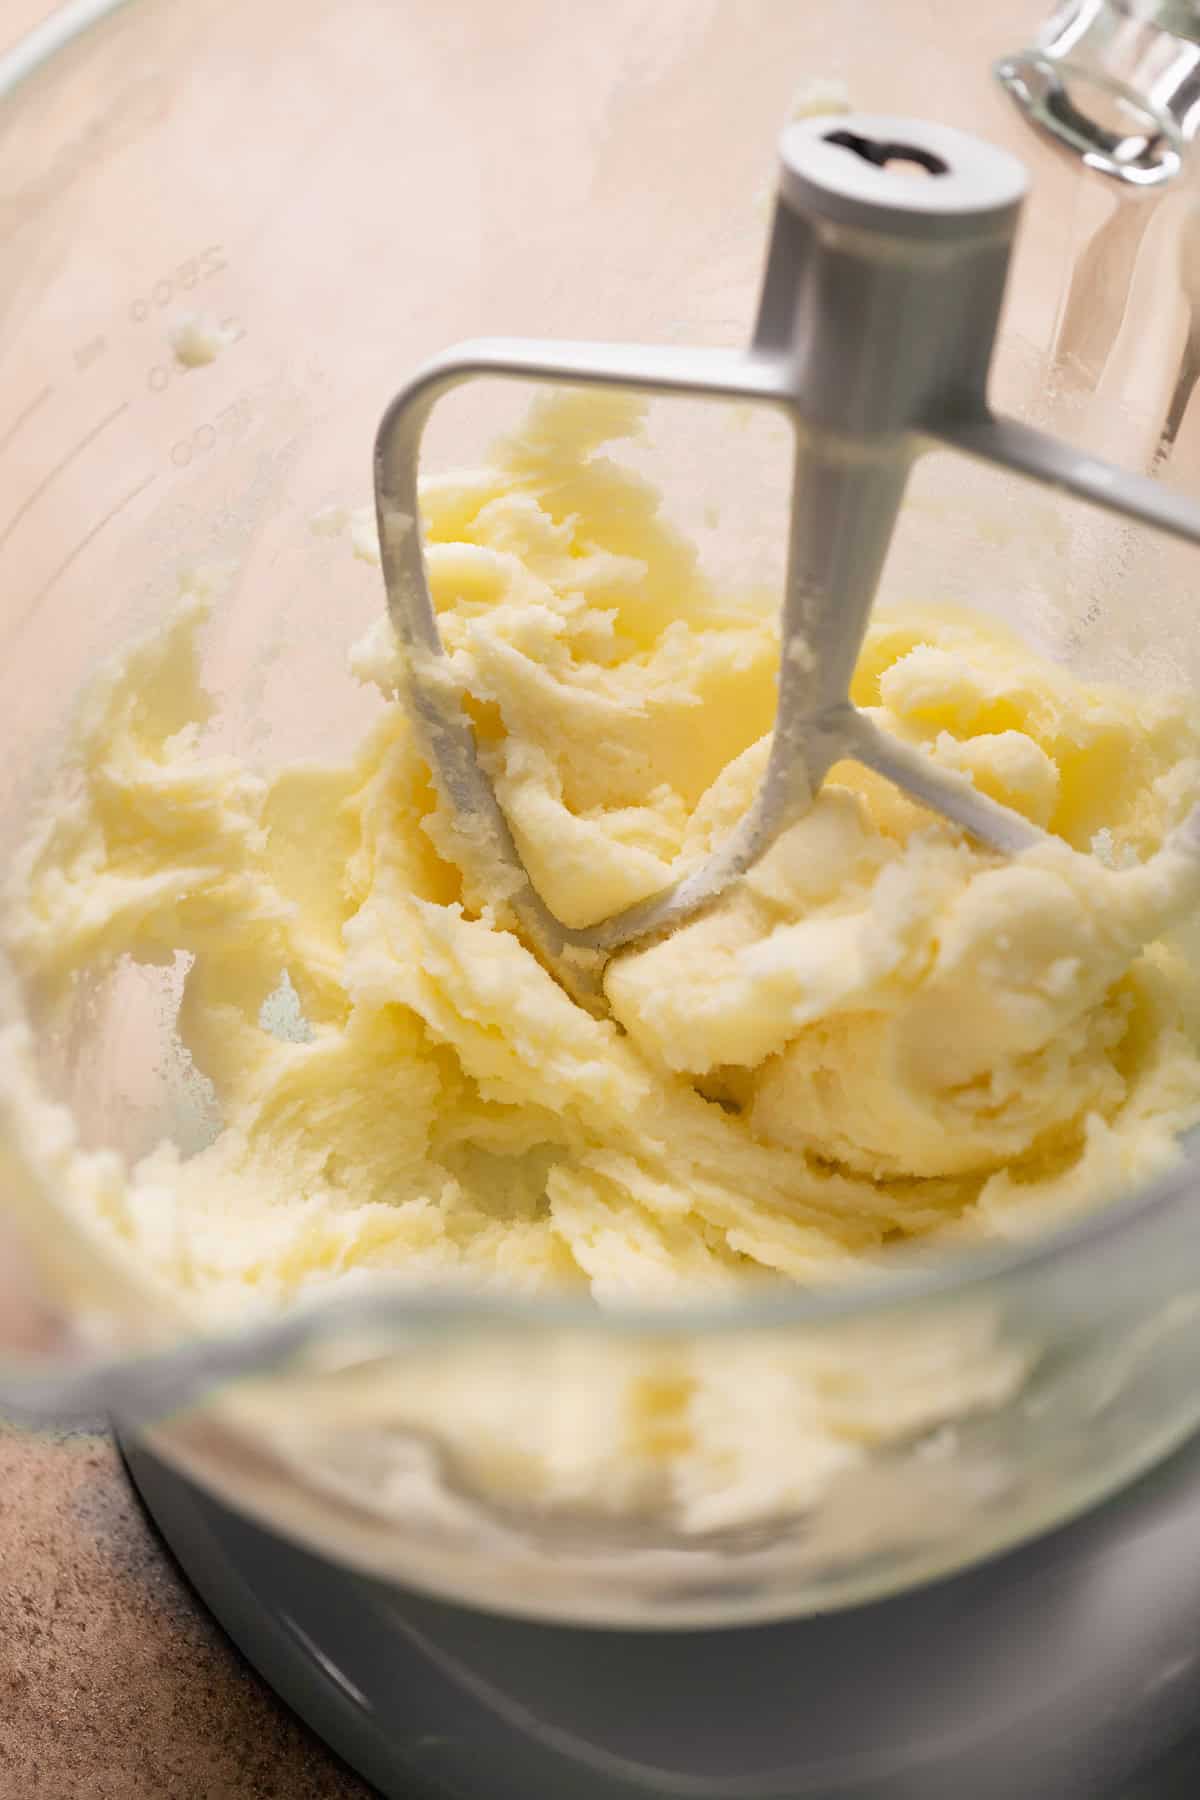
Cream the butter and sugar together in a mixing bowl. This crucial first step incorporates air into your dough, leading to a light and tender cookie. Beat them until the mixture transforms into a pale, visibly lighter, and fluffy consistency, as depicted in the image above. This usually takes about 2-3 minutes with an electric mixer.
2
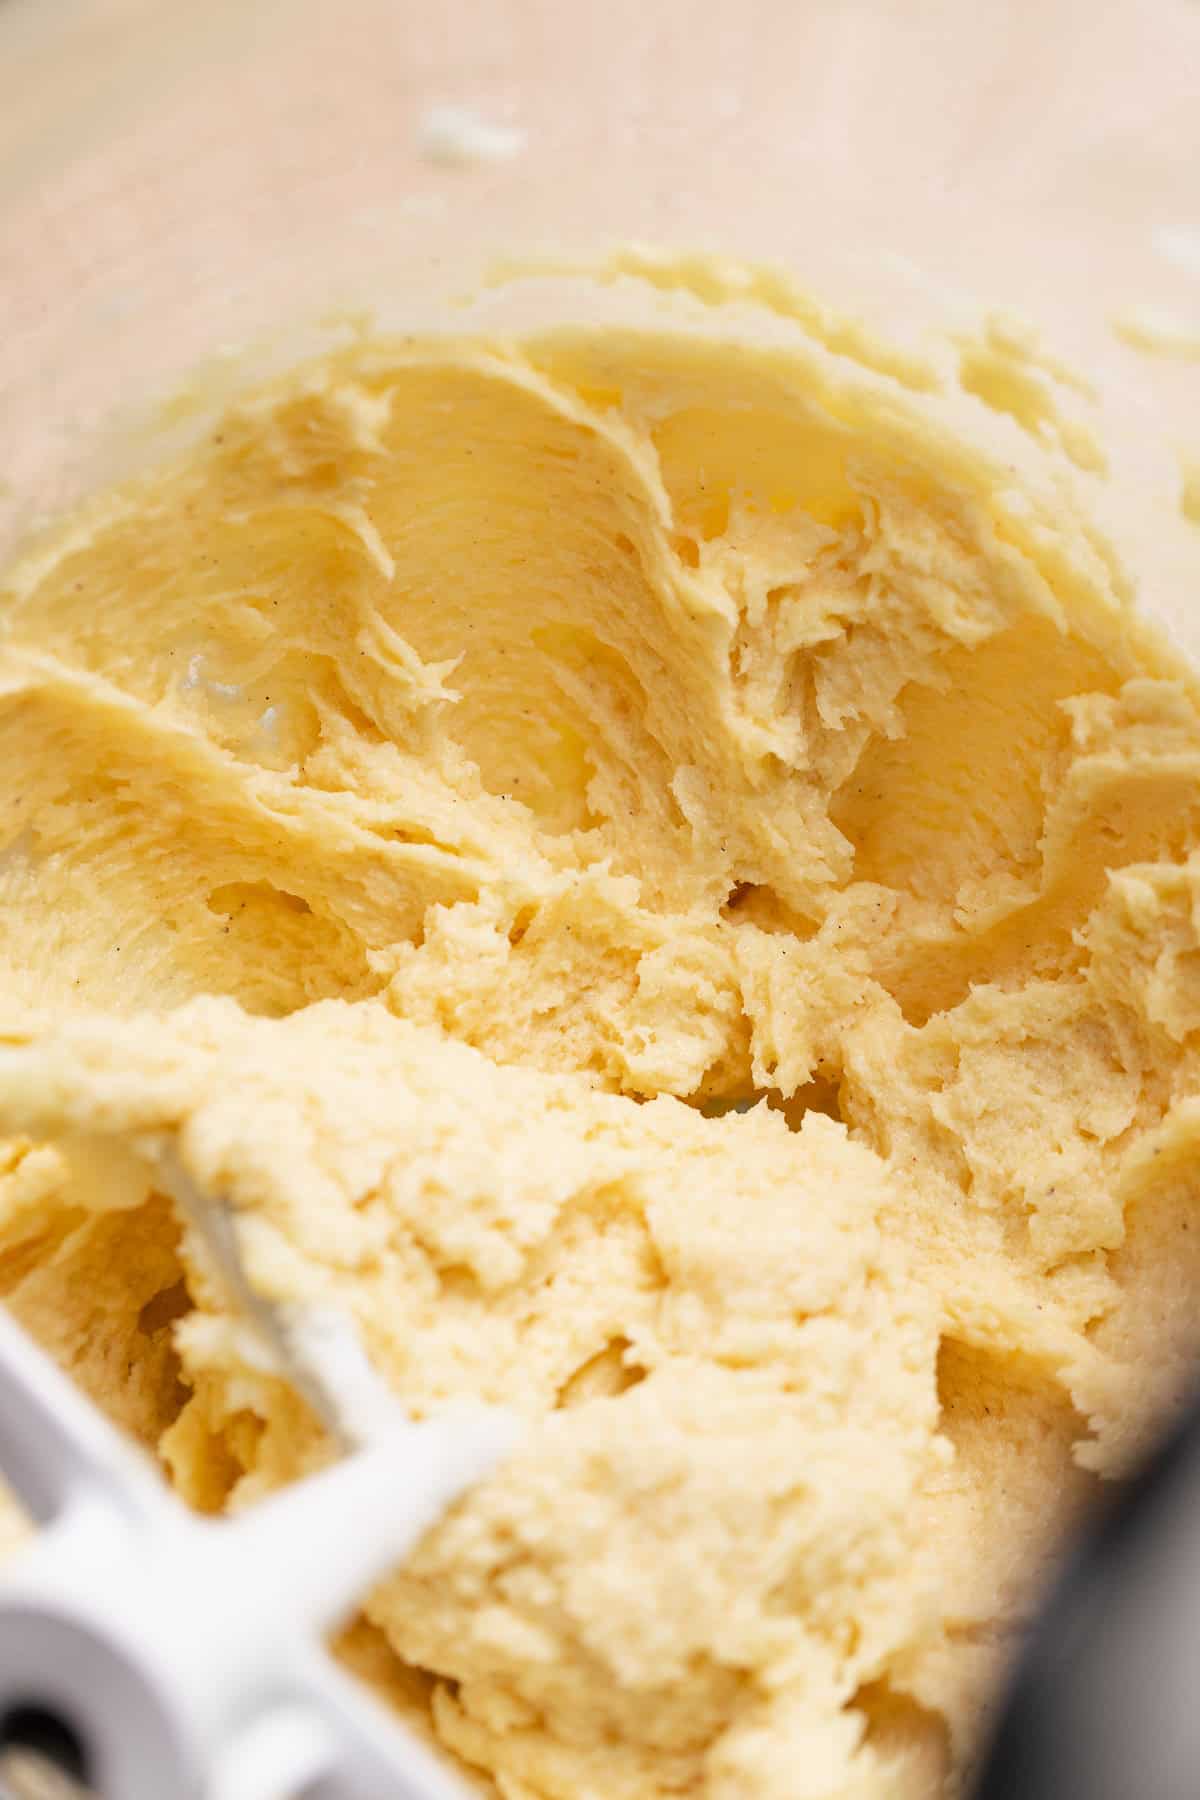
Mix in the wet ingredients. After creaming, add the egg, egg yolk, heavy cream, and vanilla. Beat until just combined. For an authentic bakery-style flavor, I highly recommend using vanilla bean paste; its rich, concentrated flavor and visible specks will elevate your cookies to gourmet status.
3
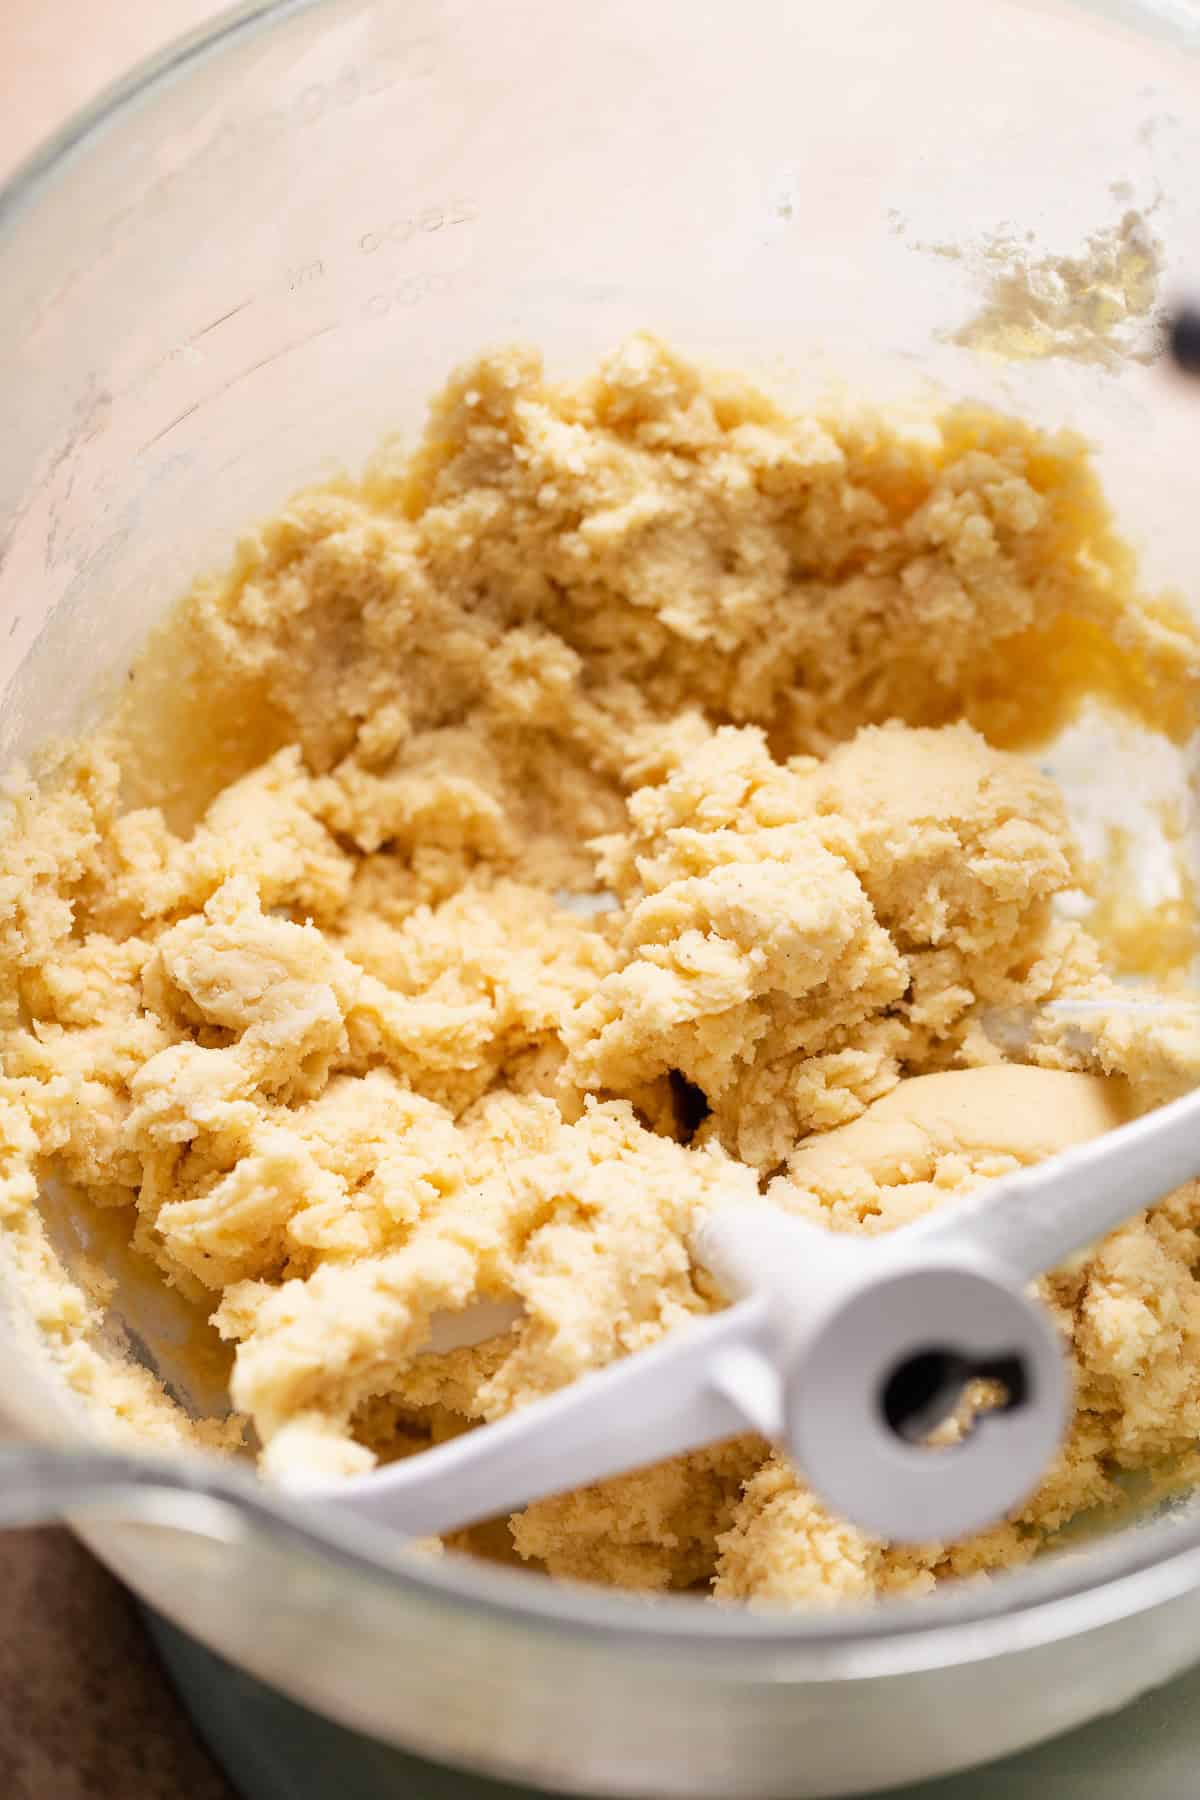
Gradually mix in the flour mixture. Add the dry ingredients to the wet ingredients in two or three additions, mixing on low speed. Stop mixing as soon as the dough comes together and no dry pockets of flour remain. Overmixing will develop the gluten, resulting in tough cookies instead of tender ones.
4
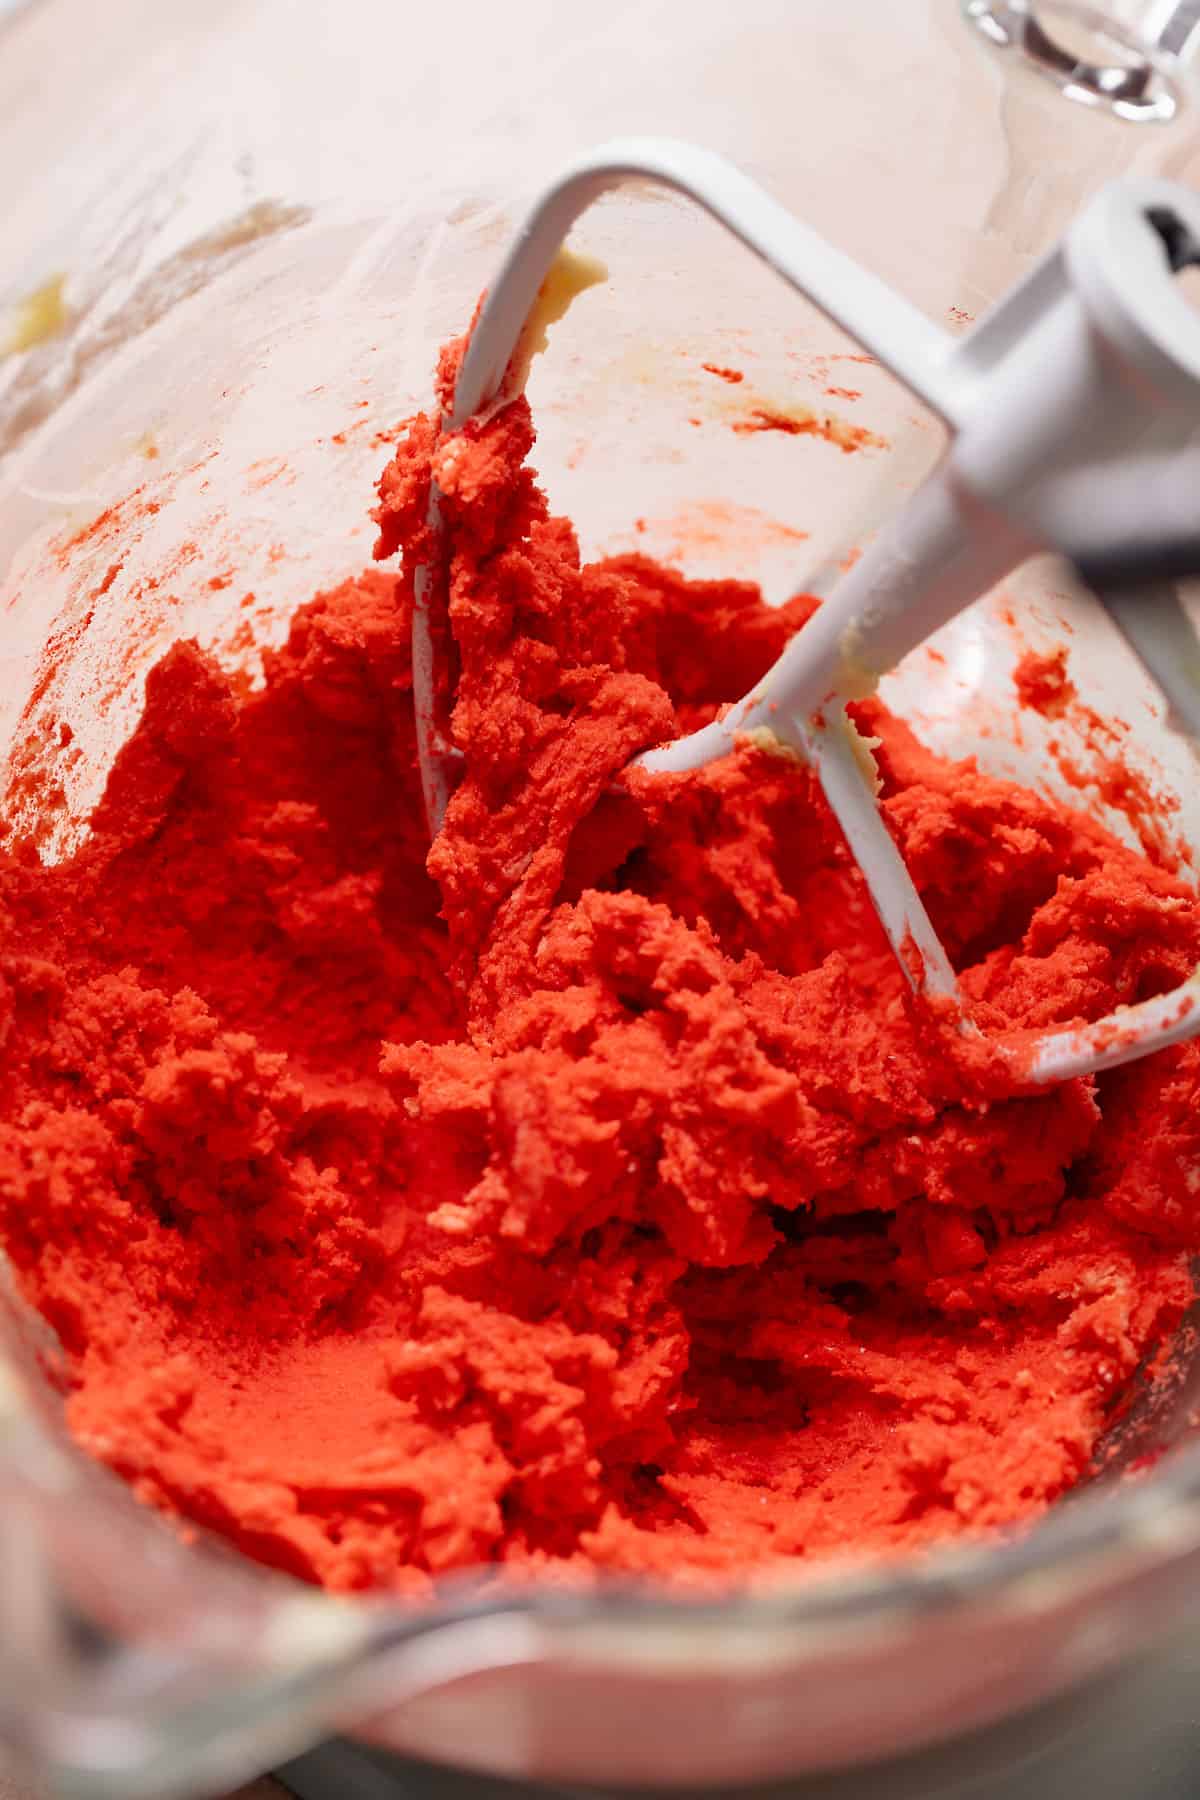
Color half of the dough red. Divide your dough in half (approximately 375-400 grams for the colored portion). Add a few drops of red gel food coloring to one half and mix until you achieve a vibrant, consistent shade of red or pink. For the best results, always use a concentrated gel food coloring like Americolor, as liquid food colorings are often not potent enough and can alter the dough’s consistency.

5
Cut out the heart shapes. Roll out the red dough between two sheets of parchment paper to about 1/2 inch thick. Use a heart-shaped cookie cutter, approximately 1 1/2 inches wide, to cut out as many hearts as possible. Gather and re-roll the scraps only once to avoid overworking the dough, which can make cookies tough. Chill the cut hearts for 10 minutes to firm them up.
6
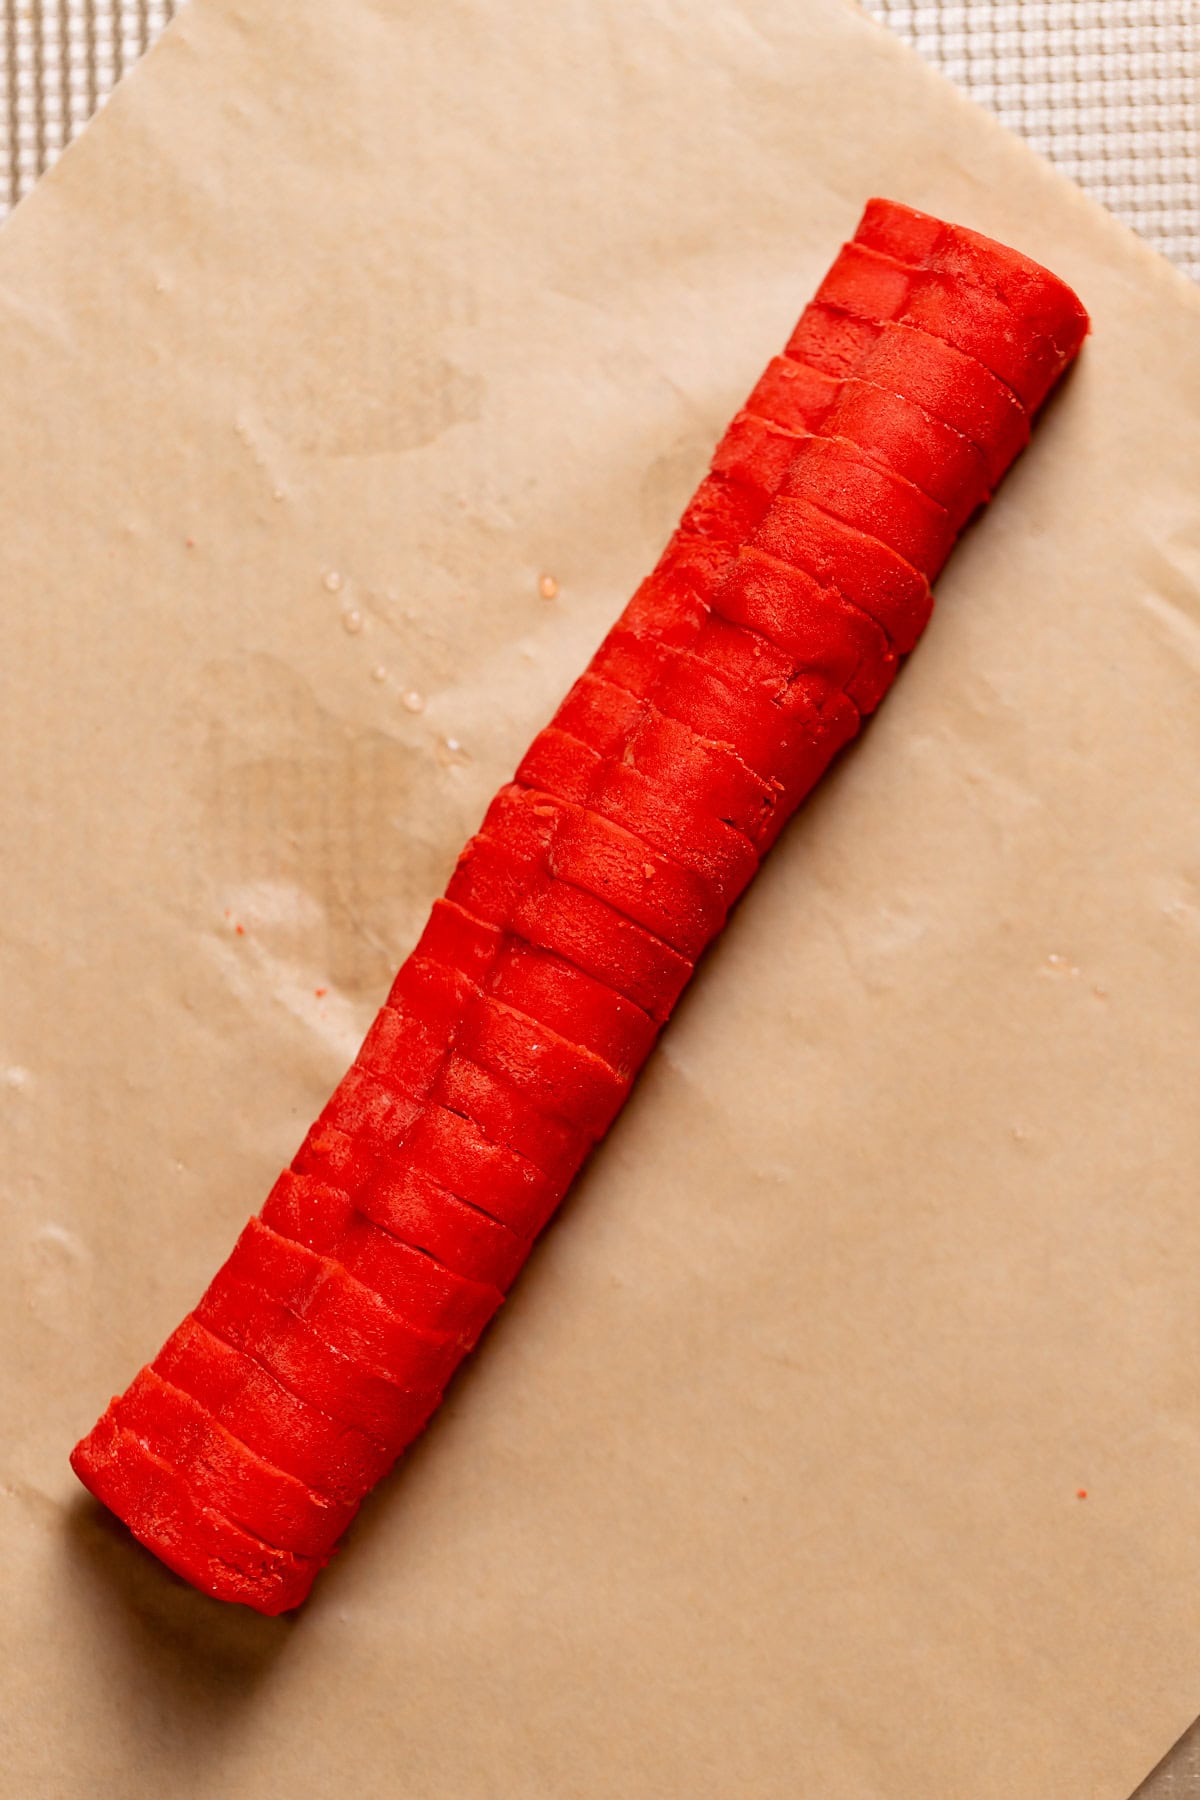
Assemble a log of the heart shapes and freeze. This is the secret to perfect heart centers! Lightly dab a touch of water on the side of each heart before pressing them together to form a long, continuous log of hearts. The water acts as a gentle adhesive, ensuring they stick together and hold their shape during baking. Place this heart log on a parchment-lined baking sheet and freeze for at least 30 minutes until very firm. A helpful, complete step-by-step video demonstrating this technique is located below the recipe card.
7
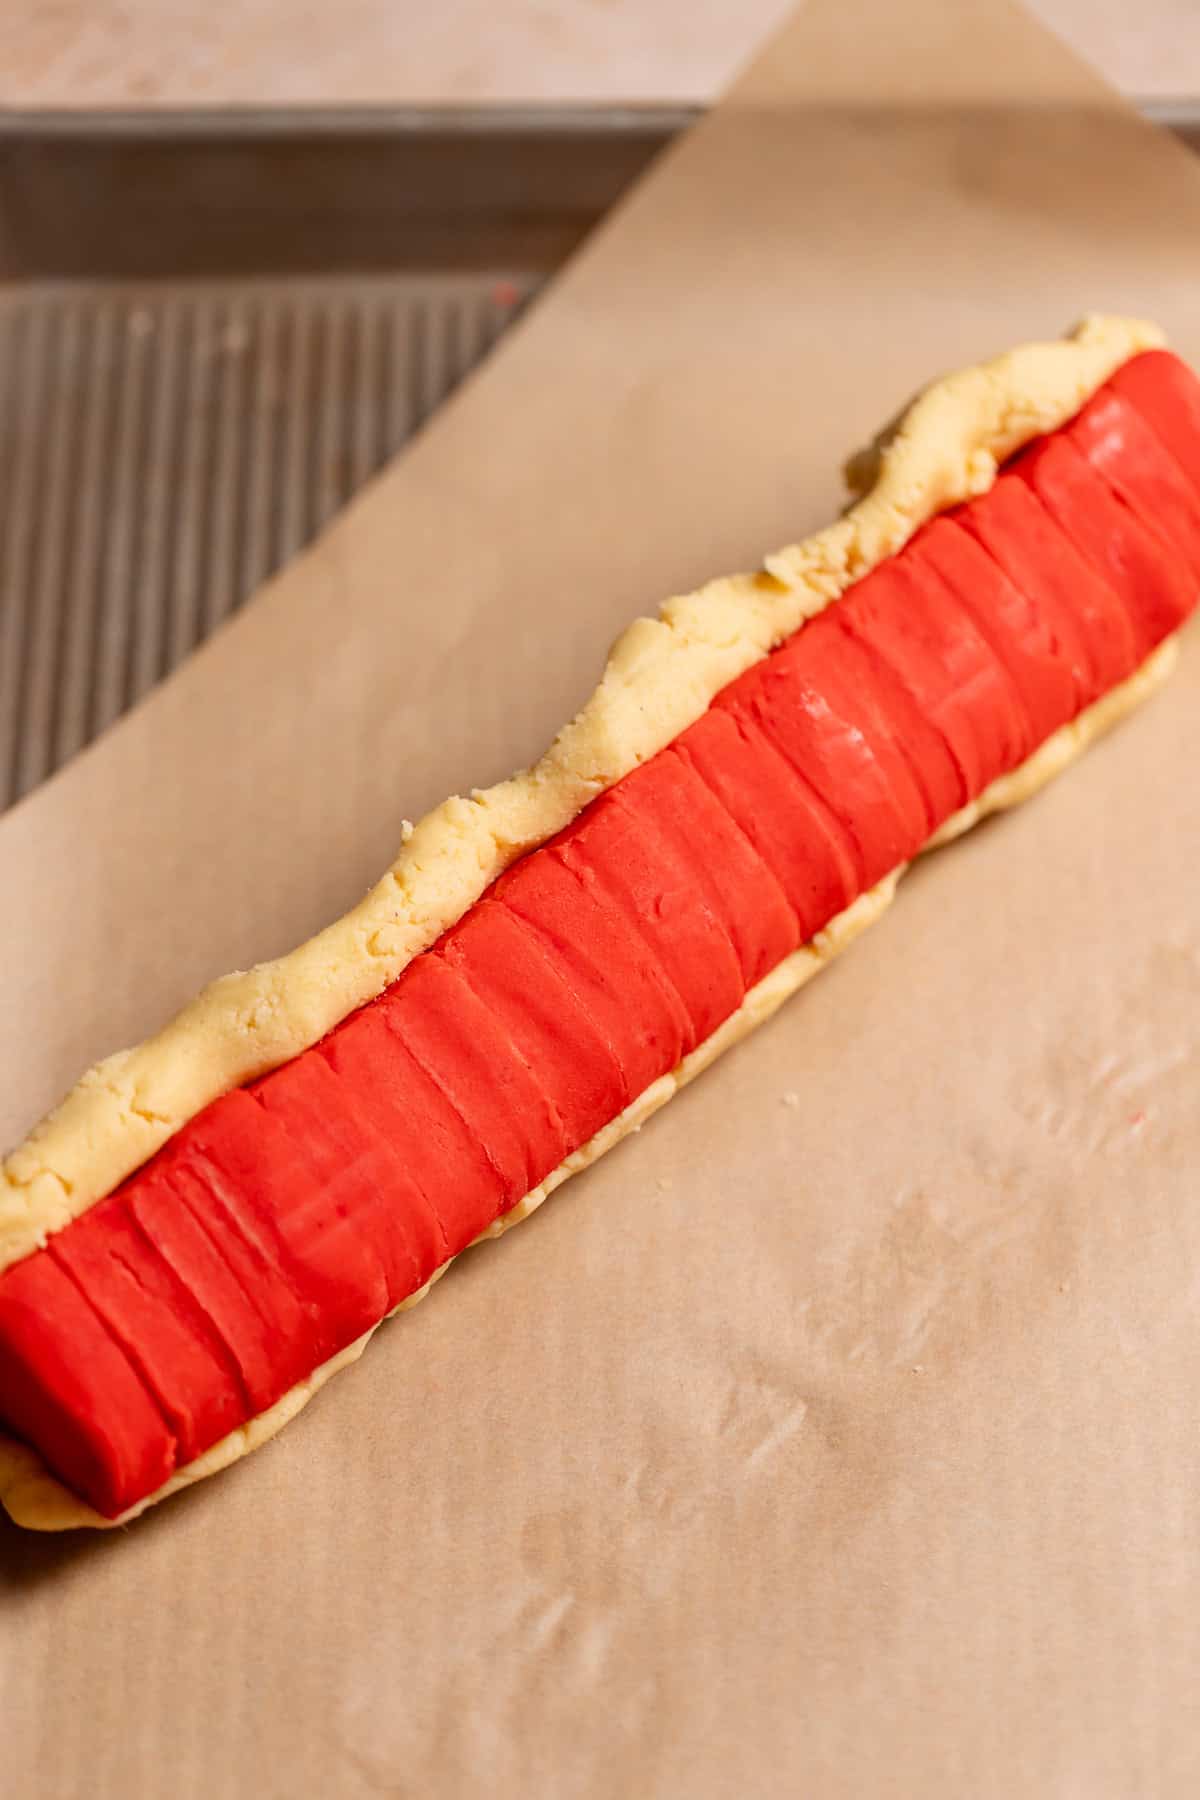
Encase the hearts with the remaining plain cookie dough. Carefully wrap the chilled log of red hearts with the plain sugar cookie dough. Gently press and mold the plain dough around the heart log, ensuring there are no air gaps or crevices. This creates a seamless exterior and guarantees that your beautiful heart centers will be perfectly visible when sliced.
8
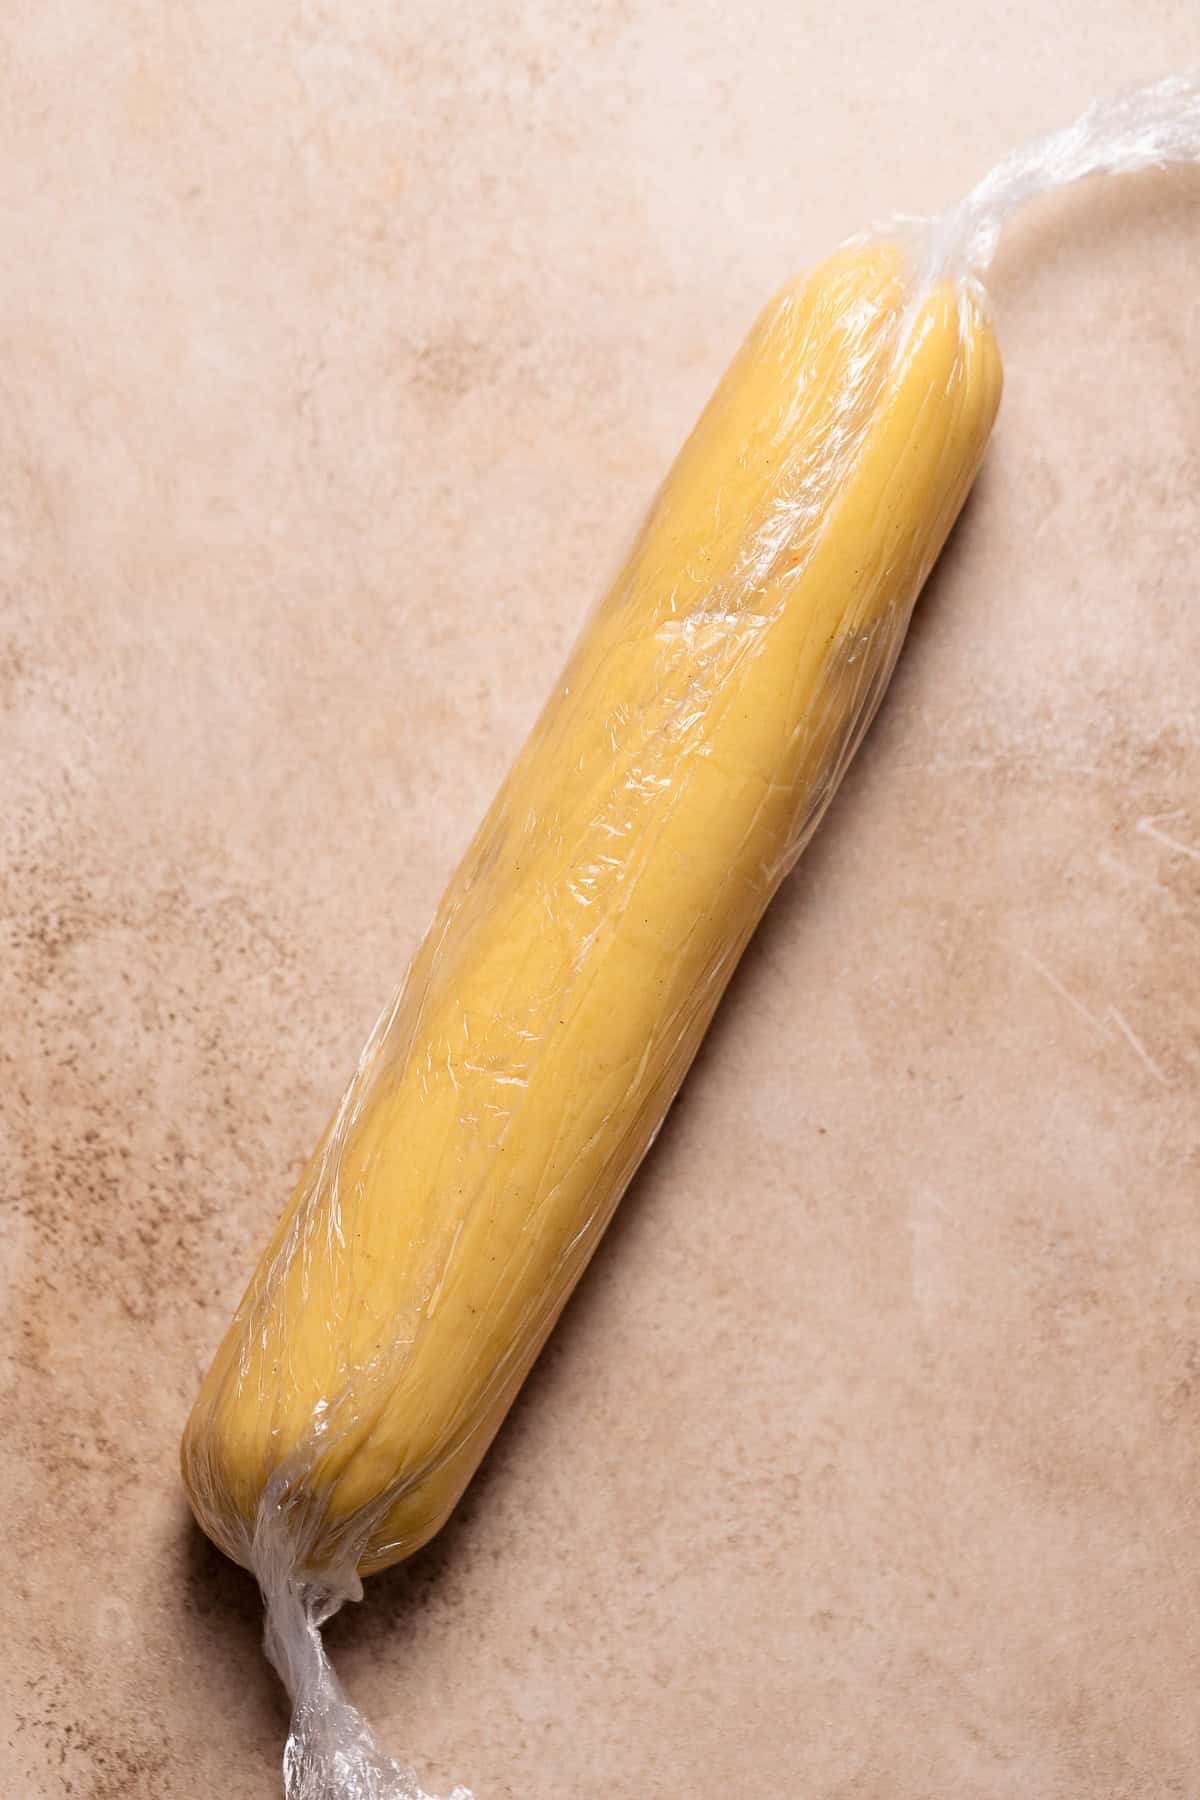
Shape the log with plastic wrap and chill. Once the plain dough fully encases the heart log, tightly wrap the entire creation in plastic wrap. Use the ends of the plastic wrap to roll the log back and forth on your countertop, gently shaping it into a perfectly round and uniform cylinder. This step helps to compress the dough and eliminate any remaining air pockets. Chill the dough log in the refrigerator for at least 2-3 hours, or preferably overnight, to allow it to firm up completely, making it much easier to slice neatly.

9
Chill, then roll the cookie log in sprinkles. Once your dough log is thoroughly chilled, unwrap it and prepare your sprinkles. Spread 1/2-1 cup of your chosen sprinkles on a clean surface. Roll the entire log firmly in the sprinkles, ensuring an even and generous coating around the circumference. You truly can’t go wrong with your sprinkle choice! I’ve tested them with nonpareils, sanding sugar, and jimmies, and all yielded fantastic and festive results.

10
Slice and bake the cookies. Preheat your oven to 350°F (180°C). Using a very sharp, thin knife, carefully slice the dough log into individual cookies, each approximately 1/2-inch thick. Arrange the sliced cookies on a parchment-lined baking tray, leaving a little space between them. Bake for 9-12 minutes, or until the edges are lightly golden and the tops appear set and matte. For a crispier texture, you can bake them for an additional minute or two. Let them cool on the baking sheet for a few minutes before transferring to a wire rack.
Customizing Your Cookies
One of the most enjoyable aspects of these slice and bake cookies is their versatility. While the red heart is classic for Valentine’s, you have endless opportunities to get creative and tailor them to any occasion or preference:
- Heart Color Variations: For the heart centers, feel free to experiment with any color of gel food coloring. Imagine vibrant pink hearts for a more subtle romantic touch, deep purple for a unique twist, or even a mix of different colors for a playful look. Green for St. Patrick’s Day, blue for a baby shower, or various pastels for Easter – the possibilities are truly limitless!
- Sprinkle Spectacle: When it comes to the sprinkled edges, you simply can’t go wrong. My cookie taste testers universally agreed that jimmie sprinkles offered the prettiest and most satisfying texture, providing a delightful crunch without being too hard. However, don’t let that limit your imagination! Nonpareils create a fine, shimmering crust, while sanding sugar offers a more sparkly, granulated finish. You could also try larger pearls or even a fun combination of multiple styles and colors to match a specific theme. Think gold sprinkles for a celebratory feel or pastel mixes for spring events.
- Flavor Enhancements: While vanilla bean paste provides an exquisite flavor, you can also infuse other extracts into your dough. A touch of almond extract can complement the vanilla beautifully, or a hint of strawberry extract could amplify the red heart theme. Just be mindful not to add too much liquid, as it can affect the dough’s consistency.
- Shape Shifting: While this recipe focuses on hearts, the slice-and-bake technique can be adapted for other simple shapes. For example, a star cutter could create festive holiday cookies, or small circles could be used to create polka-dot centers for a fun, modern design.
Don’t hesitate to let your creativity shine! These cookies are a perfect canvas for your decorative ideas, allowing you to personalize each batch for maximum impact and enjoyment.

Expert Baking Tips for Success
Achieving bakery-quality slice and bake cookies at home is entirely possible with a few key considerations. Here are my top tips to ensure your Valentine’s Day heart cookies are nothing short of perfect:
- Accurate Flour Measurement is Key: This is my absolute number one baking tip! Never scoop a measuring cup directly into your bag of flour. Doing so compacts the flour, leading to an excess amount that will result in dry, crumbly cookies. Instead, use the “spoon-and-level” method: fluff the flour in its container, then spoon it gently into your measuring cup, and level off the top with a straight edge. For truly professional results, invest in a kitchen scale and measure your flour by weight (grams).
- Butter Temperature Matters: “Cool room temperature butter” means the butter should be firm enough to hold its shape but soft enough to leave a slight indentation when pressed. Aim for a temperature between 64-68°F (18-20°C). If your butter is too warm, it will melt too quickly, causing your cookies to spread excessively. If it’s too cold, it won’t cream properly with the sugar, leading to a dense cookie.
- Don’t Overmix the Dough: Once you add the flour, mix only until just combined. Overmixing develops gluten, which can make your cookies tough and less tender. As soon as you see no more streaks of dry flour, stop mixing!
- Chill Time is Crucial: The various chilling stages in this recipe are non-negotiable. Chilling allows the butter to firm up, which prevents spreading during baking and helps the cookies maintain their intricate heart shape. It also gives the flavors time to meld and the dough to become easier to handle. Don’t rush this step!
- Sharp Knife for Clean Slices: When slicing your chilled dough log, use a very sharp, thin knife. A dull knife can drag and distort the dough, ruining the clean lines of your heart design. Wipe your knife clean between slices if dough begins to stick.
- Even Thickness for Even Baking: Try to slice your cookies as uniformly as possible, around 1/2 inch thick. This ensures they bake evenly and prevents some cookies from being underdone while others are overbaked.
By following these expert tips, you’ll be well on your way to baking a batch of absolutely perfect Valentine’s Day slice and bake heart cookies that are as delicious as they are beautiful.
Storage and Make-Ahead Instructions
These slice and bake cookies are wonderfully versatile, perfect for preparing in advance or storing for later enjoyment. Here’s how to manage your cookie dough and baked treats:
Storing Unbaked Dough:
- In the Refrigerator: The fully assembled, wrapped cookie dough log can be stored in the refrigerator for up to 5 days. This makes it an excellent make-ahead option for busy weeks or upcoming events. Simply take it out, roll in sprinkles if desired, slice, and bake when you’re ready.
- In the Freezer: For longer storage, wrap the prepared dough log tightly in several layers of plastic wrap, then an additional layer of aluminum foil, or place it in an airtight freezer-safe bag. It can be frozen for up to 3 months. When ready to bake, transfer the log to the refrigerator overnight to thaw partially, then proceed with slicing and baking. You might need to add a few extra minutes to the baking time if the dough is still very cold.
Storing Baked Cookies:
- At Room Temperature: Once baked and completely cooled, store your heart cookies in an airtight container at room temperature for up to 5-7 days. To maintain their freshness and chewiness, you can even place a slice of bread in the container; the cookies will absorb moisture from the bread.
- Freezing Baked Cookies: For longer preservation of baked cookies, arrange them in a single layer on a baking sheet and freeze until solid. Once frozen, transfer them to an airtight freezer-safe container or bag, separating layers with parchment paper to prevent sticking. They can be frozen for up to 3 months. Thaw at room temperature before serving.
With these storage tips, you can enjoy these delightful Valentine’s Day cookies whenever the craving strikes, ensuring a fresh, homemade treat with minimal effort.
If you tried this or any other recipe on my website, please let me know how it went in the comments; I love hearing from you! Also, please leave a star rating while you’re there! You can also tag me on Instagram or Facebook so I can check it out!

Valentine’s Slice and Bake Heart Cookies
Print Recipe
Save RecipeSaved!
Pin Recipe
Ingredients
- 2 1/2 cups all-purpose flour, *See notes below for measuring*
- 1/2 teaspoon baking powder
- 1 teaspoon fine sea salt
- 14 tablespoons unsalted European butter (like Kerrygold), cool room temperature
- 1 cup granulated sugar
- 1 large egg, room temperature
- 1 large egg yolk, room temperature
- 2 tablespoons heavy cream, room temperature
- 1 tablespoon vanilla bean paste
- Red gel food coloring
- 1/2-1 cup Pink and white jimmy sprinkles
Instructions
-
In a small bowl, whisk together the flour, baking powder, and salt until well combined. This ensures the leavening agent and seasoning are evenly distributed throughout the dry ingredients. Set aside.2 1/2 cups (325 g) all-purpose flour, 1/2 teaspoon baking powder, 1 teaspoon fine sea salt
-
In a large mixing bowl, using an electric mixer, cream the butter and granulated sugar together until the mixture is light, fluffy, and pale in color, which usually takes about 3 minutes. Stop and scrape down the sides of the bowl with a rubber spatula to ensure everything is evenly incorporated. Then, beat in the large egg, egg yolk, heavy cream, and vanilla bean paste until just combined and smooth. Finally, gradually add the whisked flour mixture, mixing on low speed only until the dough comes together and no dry pockets of flour are visible. Be careful not to overmix.14 tablespoons (196 g) unsalted European butter (like Kerrygold), 1 cup (200 g) granulated sugar, 1 (50 g) large egg, 1 (18 g) large egg yolk, 2 tablespoons (23 g) heavy cream, 1 tablespoon vanilla bean paste
-
Divide the dough, leaving about half (approximately 375-400 grams) in the mixing bowl. To the remaining dough, add your chosen red gel food coloring and mix until it reaches your desired shade of vibrant pink or red. Roll this tinted dough evenly between two sheets of parchment paper to about 1/2 inch thick. This will ensure uniform hearts. Freeze the rolled-out red dough for a quick chill of 10 minutes. Place the remaining plain dough in a separate bowl, cover it with plastic wrap, and set aside at room temperature.Red gel food coloring
-
Carefully remove the chilled red dough from the freezer. Use a 1 1/2-inch heart-shaped cookie cutter to cut out as many heart shapes as possible. Collect any dough scraps, gently re-roll them once, and cut out more hearts. To form the heart log, lightly dab the center of each heart with a touch of water – this acts as an adhesive. Stack the hearts end-to-end, pressing them gently but firmly to adhere, creating a single, continuous log that should be approximately 9–10 inches long. Place this heart log on a parchment-lined baking sheet and freeze for at least 30 minutes, or until it is very firm to the touch.
-
Remove the firm heart log from the freezer. Take the plain cookie dough that was set aside and carefully wrap it around the frozen heart log. Work gently, pressing and molding the plain dough to completely encase the heart log, ensuring all gaps and crevices are filled. This step is crucial for achieving a perfect outer layer for your heart design. Then, wrap the entire dough log tightly in plastic wrap and use your hands to roll it back and forth on a flat surface, shaping it into a smooth, even cylinder. Chill the entire dough log in the fridge for at least 2-3 hours or preferably overnight. This firm chilling is essential for clean, precise slices.
-
When you are ready to bake, preheat your oven to 350°F (180°C). Prepare a clean, flat surface by spreading the 1/2 to 1 cup of pink and white jimmie sprinkles. Unwrap the chilled cookie dough log and roll it firmly in the sprinkles, ensuring an even and generous coating around the entire circumference. Using a very sharp knife, slice the log into cookies that are roughly 1/2-inch thick. Place the sliced cookies on a baking sheet lined with parchment paper, leaving about an inch of space between each. Bake for 9–12 minutes, or until the bottoms are lightly golden and the tops appear set and matte. For those who prefer crispier cookies, bake for an extra minute or two.1/2-1 cup Pink and white jimmy sprinkles
-
Once baked, allow the cookies to cool on the baking sheet for a few minutes before carefully transferring them to a wire rack to cool completely. This helps them firm up and prevents breakage. Serve and enjoy!
Video
Notes
Cool room temperature butter: It’s important that your butter isn’t too soft or warm when making the dough. The ideal temperature range is 64-68°F (18-20°C). You can check this by inserting a thermometer into the center of the butter. This ensures proper creaming and prevents excessive spreading.
Sprinkles: Feel free to customize with any sprinkles you love! While jimmies were a favorite, you can use sanding sugar for a fine sparkle, nonpareils for a classic crunch, or a mixture of different types and colors to match your personal style or a specific holiday theme.
Cutting out cookies: For a crispier cookie with a slightly faster bake time, you can slice them thinner, around 1/4 inch thick. Adjust baking time accordingly. Conversely, for a chewier, thicker cookie, you can slice them slightly thicker.
Dough Log Freezer Time: For best results, ensure the heart log is very firm before encasing it with the plain dough. This prevents the red dough from distorting its shape during the wrapping process.
Chilling the Final Log: The overnight chill for the complete dough log is highly recommended. It allows the dough to fully hydrate and firm up, ensuring perfect, non-spreading cookies with beautifully defined heart centers.
The calorie information provided for the recipe is an estimate. The accuracy of the calories listed is not guaranteed.
