Irresistible One-Hour Cheesy Parmesan Bread Bites: Your New Favorite Appetizer!
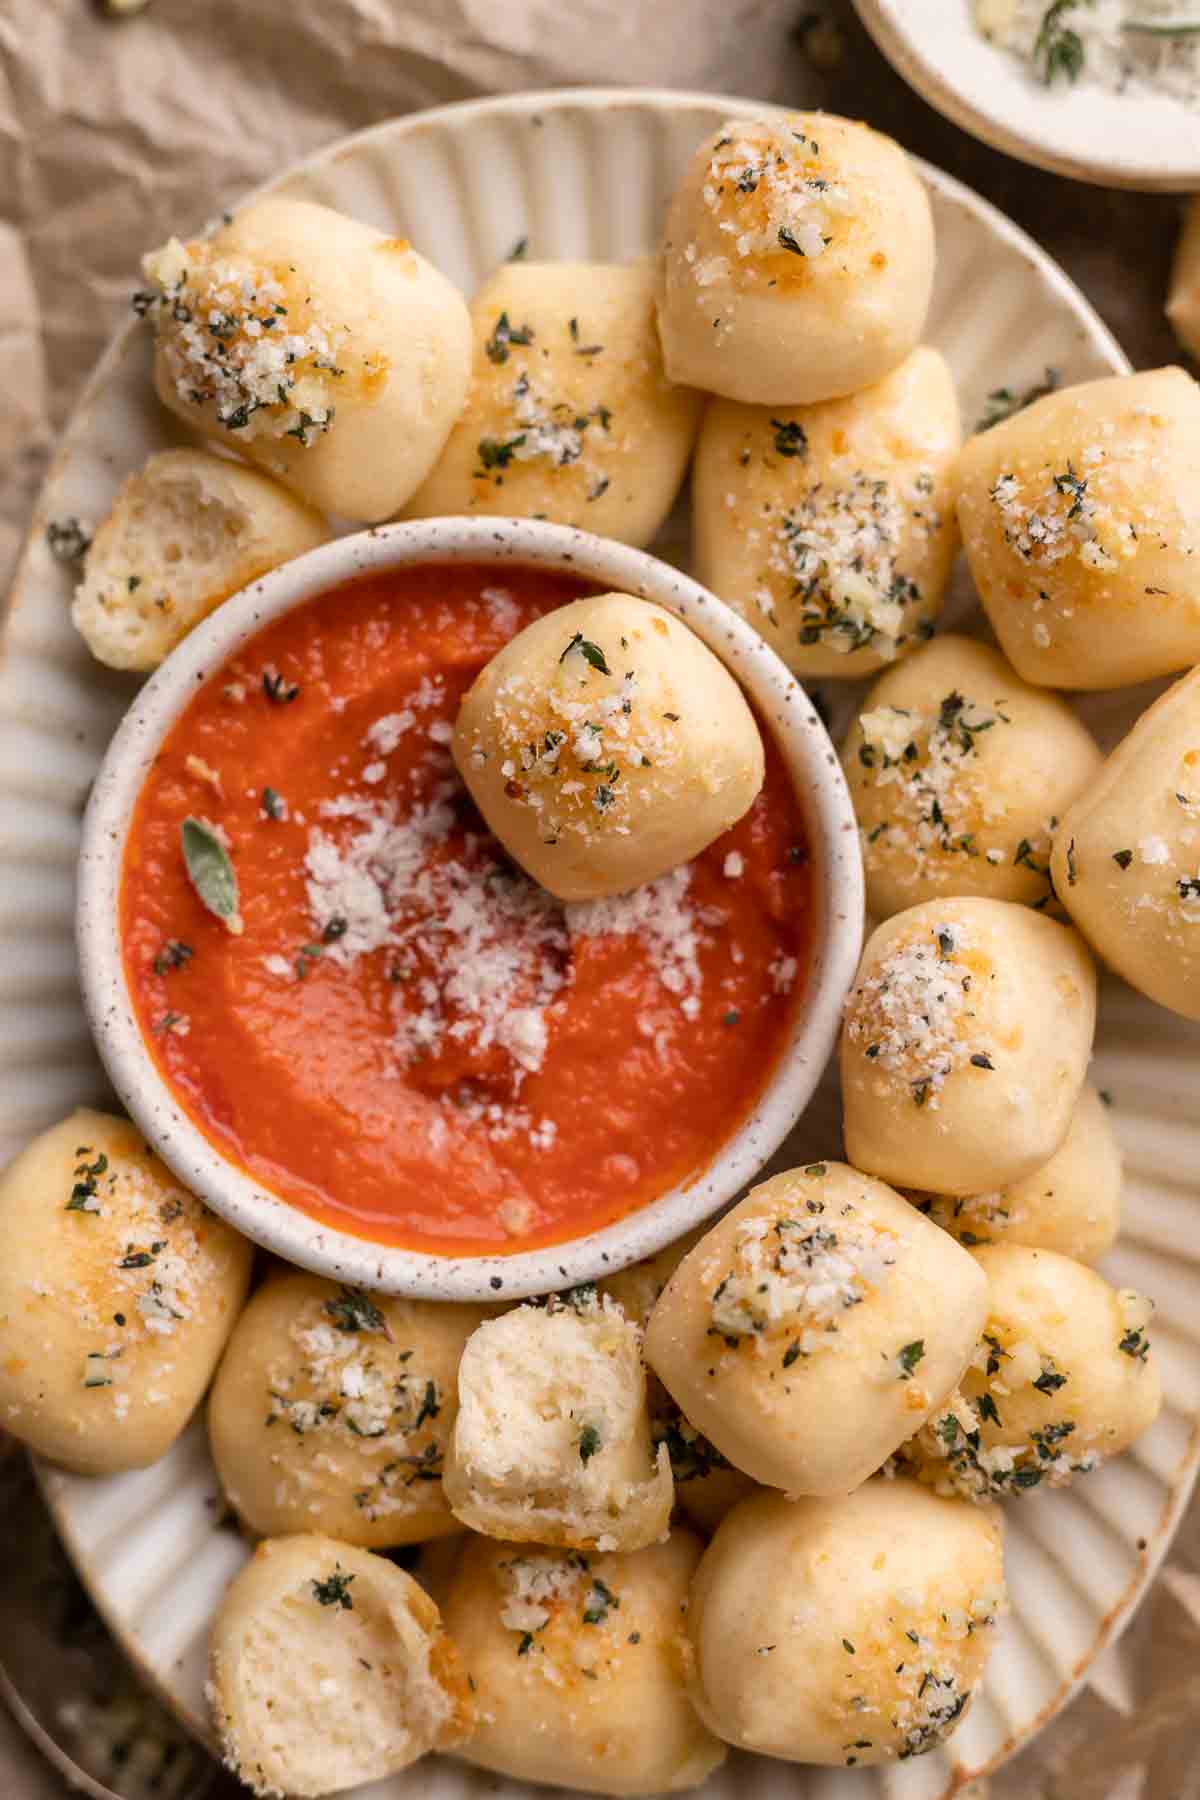
Get ready to discover the ultimate crowd-pleasing appetizer: these incredibly cheesy parmesan bread bites! You can whip up a batch of these delectable treats in just about one hour, making them perfect for last-minute gatherings or a spontaneous snack attack. Crafted with either your favorite store-bought or homemade chewy pizza dough, a generous amount of savory parmesan cheese, and a rich, aromatic garlic butter, these bites are guaranteed to be a hit at any occasion. Their irresistible flavor and soft, fluffy texture will make them a staple in your recipe repertoire, eagerly anticipated by everyone who tries them.
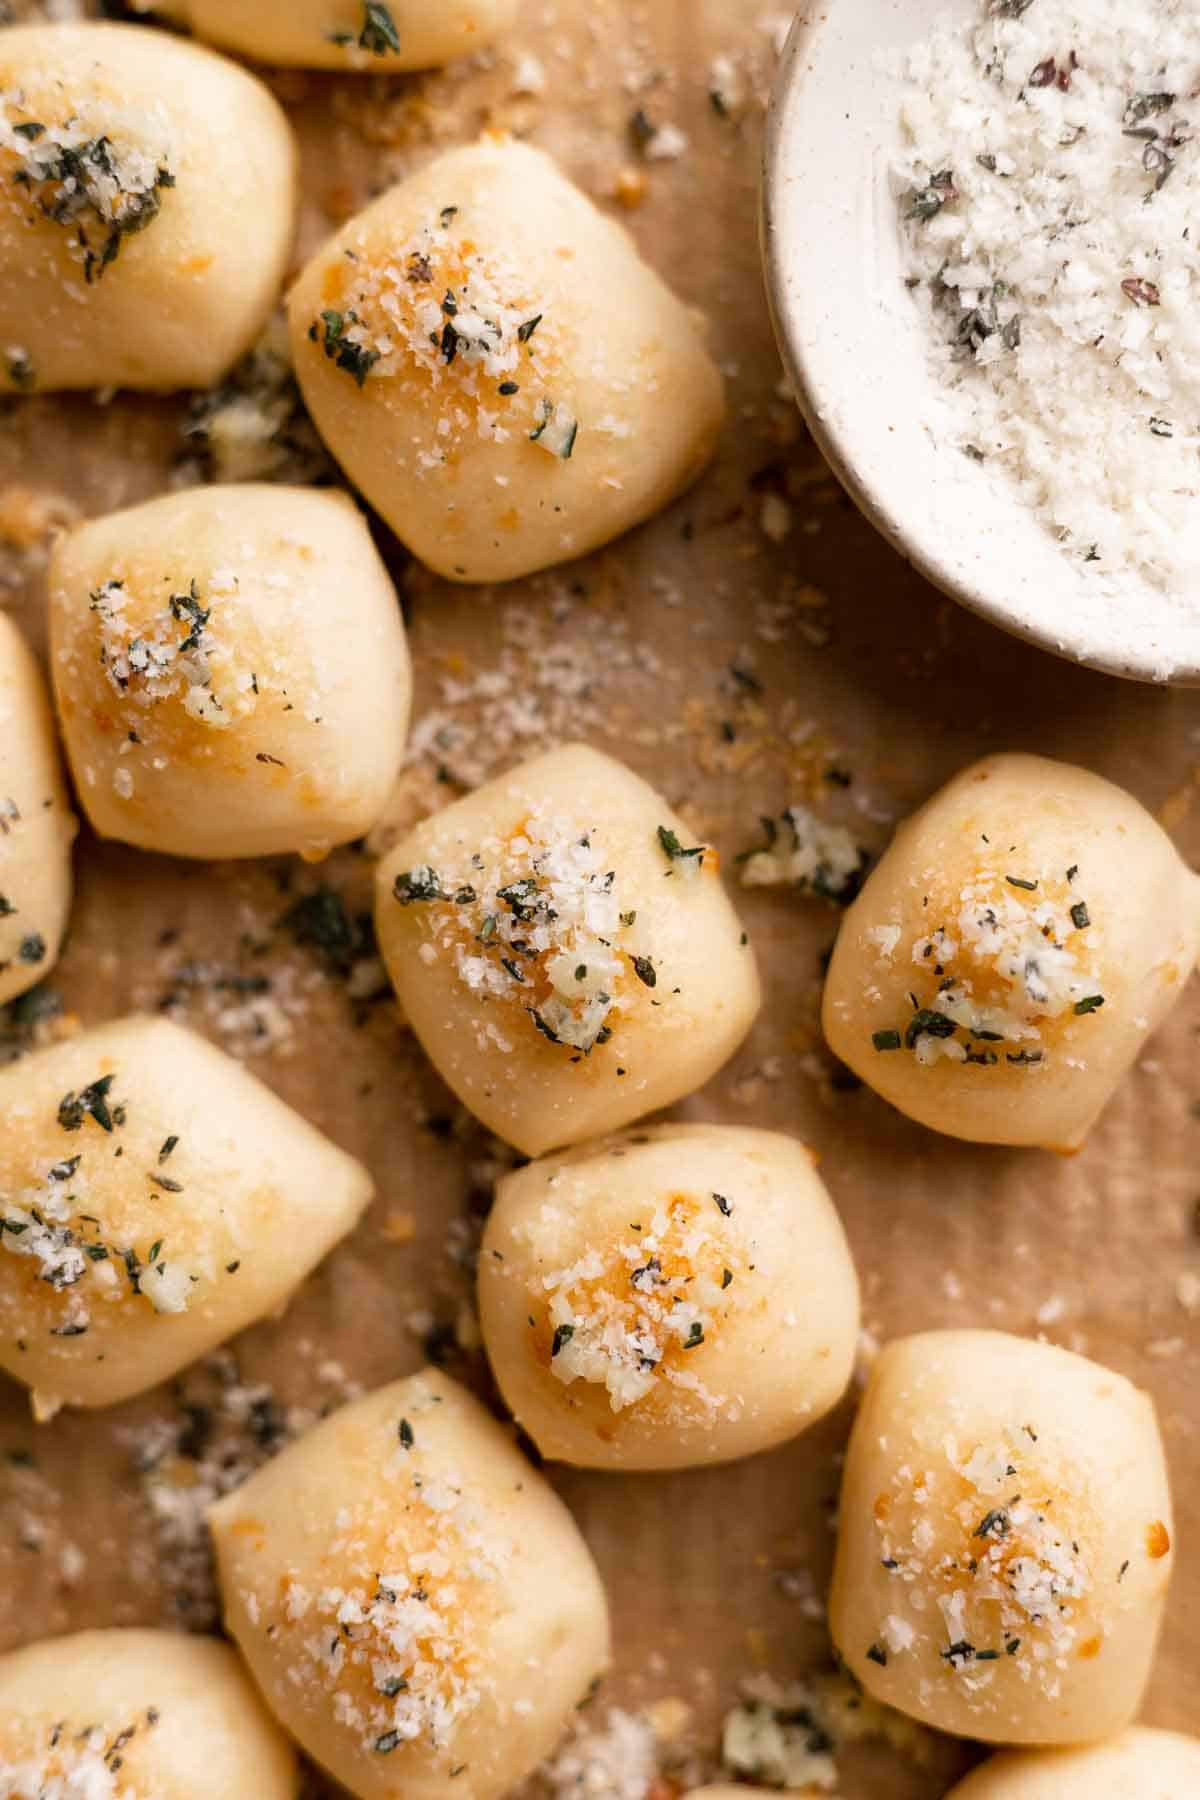
For carb lovers and cheese enthusiasts alike, these parmesan bread bites are nothing short of a revelation. They take the beloved concept of cheesy garlic bread and transform it into adorable, shareable morsels. Whether you opt for the convenience of store-bought dough or the rewarding experience of homemade pizza dough, the process is straightforward and yields spectacular results. Each bite is lovingly brushed with a tantalizing garlic herb butter and then lavishly coated with savory parmesan cheese, creating a symphony of flavors and textures.
Beyond being incredibly delicious, their quick preparation time – under one hour from start to finish – makes them an ideal choice for any gathering, from casual weeknight dinners to festive holiday parties. There’s no lengthy waiting period, just quick satisfaction! These bites have proven so popular that I even created a larger garlic bread roll version, which has received equally rave reviews. Prepare to be amazed by how easily these cheesy bread bites disappear!
Why You’ll Love These Parmesan Bread Bites
These Parmesan Bread Bites aren’t just another appetizer; they’re a delightful experience waiting to happen. Here’s why they’ll quickly become a cherished recipe in your kitchen:
- Unbelievably Quick & Easy: In a world where delicious often means time-consuming, these bread bites break the mold. With a total time of just one hour, including prep and bake time, you can have a fresh, warm, and cheesy appetizer ready to serve without any stress. This makes them perfect for unexpected guests or a last-minute craving.
- Irresistibly Cheesy Goodness: Featuring a generous double-dose of cheese – both parmesan and mozzarella are incorporated into the dough and sprinkled on top – these bites deliver an unparalleled cheesy flavor in every mouthful. The combination of salty parmesan and gooey mozzarella creates a rich and satisfying taste that cheese lovers will adore.
- Versatile for Any Occasion: From a simple family snack to a sophisticated party appetizer, these bread bites fit seamlessly into any setting. They pair wonderfully with a variety of dips like marinara sauce, pesto, or even a simple balsamic glaze. Their bite-sized nature makes them easy to serve and enjoy, no cutlery required!
- A Guaranteed Crowd-Pleaser: There’s something universally appealing about warm, garlicky, cheesy bread. These bites are consistently a hit with both kids and adults. Their comforting flavor and addictive texture ensure they’ll be the first to disappear from the appetizer spread, leaving everyone asking for the recipe.
- Simple Ingredients, Amazing Flavor: You don’t need exotic ingredients to create something extraordinary. This recipe uses readily available pantry staples, transforming humble pizza dough, garlic, butter, and cheese into an appetizer that tastes gourmet. It’s a testament to how simple, quality ingredients can create truly memorable dishes.
Table of Contents
Expert Tips for Perfectly Fluffy Bread Bites
Achieving light, airy, and flavorful bread bites is easier than you think. Follow these essential tips to ensure your parmesan bread bites turn out perfectly every single time:
Activate your yeast for success! This is perhaps the most crucial step for any yeasted dough. Yeast is a living organism, and activating it in warm water (around 105-115°F or 40-46°C) with a touch of sugar (like honey) ensures it’s alive and ready to make your dough rise. After 5 minutes, your mixture should be visibly foamy and bubbly. If it doesn’t foam, your yeast might be expired or the water was too hot/cold, and you should start with a new packet of yeast. For an in-depth guide, I’ve written a whole post about working with yeast.
Knead until the dough is soft and slightly tacky. Proper kneading develops the gluten in the flour, which is what gives your bread its structure and chewiness. You’re looking for a dough that’s smooth, elastic, and yields slightly when pressed, but doesn’t stick excessively to your hands or the mixing bowl. If your dough ball is sticking to the sides of the bowl during kneading, add just one tablespoon of flour at a time until it reaches that ideal soft, slightly tacky consistency, similar to what you see in the provided photos.
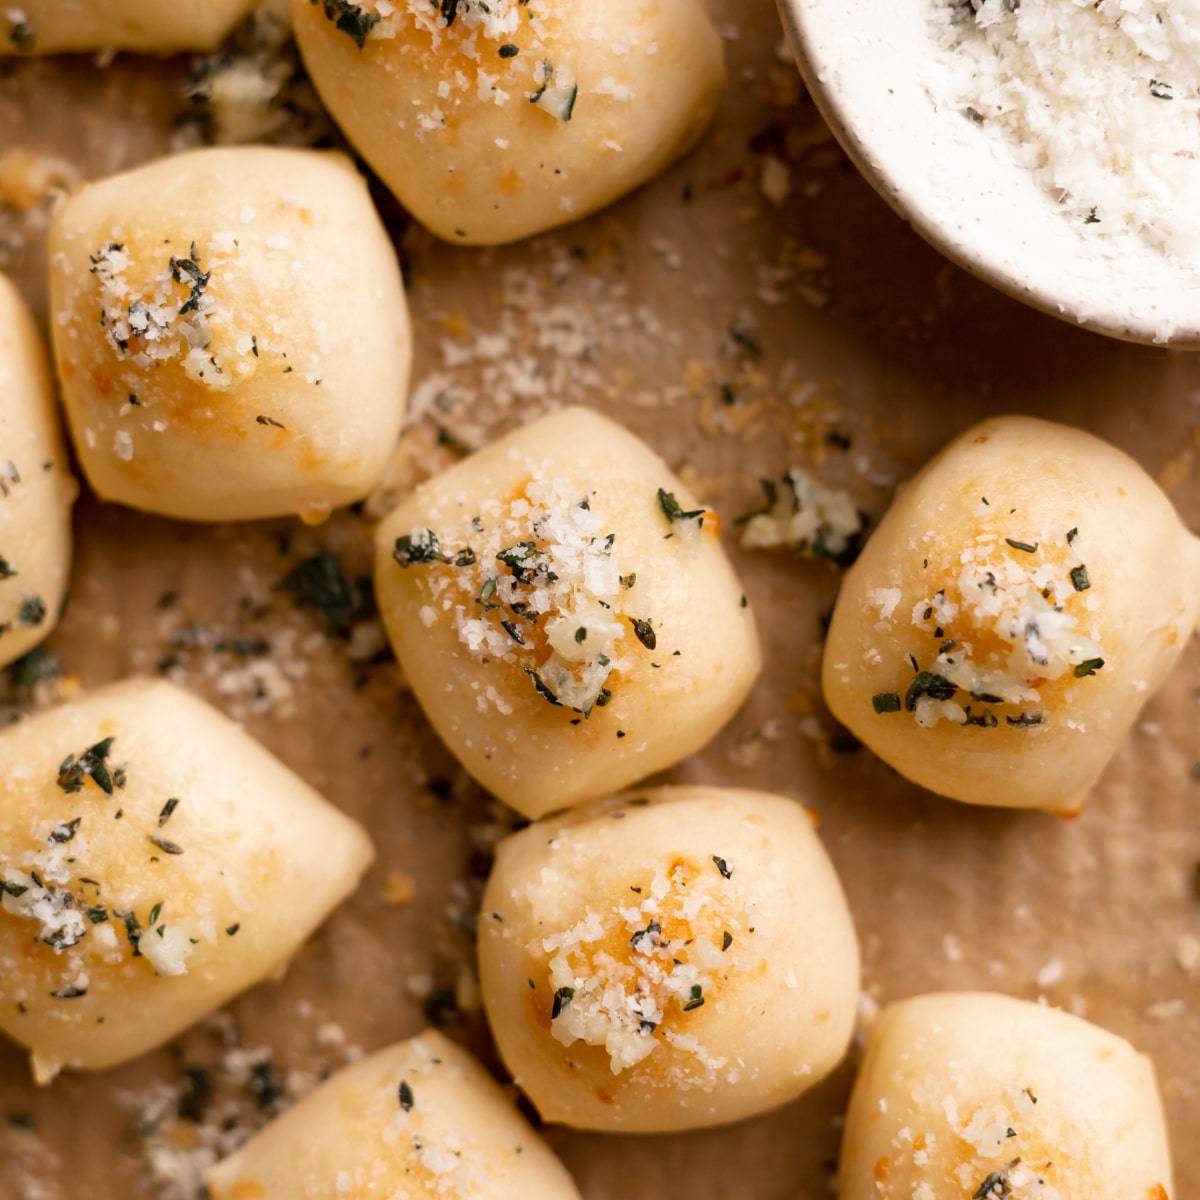
Don’t overbake to maintain softness! The key to soft, fluffy bread bites is to bake them just until they are cooked through and barely start to turn golden brown on top. Overbaking will dry them out and make them tough, losing that desirable tender interior. Keep a close eye on them towards the end of the baking time – a light golden hue is your cue to pull them from the oven.
Sprinkle generously with cheese for maximum flavor. To ensure that every bread bite is coated with delicious, melted grated parmesan cheese, it’s essential to add the parmesan right after you brush the tops with the melted garlic butter. The warm, buttery surface acts as a perfect adhesive, allowing the cheese to stick and melt beautifully as it bakes, creating a rich, savory crust.
Key Ingredients & Smart Substitutions
The beauty of these parmesan bread bites lies in their simple yet powerful ingredients. Here’s a closer look at what you’ll need and some helpful tips for substitutions to ensure the best possible outcome:
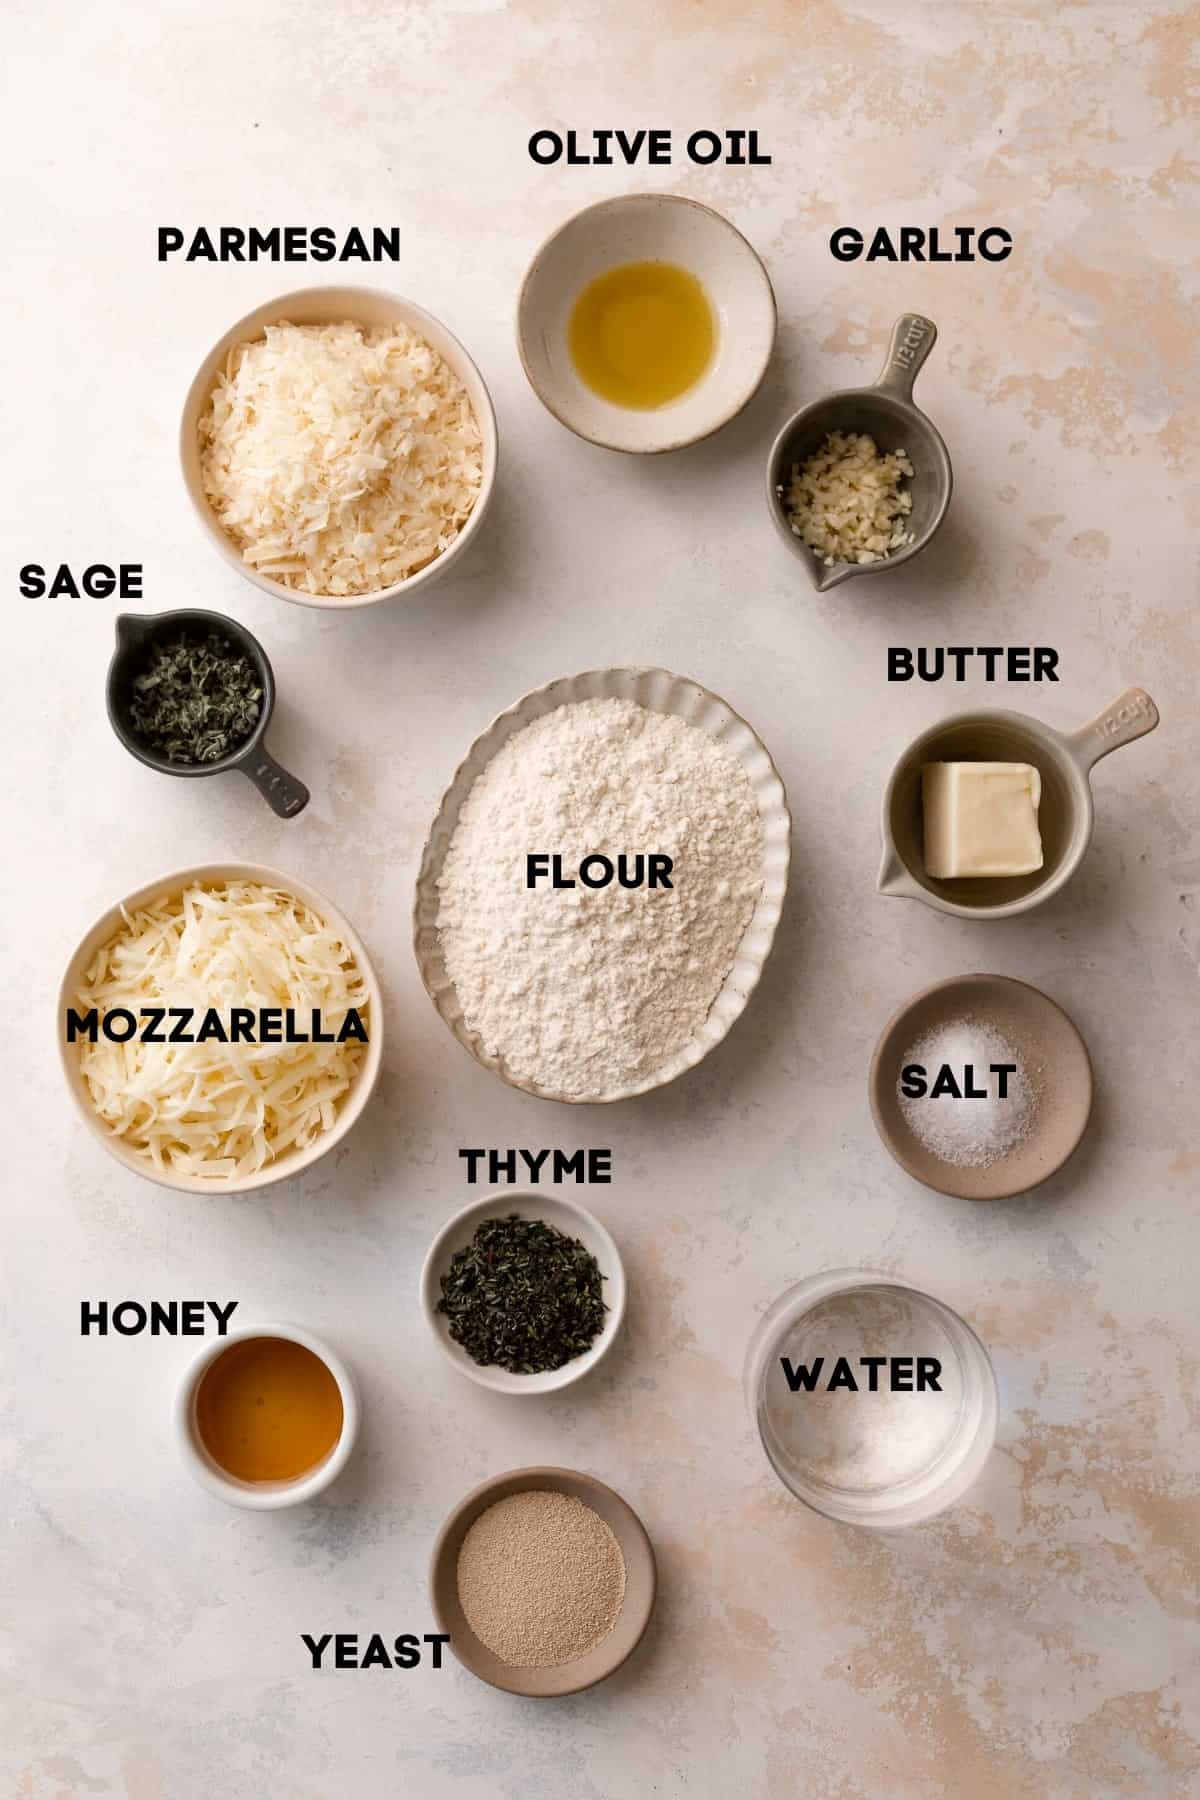
Active dry yeast: This type of yeast requires activation in warm water, a process often called “proofing,” before being mixed with other ingredients. This ensures the yeast is alive and active, which is crucial for proper dough rising. If you only have instant yeast on hand, you can typically use it interchangeably, but always check the package instructions as it often doesn’t require prior activation and can be mixed directly with dry ingredients. However, proofing is always a good safety check.
Olive oil: Using high-quality olive oil isn’t just for flavor; it also contributes to the dough’s texture, helping it remain soft on the inside while achieving a slight crispness on the outside. Extra virgin olive oil offers the richest flavor profile. If olive oil is unavailable or you prefer a milder taste, avocado oil or a neutral vegetable oil can be used as a suitable substitute, though they may alter the flavor slightly.
Parmesan cheese: For the best flavor and melt, it’s highly recommended to use a block of parmesan cheese and grate it yourself. Pre-shredded cheeses often contain anti-caking agents that can prevent them from melting smoothly and integrating properly into the dough or on top of the bread bites, leading to a grainy texture. For a bolder, saltier flavor with a delightful pungency, consider substituting with freshly grated Pecorino Romano cheese.
Mozzarella cheese: Just like with parmesan, the quality of your mozzarella makes a significant difference. Avoid pre-shredded varieties, as they can hinder proper melting. Opt for a block of whole-milk mozzarella and shred it fresh. This will yield a much creamier, stretchier melt that beautifully complements the parmesan and garlic butter, ensuring that desirable gooey center in your bread bites.
Honey: Beyond its sweetness, honey imparts a subtle floral note and helps activate the yeast, contributing to a wonderfully soft and flavorful bread dough. If you don’t have honey, an equal amount of regular granulated sugar is a perfect substitute. It’s crucial not to omit the sugar entirely, as it serves as food for the yeast, which is essential for the dough to rise properly and achieve its fluffy texture.
Fresh herbs: The fresh herbs are integral to the vibrant aroma and taste of the garlic butter. For this specific recipe, we found fresh thyme and sage to be an exquisite combination, offering earthy and slightly peppery notes. However, don’t hesitate to get creative! Other excellent fresh herb options include oregano for a Mediterranean twist, chives for a delicate oniony flavor, or parsley for a fresh, clean finish. Unlike in some recipes, I strongly advise against using dried herbs here, as they often lack the bright, aromatic punch of fresh herbs and can give the bread bites a significantly different, less appealing flavor profile, similar to why I recommend fresh for my garlic rolls.
Find the full ingredient measurements and step-by-step instructions in the detailed recipe card below!
Step-by-Step Recipe Instructions
Creating these delightful parmesan bread bites is a straightforward process, designed for efficiency without compromising on flavor. Follow these easy steps to bring them to life:
Step 1: Prepare your workspace and activate the yeast. Begin by lining two baking sheets with parchment paper; this will prevent sticking and make cleanup a breeze. In your stand mixing bowl, combine the warm water, yeast, and honey. Allow this mixture to sit for 5 minutes until it becomes foamy, indicating the yeast is active and ready to work its magic.
Step 2: Mix and knead the dough. Add the all-purpose flour, fine sea salt, olive oil, and both freshly shredded parmesan and mozzarella cheeses to the activated yeast mixture. Using the dough hook attachment on your stand mixer, knead the wet and dry ingredients on low speed for 8-9 minutes. Continue until the dough transforms into a soft, smooth, and elastic ball that is no longer overly sticky to the touch.
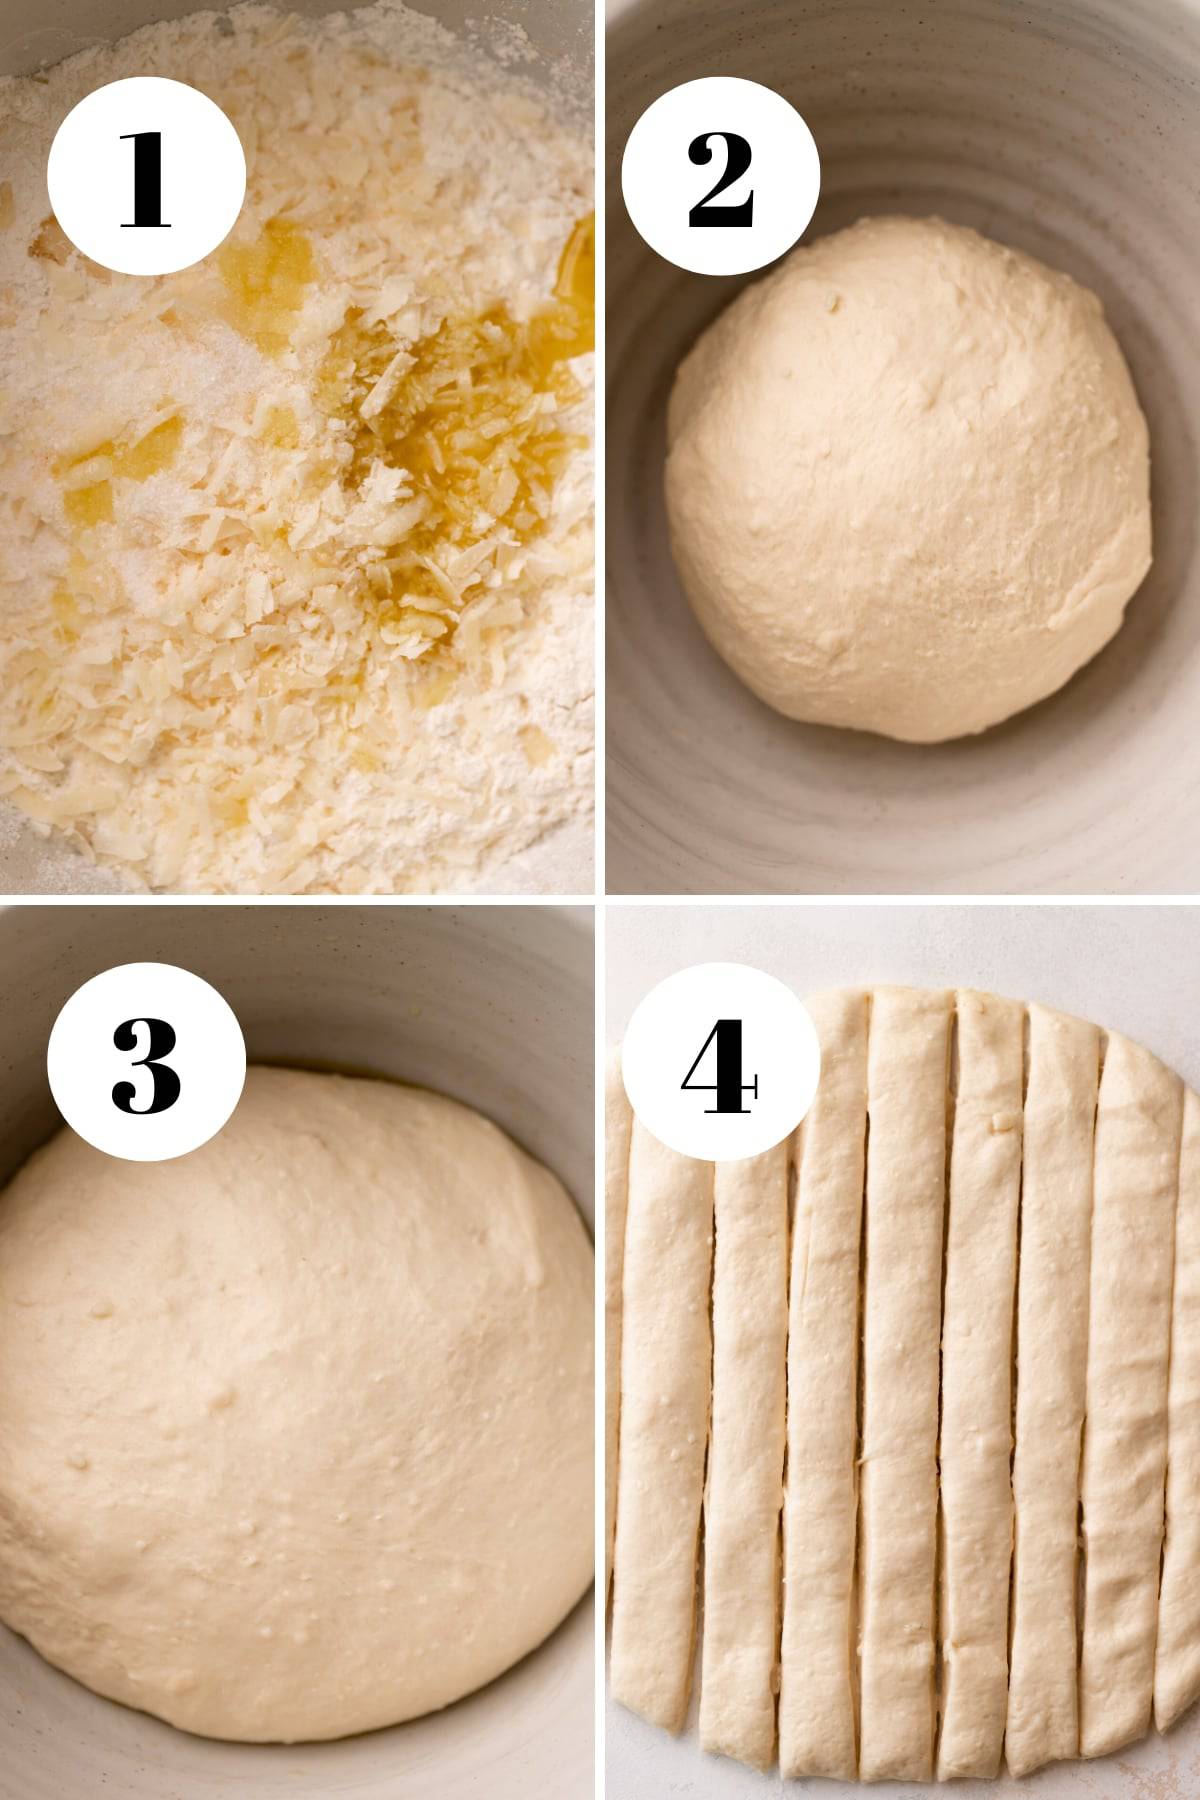
Step 3: Allow the dough to rise. Form the kneaded dough into a neat ball and place it in a lightly oiled bowl, turning it once to coat. Cover the top tightly with plastic wrap to create a warm, humid environment, and set it in a warm spot in your kitchen. Let it rise for 20-30 minutes, or until it has visibly doubled in size – this is a good indicator of successful yeast activation and gluten development.
Step 4: Cut into breadstick strips. Once your dough has doubled, gently press it down and transfer it to a clean, lightly floured surface. Form it into an approximately 8×8-inch square. Using a sharp knife or a pizza cutter, carefully slice the dough into 1-inch wide strips. Gently separate these strips from each other to prevent them from fusing back together.
Step 5: Create mini bites. Take each 1-inch strip of dough and cut it crosswise into individual 1-inch bite-sized pieces. As you cut them, transfer each little square to your prepared baking sheets, ensuring you leave about 1 inch of space between each piece. This spacing is important to allow for even baking and browning.
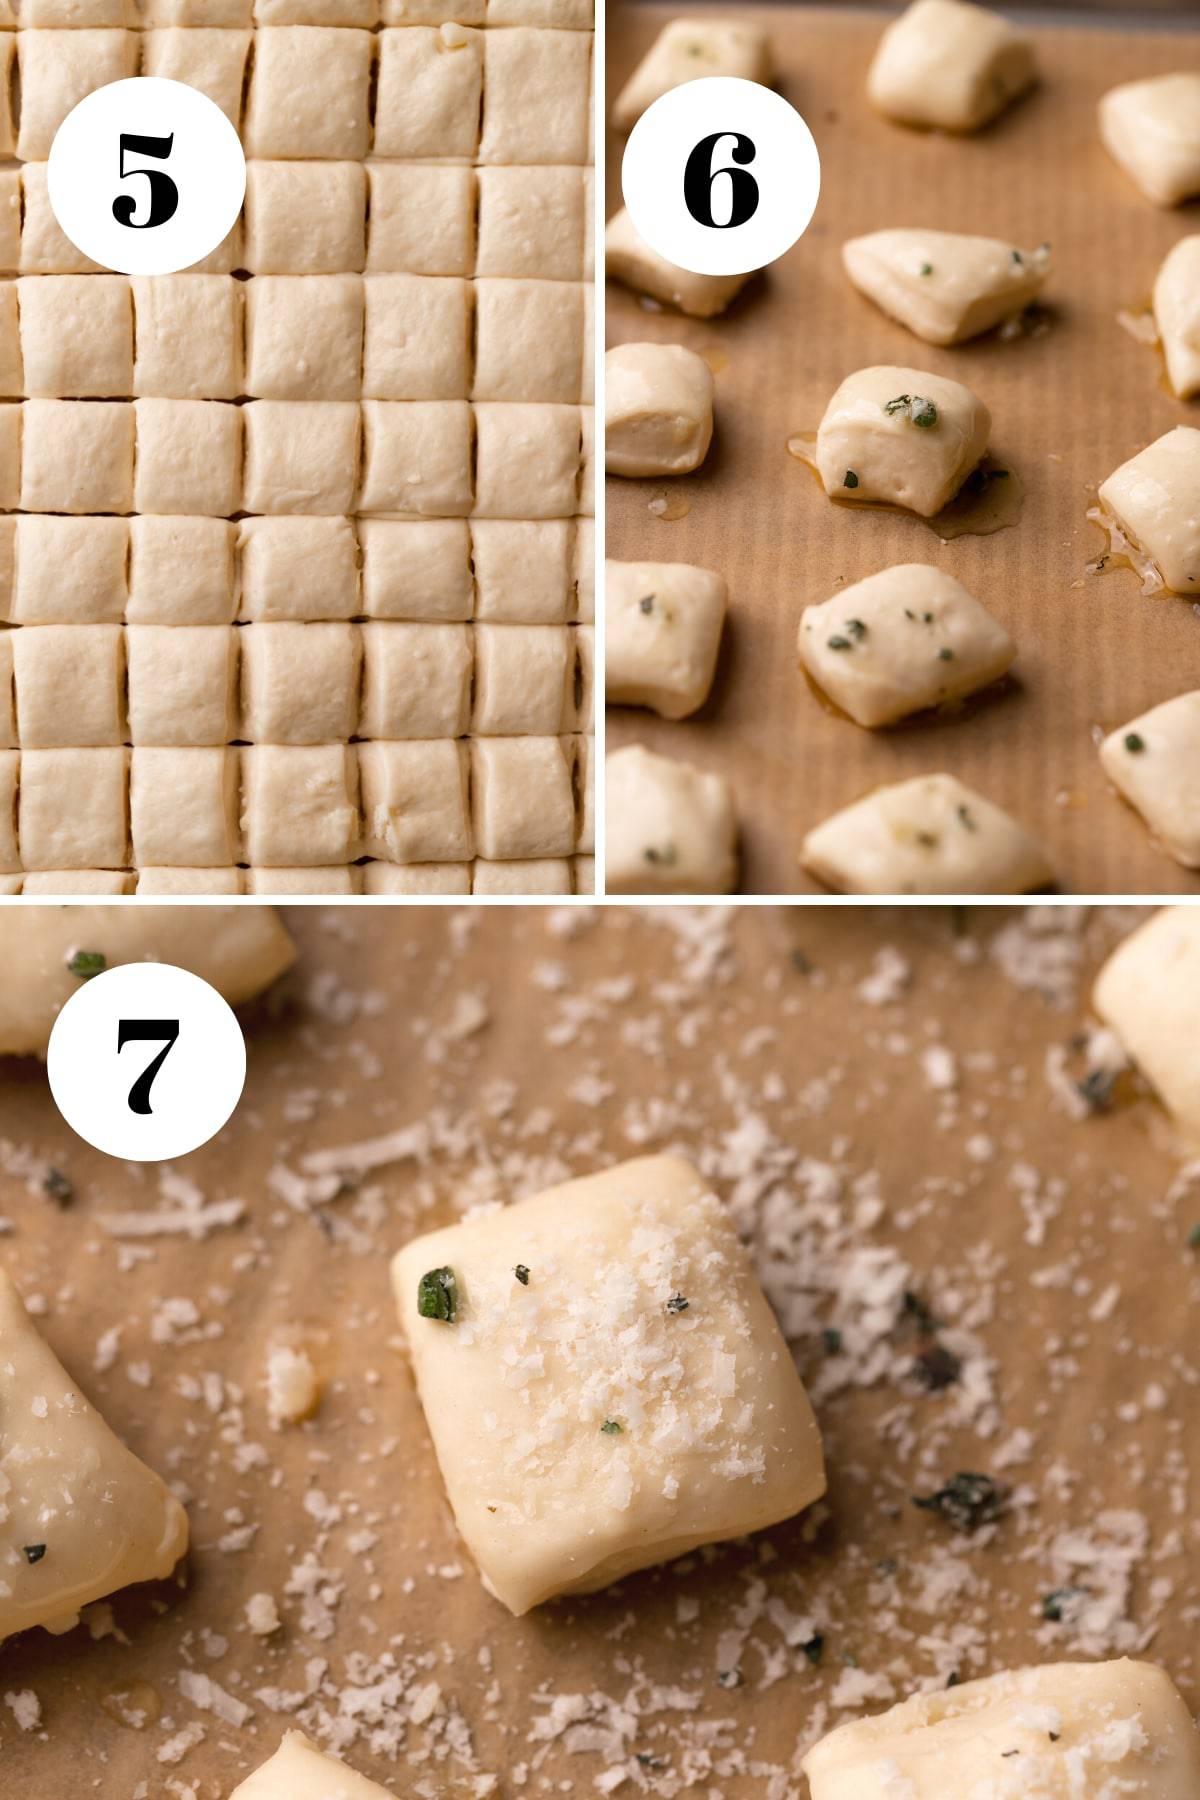
Step 6: Brush with aromatic garlic butter. While your oven preheats to 400°F (205°C), prepare your garlic butter. Melt the unsalted butter and minced garlic together, allowing the garlic to gently sizzle and release its fragrant aroma. Stir in half of your finely chopped fresh thyme and sage. Liberally brush the tops of each unbaked bread bite with this irresistible garlic herb butter, ensuring every surface is coated for maximum flavor.
Step 7: Sprinkle with parmesan and bake! Combine the remaining parmesan cheese with the other half of the fresh herbs. Generously sprinkle this flavorful cheese and herb mixture over the buttered bread bites. Transfer the baking sheets to the preheated oven, baking one tray at a time for 10-12 minutes, or until the dough is beautifully puffy and the tops are just lightly golden brown. Once out of the oven, give them another generous brush of garlic butter and a final sprinkle of fresh cheese before serving warm. Enjoy the delightful aroma and incredible taste!
Storage and Reheating Tips
These parmesan bread bites are best enjoyed fresh and warm, but if you happen to have any leftovers (a rare occurrence!), they can be easily stored and reheated to retain their deliciousness. For optimal freshness, store any leftover bread bites in an airtight container at room temperature. When stored properly, they will maintain their quality for approximately 2-3 days.
It’s natural for bread products to firm up a bit after the first day. To bring them back to their original soft and fluffy glory, reheating is key. You can gently warm them in the microwave for a few seconds until softened, or for a crispier exterior and more even heating, reheat them in the oven at 300°F (149°C) for about 5-10 minutes, or until they are warmed through and tender again. Avoid overheating to prevent them from drying out.
Frequently Asked Questions
Here are some common questions about making and serving these delightful parmesan bread bites:
Your dough has finished its initial rise when it has visibly doubled in size. To confirm, you can gently press two fingers into the dough; if the indent remains, it’s usually ready. If it springs back immediately, it might need a little more time to relax and rise.
The tell-tale sign that your parmesan bread bites are perfectly baked is when their tops have just barely turned a beautiful light golden brown. They should also look visibly puffed up and feel soft to the touch. Avoid letting them get dark brown, as this can lead to a dry and tough texture.
While these cheesy bread bites are utterly delicious on their own, they truly shine when paired with a flavorful dipping sauce! Our top recommendation is warm marinara sauce for classic Italian-inspired enjoyment. However, feel free to get creative: they’re also fantastic with pesto, a rich garlic aioli, a spicy arrabbiata, or even a simple balsamic reduction. They make an excellent appetizer for holidays, game nights, or as a side with pasta dishes and soups.
Absolutely! If you want to get a head start, you can prepare the dough up to the end of step 2, after it’s been kneaded. Place the dough ball in a lightly oiled bowl, cover it tightly with plastic wrap, and refrigerate it for up to 24 hours. When you’re ready to bake, remove the dough from the fridge and let it come to room temperature (about 30-60 minutes) before proceeding with step 3 (the second rise) and the rest of the recipe.
More Irresistible Cheesy Recipes
If you’re a fan of cheesy delights, you’ll love these other recipes that bring gooey, savory goodness to your table:
- Stuffed Pretzels: Soft, chewy pretzels filled with savory fillings – an ultimate comfort food!
- Cheesy Green Bean Casserole: A classic side dish elevated with an extra layer of irresistible cheese.
- Cast Iron Skillet Pizza: Achieve a perfectly crispy crust and bubbly cheese right in your skillet for pizza night.
If you tried this or any other recipe on my website, please let me know how it went in the comments; I love hearing from you! Also, please leave a star rating while you’re there! You can also tag me on Instagram or Facebook so I can check it out!
Parmesan Bread Bites
Print Recipe
Save RecipeSaved!
Pin Recipe
50 minutes
10 minutes
1 hour
Ingredients
- 1 cup warm water
- 2 1/4 teaspoons active dry yeast
- 1 tablespoon honey, substitute granulated sugar
- 2 3/4 cup all-purpose flour, *See notes below for measuring*
- 1/2 cup fresh shredded parmesan cheese
- 1/2 cup freshly shredded mozzarella cheese
- 1 tablespoon olive oil
- 1 teaspoon fine sea salt
Garlic Butter
- 6 tablespoons unsalted butter
- 4 garlic cloves, minced
- 1 tablespoon fresh thyme, finely chopped
- 1 tablespoon fresh sage, finely chopped
- 1/2 cup parmesan cheese
Instructions
-
Line two baking sheets with parchment paper and set them aside.
-
Combine the water, yeast, and honey in a mixing bowl. Set aside to active the yeast for 5 minutes. It should look foamy when active.2 1/4 teaspoons (7 g) active dry yeast, 1 cup (214 g) warm water, 1 tablespoon (16 g) honey
-
Then add the flour, salt, olive oil, parmesan, and mozzarella cheese to the bowl.2 3/4 cup (338 g) all-purpose flour, 1/2 cup (39 g) fresh shredded parmesan cheese, 1/2 cup (39 g) freshly shredded mozzarella cheese, 1 tablespoon (14 g) olive oil, 1 teaspoon (5 g) fine sea salt
-
Knead on low for 8-9 minutes until the dough is soft, smooth, and elastic.
-
Shape the dough into a ball and place it in a lightly oil bowl. Cover the top tightly with plastic wrap and set it in a warm place to rise for 20-30 minutes or until doubled in size.
-
Preheat the oven to 400 F/205 C.
-
Remove the dough from the bowl, place it on your counter, and form it into an 8×8-inch square.
-
Then, use a sharp knife or pizza cutter to cut 8 one-inch strips from the square. Separate the strips to keep them from sticking together.
-
Cut each strip into one-inch squares and transfer them to the prepared baking sheets, giving them at least an inch of space.
-
Make the garlic butter by melting the butter and minced garlic together until the garlic is sizzling and fragrant. Stir in half of the fresh thyme and fresh sage.6 tablespoons (84 g) unsalted butter, 4 garlic cloves, 1 tablespoon fresh thyme, 1 tablespoon fresh sage
-
Spoon or brush the tops of each bread bite with the garlic butter.
-
Mix the parmesan cheese with the other half of the fresh herbs and generously sprinkle the tops with it.1/2 cup (39 g) parmesan cheese
-
Bake them one tray at a time for 10-12 minutes or until the tops are lightly golden brown.
-
Once out of the oven, brush or spoon more garlic butter over the tops and sprinkle with more cheese.
-
Serve warm with marinara, and enjoy!
Notes
Activate your yeast! Use warm water (not hot) and let the yeast become foamy before using. Use a new yeast packet if you don’t notice any activity after 5 minutes. Proper yeast activation is crucial for a fluffy dough.
Knead until the dough is soft and tacky. If your dough ball is sticking to the sides of the bowl, add one tablespoon of flour at a time until it looks like the photos provided. This ensures perfect gluten development.
Don’t overbake! For soft and fluffy bread bites, remove them from the oven as soon as the tops turn a light golden brown. Overbaking will make them dry and tough.
Generous cheese application: To help the grated parmesan cheese stick and melt perfectly, sprinkle it on immediately after brushing the tops with melted garlic butter.
Storage: Store the baked bites at room temperature in an airtight container. If stored properly, they will stay fresh for 2-3 days, though they are best enjoyed on the day they are made.
Reheating: These bites will naturally harden after the first day. To soften them and restore their delicious texture, reheat the bites in the microwave for short bursts or in the oven at 300°F/149°C for 5-10 minutes until warm and soft.
The calorie information provided for the recipe is an estimate. The accuracy of the calories listed is not guaranteed.
