Decadent Oreo Brookies: The Ultimate Fudgy Brownie & Chewy Cookie Hybrid Recipe
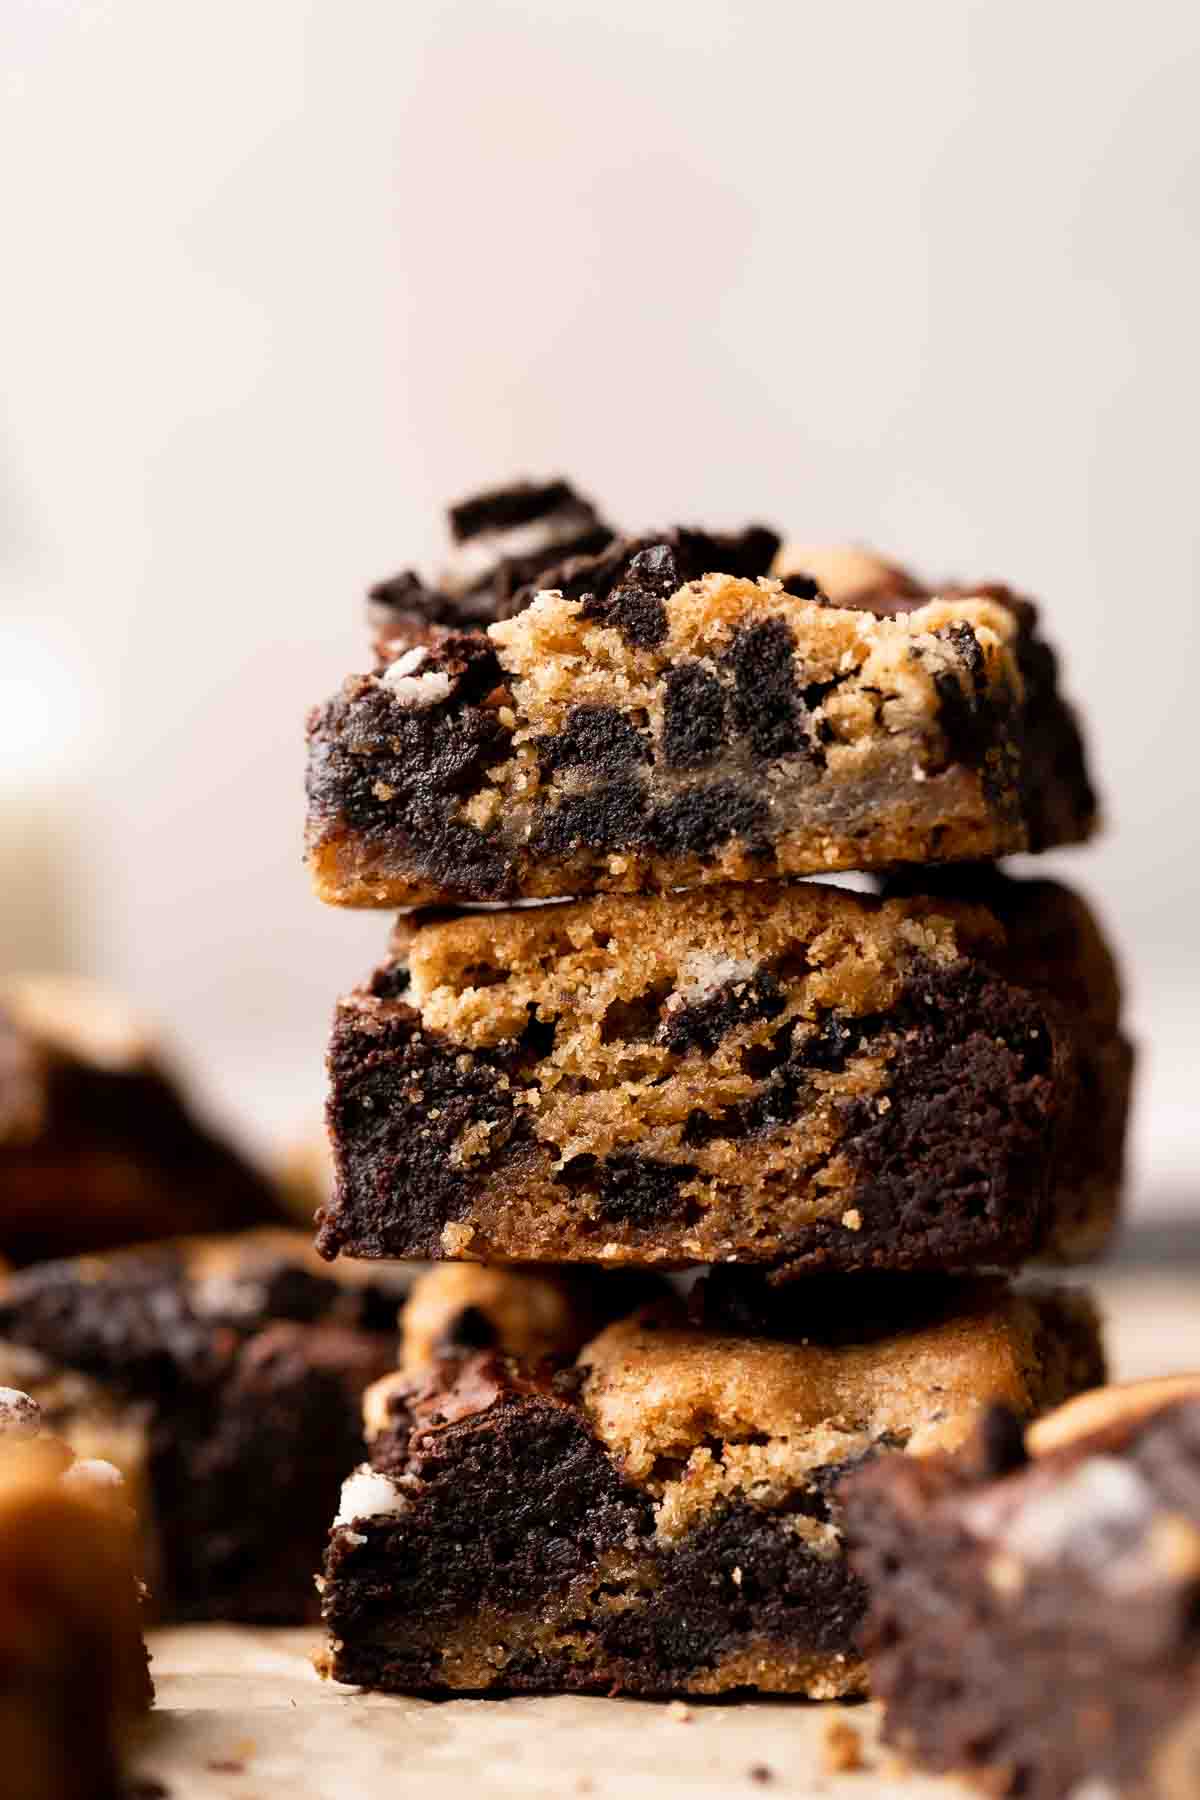
Prepare yourself for a dessert experience that truly offers the best of both worlds: Oreo brookies! These irresistible treats combine the rich, fudgy goodness of a classic brownie with the soft, chewy perfection of a chocolate chip cookie, all generously studded with America’s favorite cookie – Oreos. This brownie cookie fusion isn’t just a dessert; it’s a celebration of textures and flavors that will captivate any chocolate or cookie enthusiast.
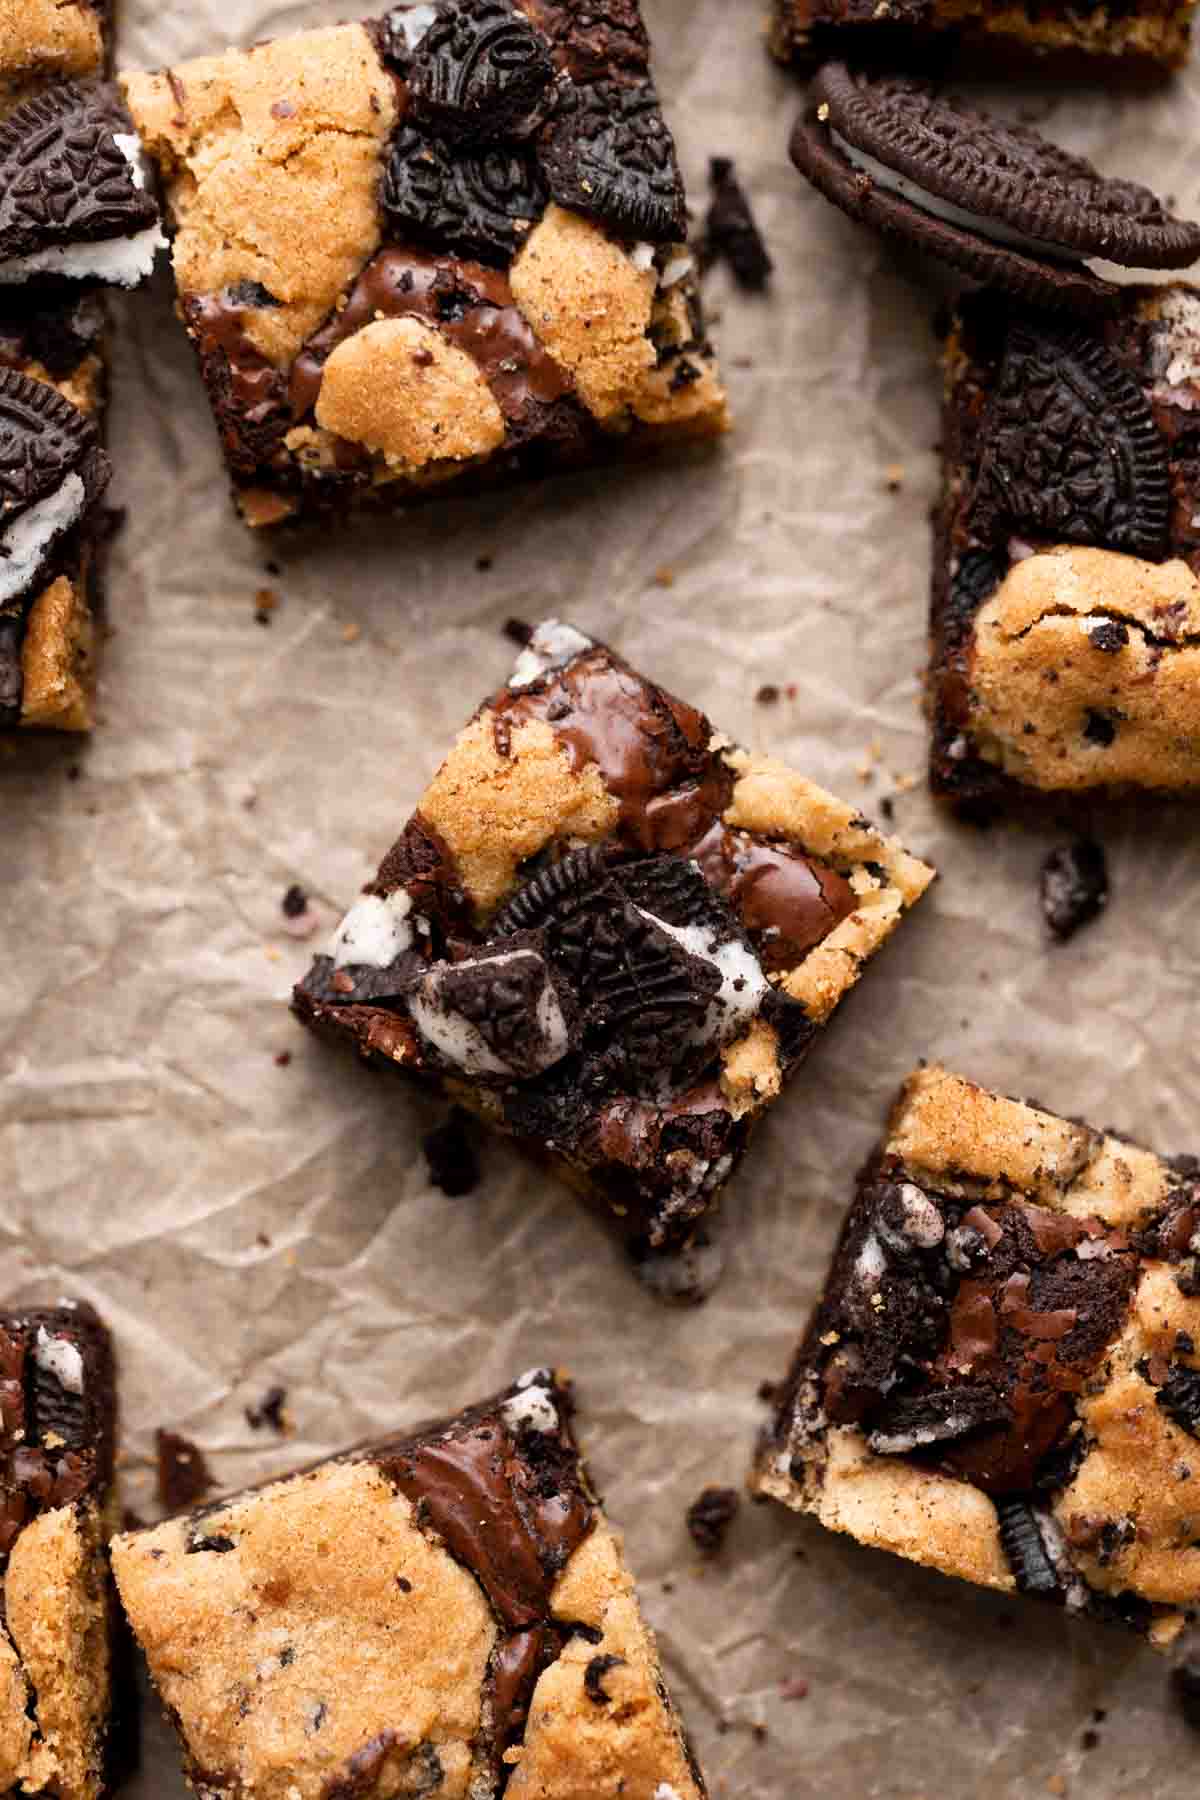
It’s no secret that Oreo desserts hold a special place in my heart when it comes to baking. After perfecting recipes like chocolate chip Oreo cookies and a delightful Oreo cookie cake, the natural next step was to create these spectacular Oreo brookies! They offer everything you could wish for in a homemade treat: a swift preparation, straightforward steps, and an explosion of flavor that makes them ideal for any chocolate and Oreo enthusiast.
If your love for brownies runs deep, be sure to explore some of my other popular creations like the rich Espresso Brownies, the unique Miso Brownies, and the visually stunning Cheesecake Marble Brownies. But for now, let’s dive into the marvelous world of brookies!
Why We Absolutely Love These Oreo Brookies
- Layered Perfection: These brookies feature distinct layers of rich cookie dough and luscious brownie batter, artfully swirled together to create a visually appealing and texturally exciting treat. Each bite offers a harmonious blend of both classic desserts, ensuring you never have to choose between a cookie and a brownie again.
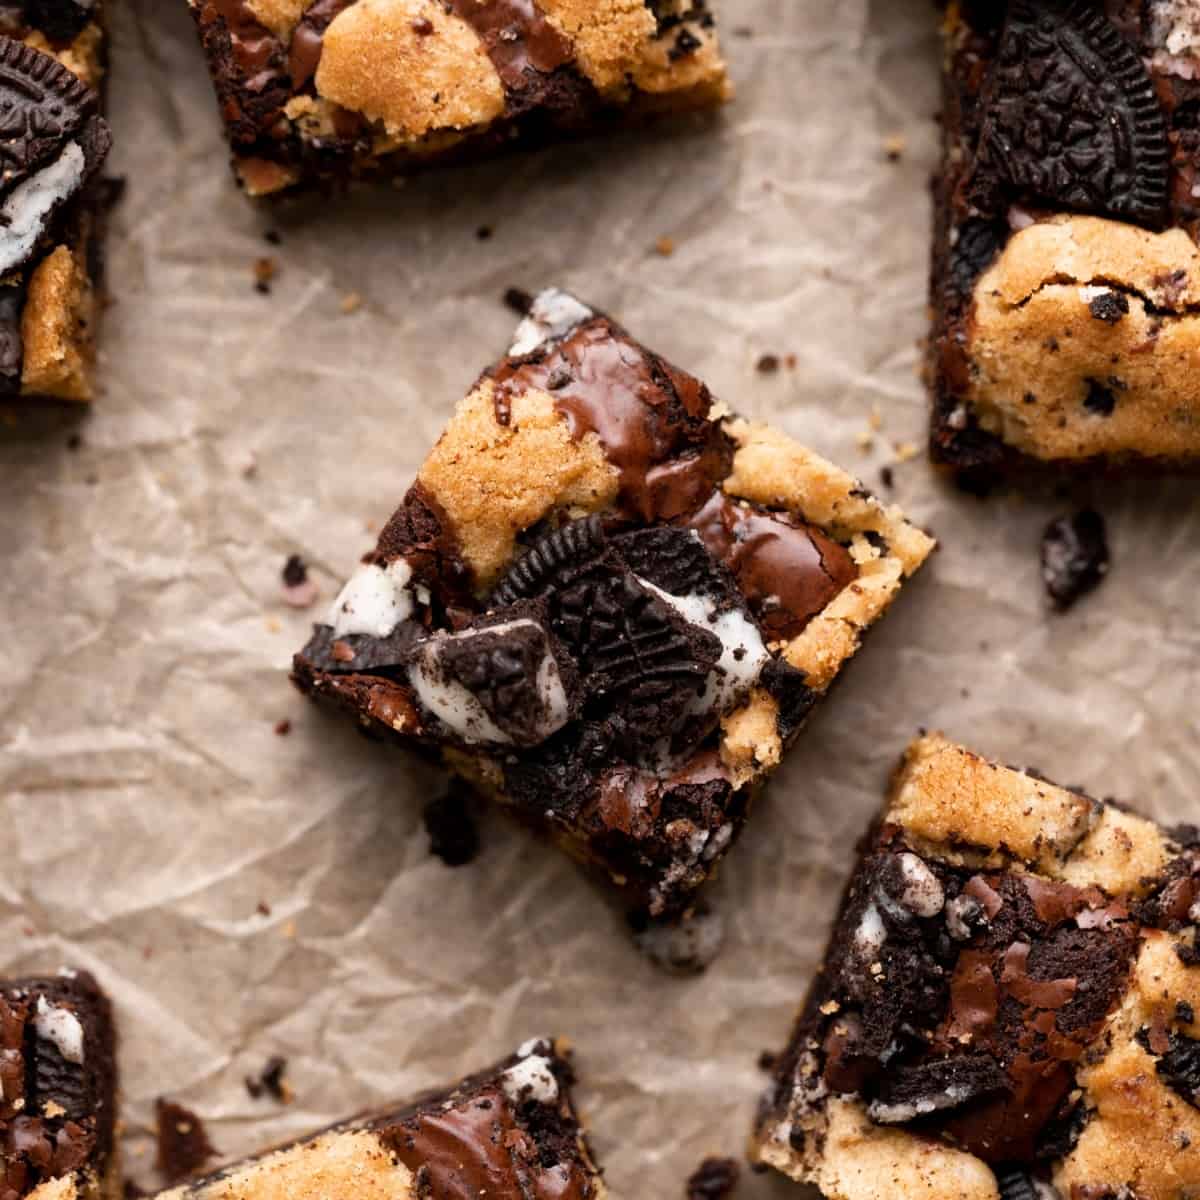
- Oreo Overload: We’ve packed these brookies with an abundance of crushed Oreo cookies! Not only are chopped Oreos folded into the cookie dough, but extra pieces are also sprinkled on top, delivering that iconic chocolate-and-cream crunch in every single square. It’s a true paradise for any Oreo fan.
- Unbeatable Texture Combo: Experience the perfect marriage of textures. The brownie layer is incredibly fudgy and dense, while the cookie dough layer maintains a delightfully soft and chewy consistency. This dynamic duo creates an experience that is both comforting and exciting, elevating these bars beyond ordinary brownies or cookies.
- Effortless & Quick Baking: Despite their sophisticated appearance and dual layers, these Oreo brookies are surprisingly simple to make. Requiring just 8 basic ingredients and coming together in under an hour, they’re the ideal last-minute dessert for parties, potlucks, or simply satisfying a sudden sweet craving.
Essential Ingredient Notes and Smart Substitutions
Crafting the perfect Oreo brookies starts with understanding your ingredients. Here’s a breakdown of the key components and how they contribute to the final masterpiece, along with some helpful substitution tips.
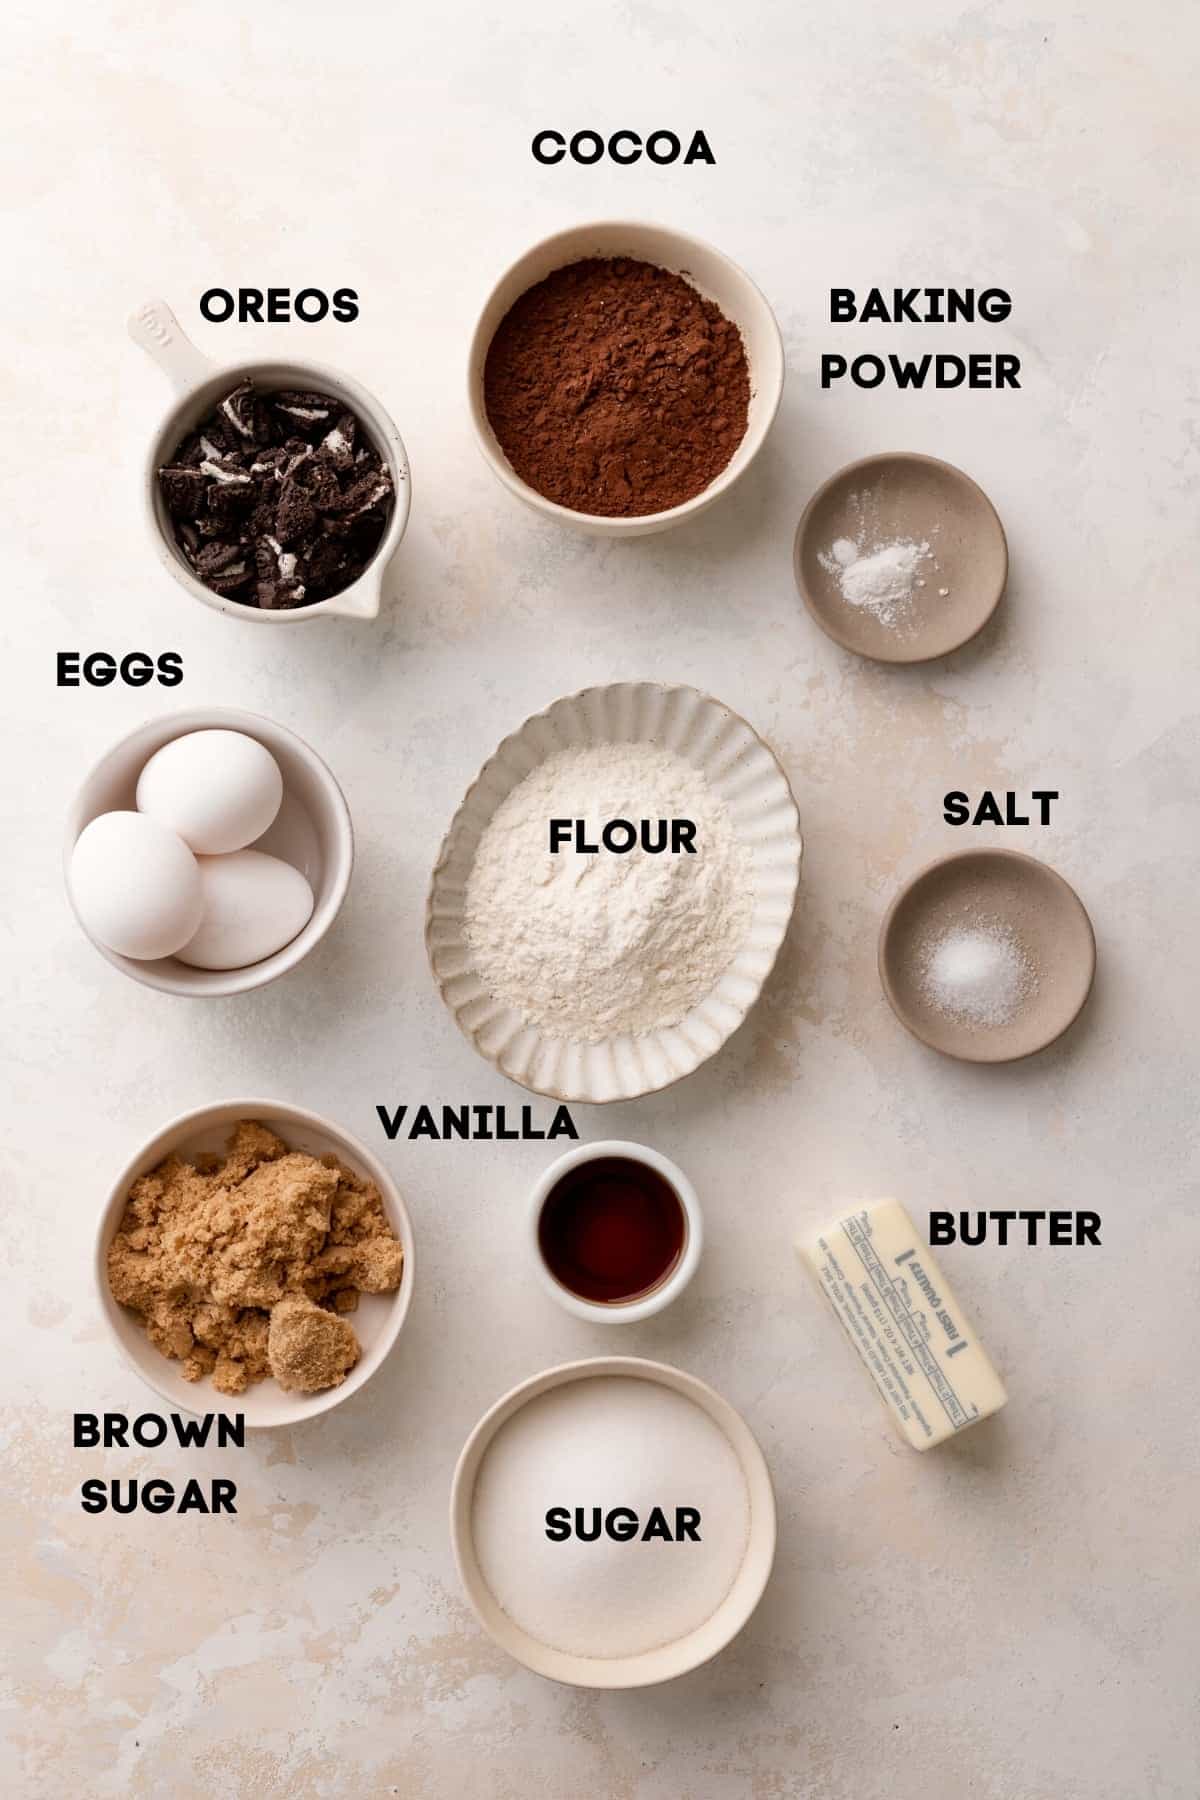
Unsalted butter: Using unsalted butter allows you to control the overall saltiness of your dessert. If you only have salted butter on hand, you can still use it! Simply reduce the amount of added salt in both the cookie dough and brownie batter by about ¼ teaspoon.
Unsweetened cocoa powder: For the most intensely rich flavor and a beautifully dark color in your brownies, I highly recommend using Dutch-processed cocoa powder. This type of cocoa has been alkalized, reducing its acidity and resulting in a smoother, less bitter chocolate taste. It’s the secret to achieving that deep, fudgy profile, much like in my chocolate brownie cookies!
Chocolate chips: Both semi-sweet and dark chocolate chips work wonderfully in this recipe. They melt into the brownie batter, contributing to its signature fudgy texture and decadent flavor. Feel free to use your preferred chocolate or even a mix for added complexity.
Light brown sugar: This ingredient is crucial for achieving that wonderfully soft and chewy texture in the cookie dough layer. The molasses in brown sugar adds moisture and depth of flavor, making the cookies irresistible. Granulated sugar is used in both layers to provide sweetness and help with proper structure.
Original Oreo cookies: While the classic Original Oreos are perfect for this recipe, don’t hesitate to get creative! This recipe is incredibly versatile. Consider substituting with a different flavor of Oreo (like Mint, Golden, or peanut butter) to customize your brookies for any holiday, season, or special occasion. Just be sure to chop them coarsely to ensure they are evenly distributed.
All-purpose flour: The foundation of both the cookie and brownie layers. Measure accurately, preferably by weight, to ensure proper consistency.
Eggs: Essential for structure and richness. Ensure they are at room temperature for optimal emulsification and a smoother batter.
Vanilla extract: A flavor enhancer that complements the chocolate and Oreo notes beautifully. Use a good quality pure vanilla extract for the best taste.
Baking soda & Salt: Baking soda provides lift and chewiness to the cookie dough, while salt balances the sweetness and enhances all the flavors.
Full ingredient measurements and detailed instructions can be found in the comprehensive recipe card below!
Step-by-Step Recipe Instructions
Creating these delightful Oreo brookies is a fun and straightforward process. Follow these detailed steps to ensure perfectly fudgy and chewy results every time.
Preparation:
First, line a square 8×8 baking pan with parchment paper, making sure the paper hangs over all four sides. This creates “handles” that will make it incredibly easy to lift your brookies out of the pan once they’re baked and cooled. Preheat your oven to 350°F (180°C) and prepare to embark on a delicious journey!
Making the Chewy Cookie Dough:
Step 1: Cream Wet Ingredients. In the bowl of a stand mixer fitted with a paddle attachment, or in a large bowl with a hand mixer, cream together the room-temperature unsalted butter, granulated sugar, and light brown sugar. Beat these ingredients for about two minutes until the mixture is light, fluffy, and well combined. This creaming process incorporates air, contributing to the cookie’s tender texture. Next, mix in the large egg yolk and vanilla extract until they are fully incorporated and the mixture is smooth.
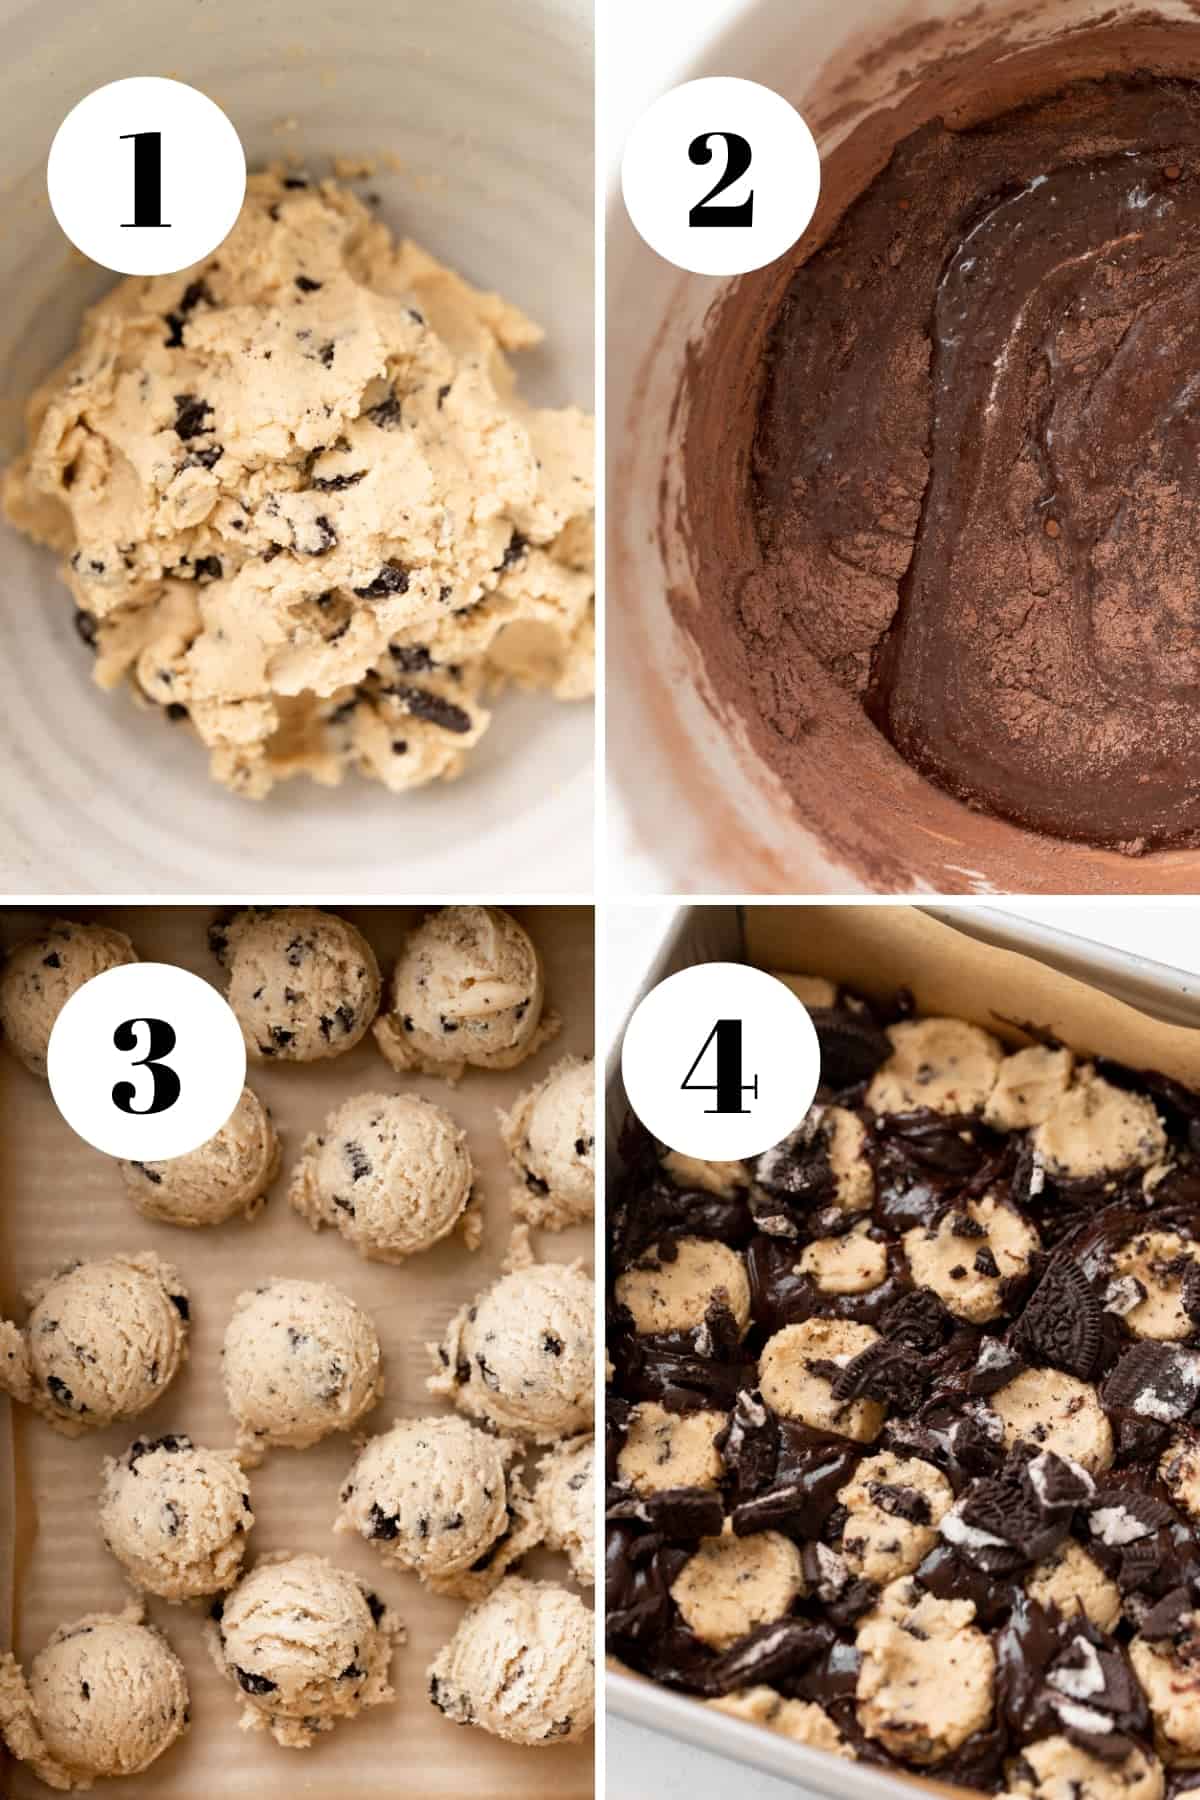
Step 2: Fold in Dry Ingredients & Oreos. Gently fold in the all-purpose flour, baking soda, and fine sea salt until just combined. Be careful not to overmix, as this can lead to tough cookies. Finally, add the chopped Oreo pieces to the dough, mixing just enough to distribute them evenly. Set this delicious cookie dough aside (image 1 below).
Crafting the Fudgy Brownie Batter:
Step 3: Melt Butter & Chocolate. In a medium microwave-safe bowl or over a double boiler, melt the unsalted butter and chocolate chips together until completely smooth and combined. Stir occasionally to prevent burning. Once melted, set the mixture aside to cool slightly.
Step 4: Whisk Wet Ingredients. In a separate mixing bowl, whisk together the large egg, granulated sugar, and vanilla extract vigorously for about two minutes. The mixture should become noticeably lighter in color and fluffy. This step is crucial for achieving that desirable crackly top on your brownies. Gradually stream the slightly cooled melted butter and chocolate mixture into the egg mixture, mixing until just combined. Avoid overmixing to keep the brownies fudgy.
Step 5: Fold in Dry Ingredients. Finally, gently fold in the all-purpose flour, unsweetened cocoa powder, and salt until just combined and no streaks of dry ingredients remain. Again, mix minimally to maintain the brownie’s tender texture (image 2 above).
Assembling Your Oreo Brookies:
Step 6: Scoop Cookie Dough. Using a standard cookie scoop (about 2 tablespoons per scoop), drop portions of the cookie dough into your prepared baking pan. Arrange them so there’s some space in between each dollop. You’ll want enough cookie dough to cover roughly half of the pan’s surface area (image 3 above).
Step 7: Scoop Brownie Batter. With the same-sized scoop, fill the empty spaces in between the cookie dough portions with the brownie batter. Alternate the cookie dough and brownie batter, creating a checkerboard pattern or simply filling in the gaps. Don’t worry if it looks a little messy; it will all meld together beautifully (image 4 above).
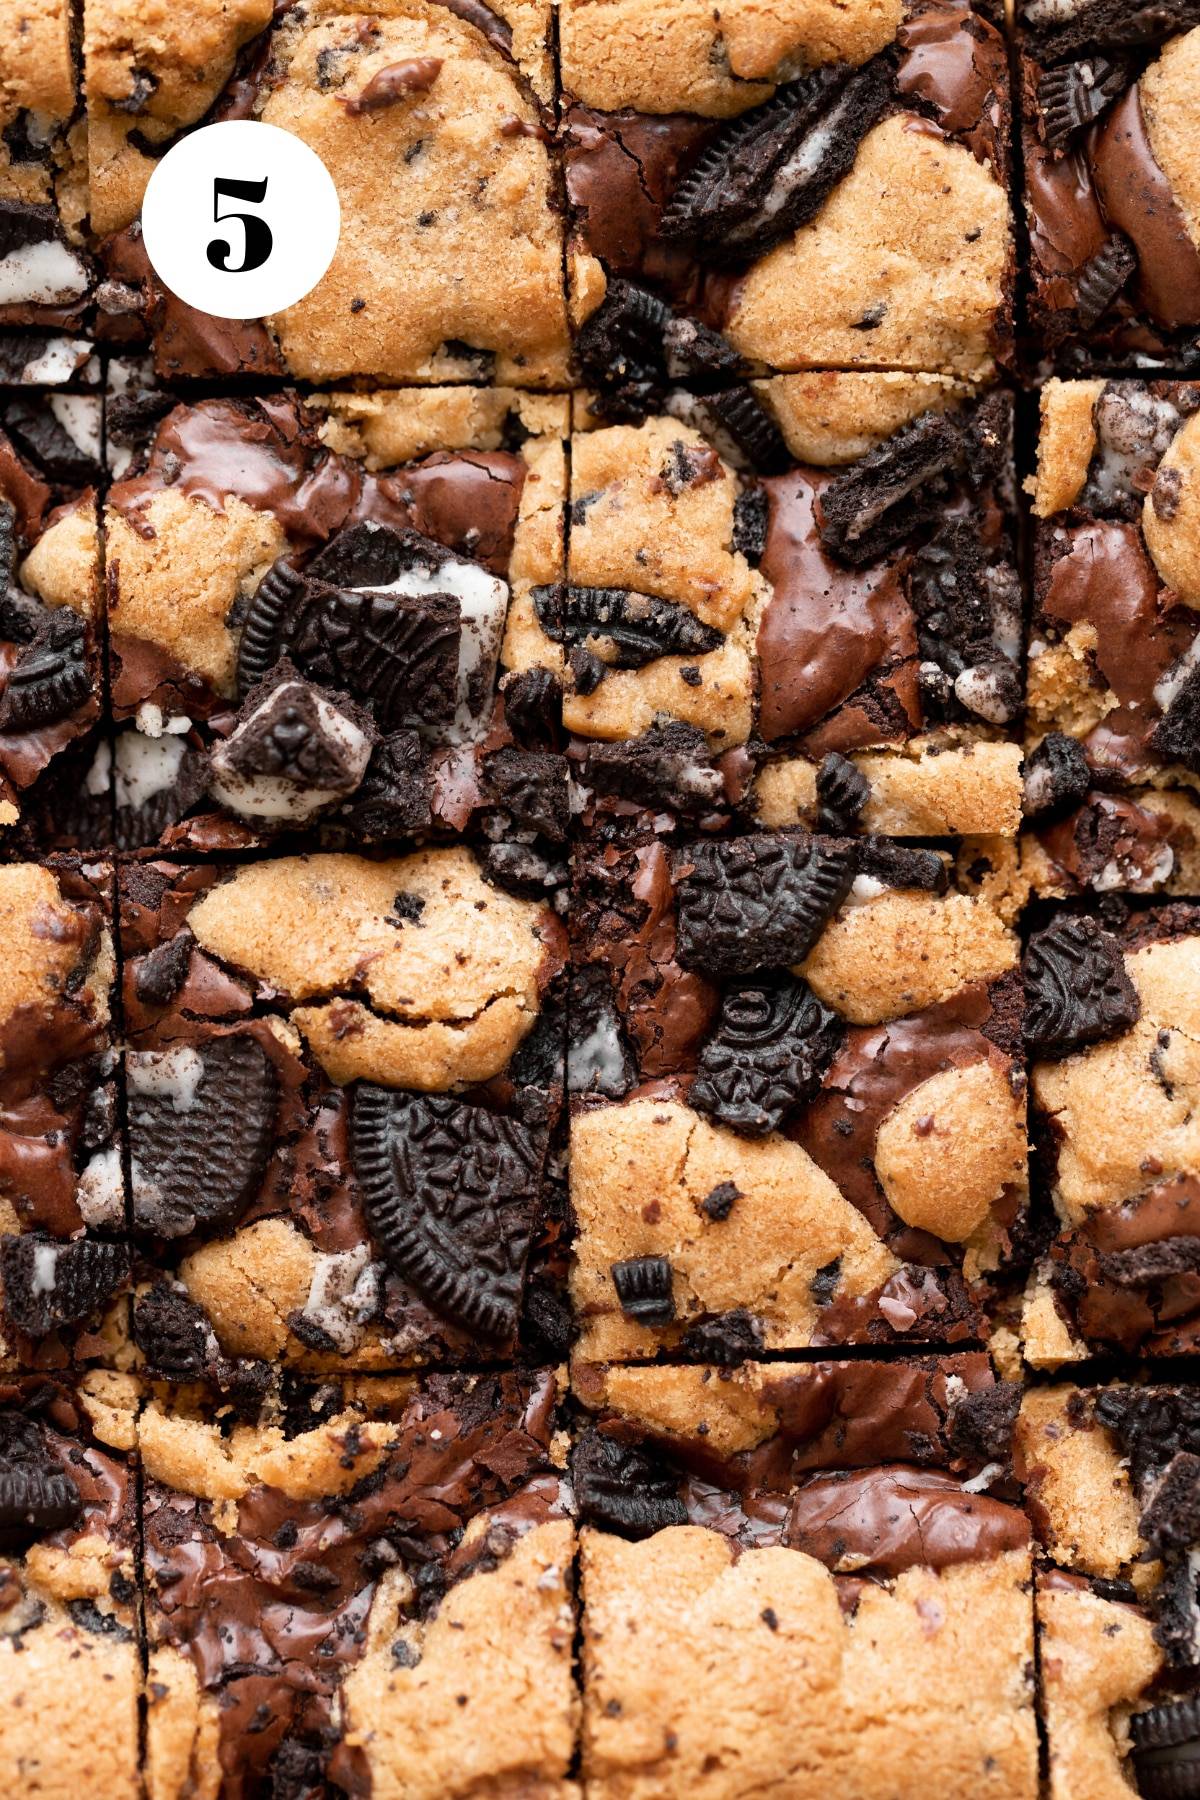
Step 8: Bake to Perfection. Gently use your finger or the back of a spoon to press down the tops of the cookie dough balls so they are roughly the same height as the brownie batter. This helps ensure an even bake. Sprinkle extra chopped Oreos generously over the entire surface for an extra burst of flavor and crunch. Bake in the preheated oven for 25-27 minutes.
After about 20 minutes of baking, keep an eye on the cookie dough. If it starts to brown too quickly, lightly place a piece of aluminum foil loosely over the top of the pan. This will prevent the cookie layer from over-browning and becoming too crispy while allowing the fudgy brownie to finish baking through. You’ll know your brookies are perfectly done when a toothpick inserted into the brownie batter comes out with a few moist crumbs attached, indicating a gooey, fudgy center (image 5 above). The edges should be set, and the cookie portions golden brown.
Expert Baking Tips for Perfect Brookies
Achieving bakery-quality brookies is easy with these insider tips:
- Precision with a Kitchen Scale: Baking with a kitchen scale is a game-changer for consistency. Measuring ingredients by weight (learn why here) is far more accurate than using volume (cup) measurements, eliminating discrepancies that can occur with how ingredients are scooped. For your convenience, you can often convert recipes to metric measurements by clicking a “metric” button next to the ingredients list in the recipe card.
- Preventing Over-Browning with Foil: Around the 20-minute mark, the cookie dough layer might start to get a little too golden. To prevent it from becoming overly browned or crispy while the brownie portion continues to cook to its fudgy perfection, loosely tent the top of your baking pan with aluminum foil. This clever trick helps reflect heat, allowing the brookies to finish baking evenly.
- Patience is Key: Cool Completely! We know it’s hard to wait when a warm, chocolatey aroma fills your kitchen, but resist the urge to cut into your brookies too soon! Allowing them to cool completely in the pan is crucial. As they cool, the brownie and cookie layers will set properly, making them much easier to slice into clean, beautiful squares without crumbling. Cooling also enhances their fudgy and chewy texture.
- Room Temperature Ingredients: Ensure your butter and eggs are at room temperature before you start. Room temperature butter creams better with sugar, creating a smoother, more emulsified batter. Room temperature eggs also integrate more seamlessly into the batter, preventing curdling and leading to a more uniform final texture.
- Don’t Overmix Dry Ingredients: When adding flour to both the cookie dough and brownie batter, mix only until just combined. Overmixing develops the gluten in the flour, which can result in tough, dry brookies instead of the desired fudgy and chewy texture.
Storage and Freezing Guidelines
To keep your delicious Oreo brookies fresh and enjoyable for as long as possible, follow these simple storage and freezing tips:
Room Temperature Storage: Once completely cooled, store your Oreo brookies in an airtight container or a heavy-duty ziplock bag at room temperature. They will remain wonderfully fresh and delicious for 2-3 days. To maintain their texture, you can separate layers with parchment paper if stacking.
Freezing for Longer Freshness: If you want to extend the life of these delectable treats, freezing is an excellent option! After baking and allowing them to cool completely, cut the brookies into individual squares. Place them in a single layer on a baking sheet and freeze for about 30 minutes until firm. Then, transfer the frozen squares to an airtight freezer-safe container or a freezer bag. They will stay fresh in the freezer for up to 1 month. When you’re ready to enjoy them, simply take them out and let them thaw at room temperature for an hour or two before serving. You can also briefly warm them in the microwave for a fresh-baked feel!
Frequently Asked Questions About Oreo Brookies
Got questions about making these incredible Oreo brookies? We’ve got answers!
The beauty of this recipe is its adaptability! While classic Original Oreos are fantastic, feel free to experiment with any variety that tickles your fancy. Double-Stuffed Oreos will add extra creaminess, and seasonal flavors like Mint Oreos, Golden Oreos, or even Peanut Butter Oreos can create unique and exciting twists. Just make sure they are coarsely chopped for the best texture distribution throughout the brookies.
Absolutely! If you’re looking for a super quick shortcut, using a boxed brownie mix and pre-made refrigerated cookie dough is a great option. Follow the instructions on your box mix for preparing the brownie batter, and add your chopped Oreos directly into it. For the cookie dough, you can either chop and fold in extra Oreos or simply use it as is. When baking, keep a close eye on your brookies, as the baking time may differ slightly from this homemade recipe. Start checking for doneness around the 20-minute mark.
Yes, you can! For a warm, gooey treat, gently reheat individual brookie squares. You can pop them in the microwave for 10-20 seconds until warm and soft, or place them in a preheated oven at 300°F (150°C) for about 5-7 minutes. They’re particularly delightful when served warm with a scoop of vanilla ice cream or a glass of cold milk!
Definitely! Feel free to customize your brookies further. White chocolate chips, chopped nuts (like walnuts or pecans), or even a swirl of caramel sauce could make fantastic additions. Just fold them into either the cookie dough or brownie batter, or sprinkle them on top before baking.
This recipe is designed for an 8×8-inch square baking pan. Using a pan of this size ensures the proper thickness for both the brownie and cookie layers, resulting in perfectly proportioned brookies. If you use a larger pan, your brookies will be thinner, and the baking time will likely be reduced.
More Irresistible Oreo Recipes to Try
If you’re an undeniable fan of Oreo desserts, you’ll love exploring these other fantastic recipes from my kitchen:
- Hi-Hat Oreo Cupcakes
- Oreo Cheesecake Cookies
- Oreo Topped Brownies
- Cookies and Cream Cinnamon Rolls
If you tried this or any other recipe on my website, please let me know how it went in the comments below. I love hearing from you! Also, please leave a star rating while you’re there! You can also tag me on Instagram or Facebook so I can check it out!
Oreo Brookies Recipe
Cambrea Gordon
Print Recipe
Save Recipe
Pin Recipe
20 mins
27 mins
47 mins
Dessert
American
16 servings
Equipment
- square 8×8 baking pan
Ingredients
For the Cookie Dough
- 6 tbsp unsalted butter, room temperature
- 1/2 cup light brown sugar, packed
- 1/8 cup granulated sugar
- 1 large egg yolk, room temperature
- 1 tsp vanilla extract
- ¾ cup + 2 tbsp all-purpose flour
- 1/2 tsp fine sea salt
- 1/2 tsp baking soda
- 4 Oreos, chopped (plus more for the top)
For the Brownie Batter
- 4 tbsp unsalted butter
- 1/3 cup semi-sweet chocolate chips
- 1/4 cup + 1/8 cup granulated sugar
- 1 large egg, room temperature
- 1 tsp vanilla extract
- 1/4 cup all-purpose flour
- 1/4 cup unsweetened cocoa powder
- 1/4 tsp fine sea salt
Instructions
-
Line a square 8×8 baking pan with parchment paper to hang over all four sides. Then preheat the oven to 350°F (180°C).
-
In a large mixing bowl, cream the 6 tbsp butter, 1/2 cup light brown sugar, and 1/8 cup granulated sugar for 2 minutes until light and fluffy.
-
Mix in the egg yolk and 1 tsp vanilla extract until combined.
-
Fold in the ¾ cup + 2 tbsp flour, 1/2 tsp salt, 1/2 tsp baking soda, and 4 chopped Oreos until just combined. Set aside.
-
In a separate medium bowl, melt the 4 tbsp butter and 1/3 cup chocolate chips together until smooth and combined. Set aside to cool slightly.
-
In another mixing bowl, whisk the 1/4 cup + 1/8 cup sugar, 1 large egg, and 1 tsp vanilla together until light and fluffy, about 2 minutes.
-
Stream the melted butter and chocolate into the egg mixture and mix until just combined.
-
Fold in the 1/4 cup flour, 1/4 cup cocoa powder, and 1/4 tsp salt until just combined.
-
Scoop two tablespoon sized portions of cookie dough into the prepared baking pan, leaving spaces in between.
-
Scoop the brownie batter into the alternate spots, filling the spaces between the cookie dough.
-
Gently press down the top cookie dough balls so that they are the same height as the brownie batter.
-
Sprinkle extra chopped Oreos on top.
-
Bake at 350°F (180°C) for 25-27 minutes or until the cookie dough is golden brown and a toothpick inserted into the brownie batter comes out covered in a few moist crumbs. (After 20 minutes, loosely cover the top with foil to prevent the cookie from browning too much.)
-
Allow to cool completely in the pan before lifting out and cutting into squares.
Notes
For more detailed insights, refer to the “Expert Baking Tips” section above, covering the importance of a kitchen scale, using foil during baking, and cooling completely for best results.
- Storage: Store the cooled brownie cookies in an airtight container or ziplock bag at room temperature for 2-3 days.
- Freezer: For longer storage, cut into squares and freeze in an airtight container or freezer bag for up to 1 month. Thaw at room temperature before eating.
Serving: 1serving
|
Calories: 160kcal
|
Carbohydrates: 22g
|
Protein: 2g
|
Fat: 7g
|
Saturated Fat: 4g
|
Polyunsaturated Fat: 0.5g
|
Monounsaturated Fat: 2g
|
Trans Fat: 0.2g
|
Cholesterol: 34mg
|
Sodium: 164mg
|
Potassium: 73mg
|
Fiber: 1g
|
Sugar: 14g
|
Vitamin A: 170IU
|
Calcium: 16mg
|
Iron: 1mg
The calorie information provided for the recipe is an estimate. The accuracy of the calories listed is not guaranteed.
Tried this recipe?
Leave a comment below & tag @cambreabakes on social!
