Ultimate Chocolate Oreo Cake Recipe: Layers of Indulgence
Prepare to create the most incredible Chocolate Oreo Cake you’ve ever tasted! This recipe brings together everything you crave in a decadent dessert: intensely moist chocolate cake layers, a rich, velvety Oreo frosting, and an abundance of crushed Oreo cookies embedded in every single bite. Forget the bakery; this homemade masterpiece is so luxurious and satisfying, it will quickly become your go-to recipe for any celebration or simply when a craving for something truly extraordinary strikes.
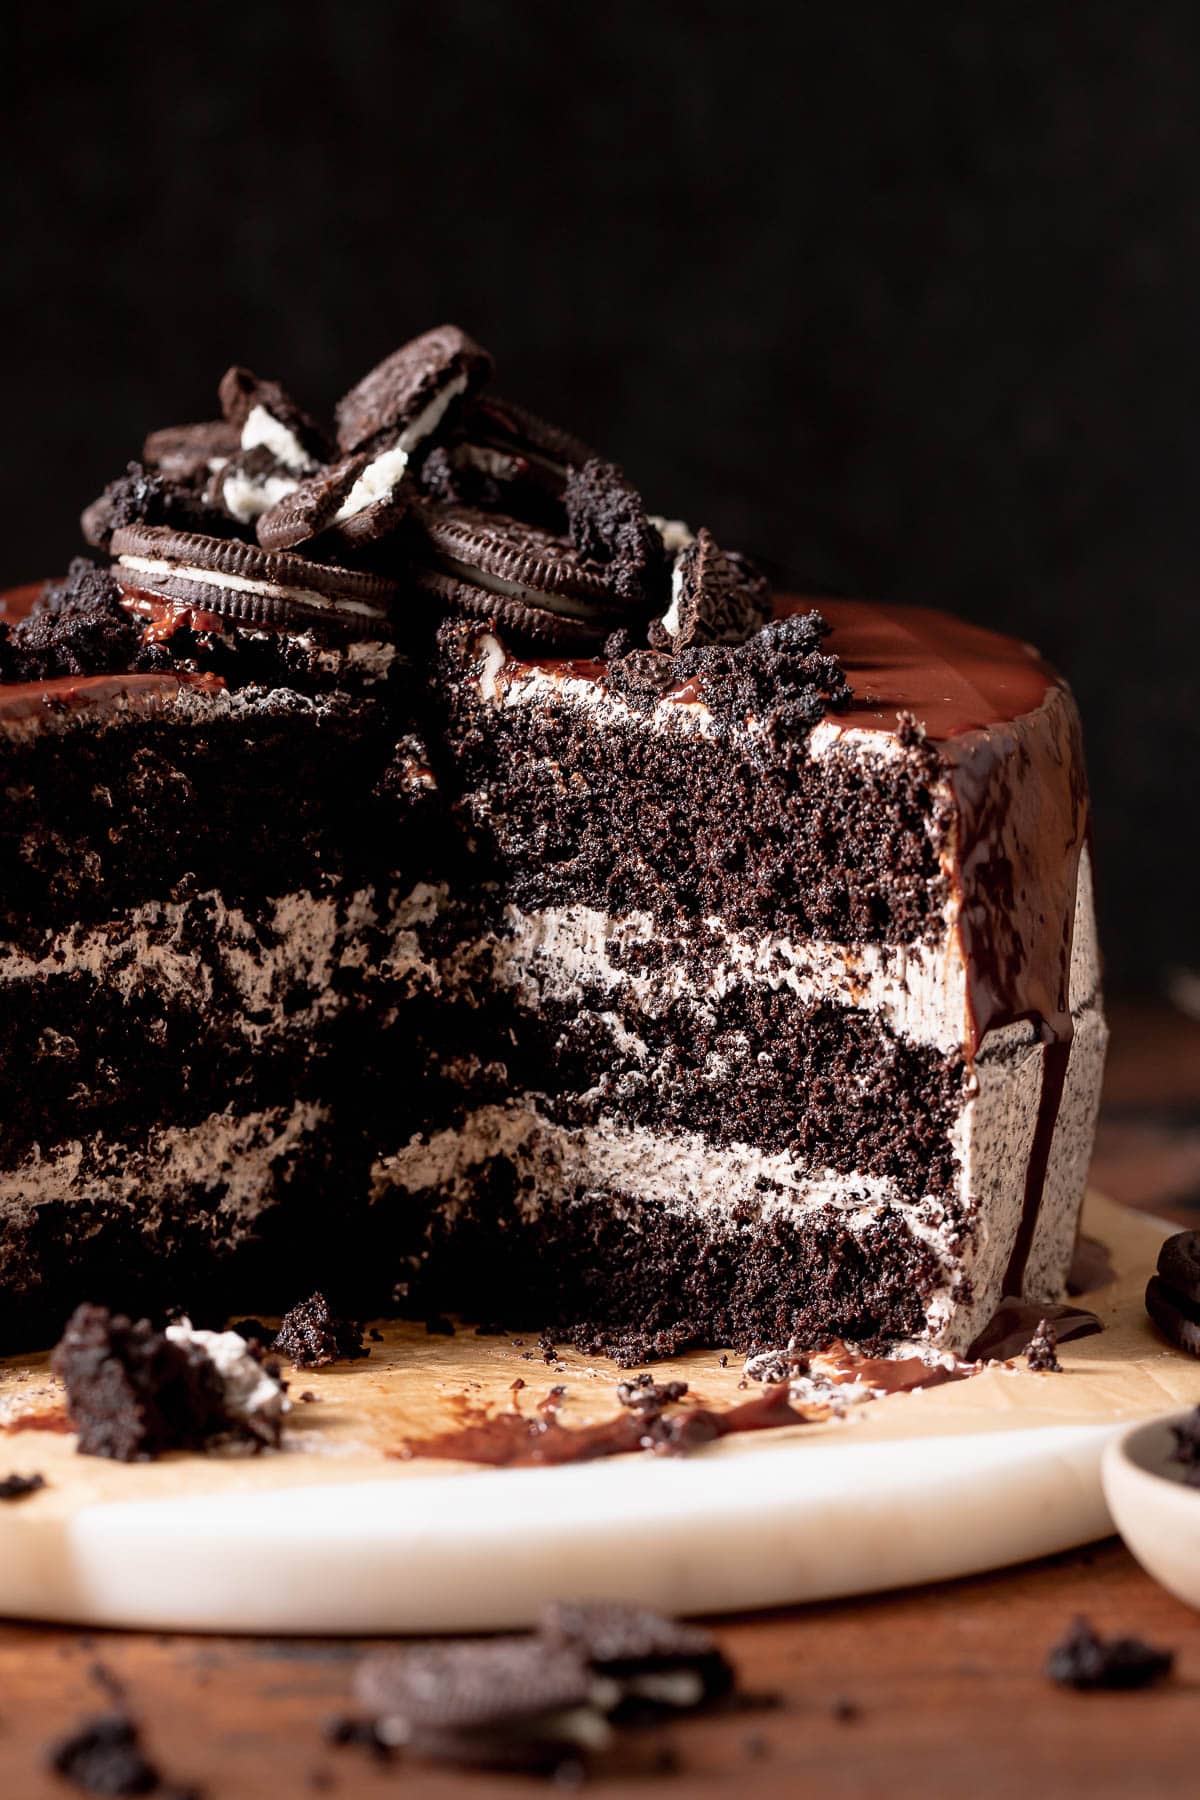
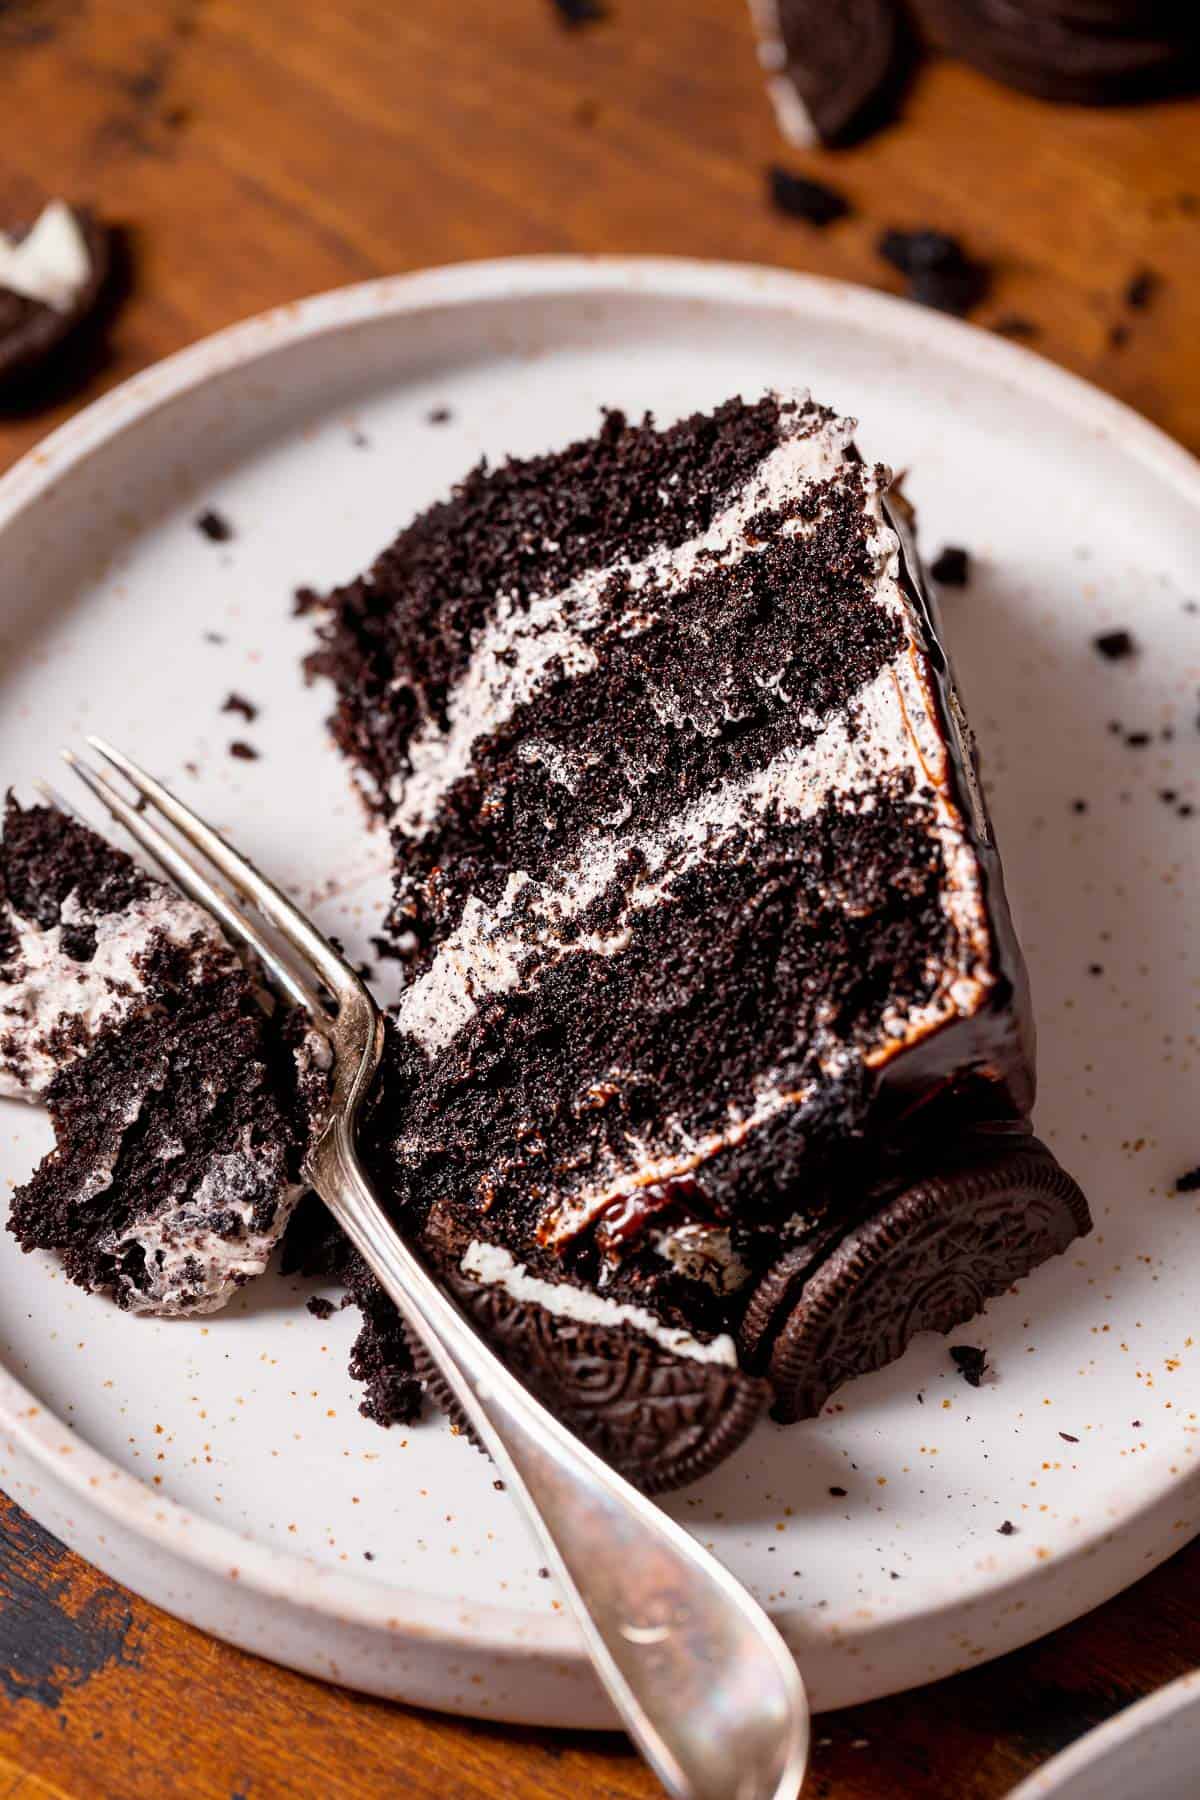
The timeless combination of rich chocolate and crunchy Oreos is truly a match made in heaven, and this dessert elevates it to an art form. Each slice reveals tender chocolate cake layers generously filled with a decadent Oreo cream, ensuring an explosion of cookies-and-cream flavor in every mouthful. This recipe isn’t just a cake; it’s an experience designed to delight all your senses and satisfy even the most discerning sweet tooth.
Drawing on years of experience as a pastry chef, I’ve meticulously developed and tested this recipe to guarantee it’s as unbelievably irresistible as my popular Oreo cinnamon rolls and Oreo chocolate chip cookies. Whether you’re baking for a special birthday celebration, a festive holiday gathering, or a casual weekend treat, this show-stopping cake is guaranteed to impress your guests and leave them asking for the recipe!
Table of Contents
Why This Chocolate Oreo Cake is a Must-Try
This isn’t just another chocolate cake; it’s a true Oreo lover’s dream, meticulously designed to maximize that irresistible cookies-and-cream flavor in every bite. Here’s what makes this recipe stand out:
- Oreos in Every Layer: We’re not holding back! Finely crushed Oreos are generously mixed directly into both the moist chocolate cake batter and the luscious buttercream frosting. This ensures that every single layer of your cake is infused with that unmistakable cookies-and-cream goodness, creating a harmonious blend of textures and flavors.
- Extra Oreo Toppings Galore: To achieve that show-stopping, professional bakery-style finish (similar to my popular Oreo cookie cake), we go the extra mile with toppings. The cake is adorned with additional crushed Oreos and even whole Oreo cookies, adding visual appeal, an extra textural crunch, and an undeniable boost of authentic Oreo flavor.
- Unrivaled Moisture and Texture: Thanks to a carefully balanced recipe and expert baking techniques, these chocolate cake layers are incredibly moist and tender, providing the perfect contrast to the creamy, cookie-studded frosting. This cake isn’t just flavorful; it’s a delight to eat from the first forkful to the last.
- Perfect for Any Occasion: While it looks and tastes gourmet, this recipe is surprisingly approachable for home bakers. It’s robust enough for a birthday centerpiece yet comforting enough for a simple family dessert. It’s truly a crowd-pleaser that will earn you rave reviews!
Essential Ingredients for Your Cookies and Cream Masterpiece
Creating this spectacular Oreo cake relies on a few key ingredients, each playing a vital role in achieving its perfect flavor and texture. Pay close attention to these components, as some substitutions can significantly alter the outcome.
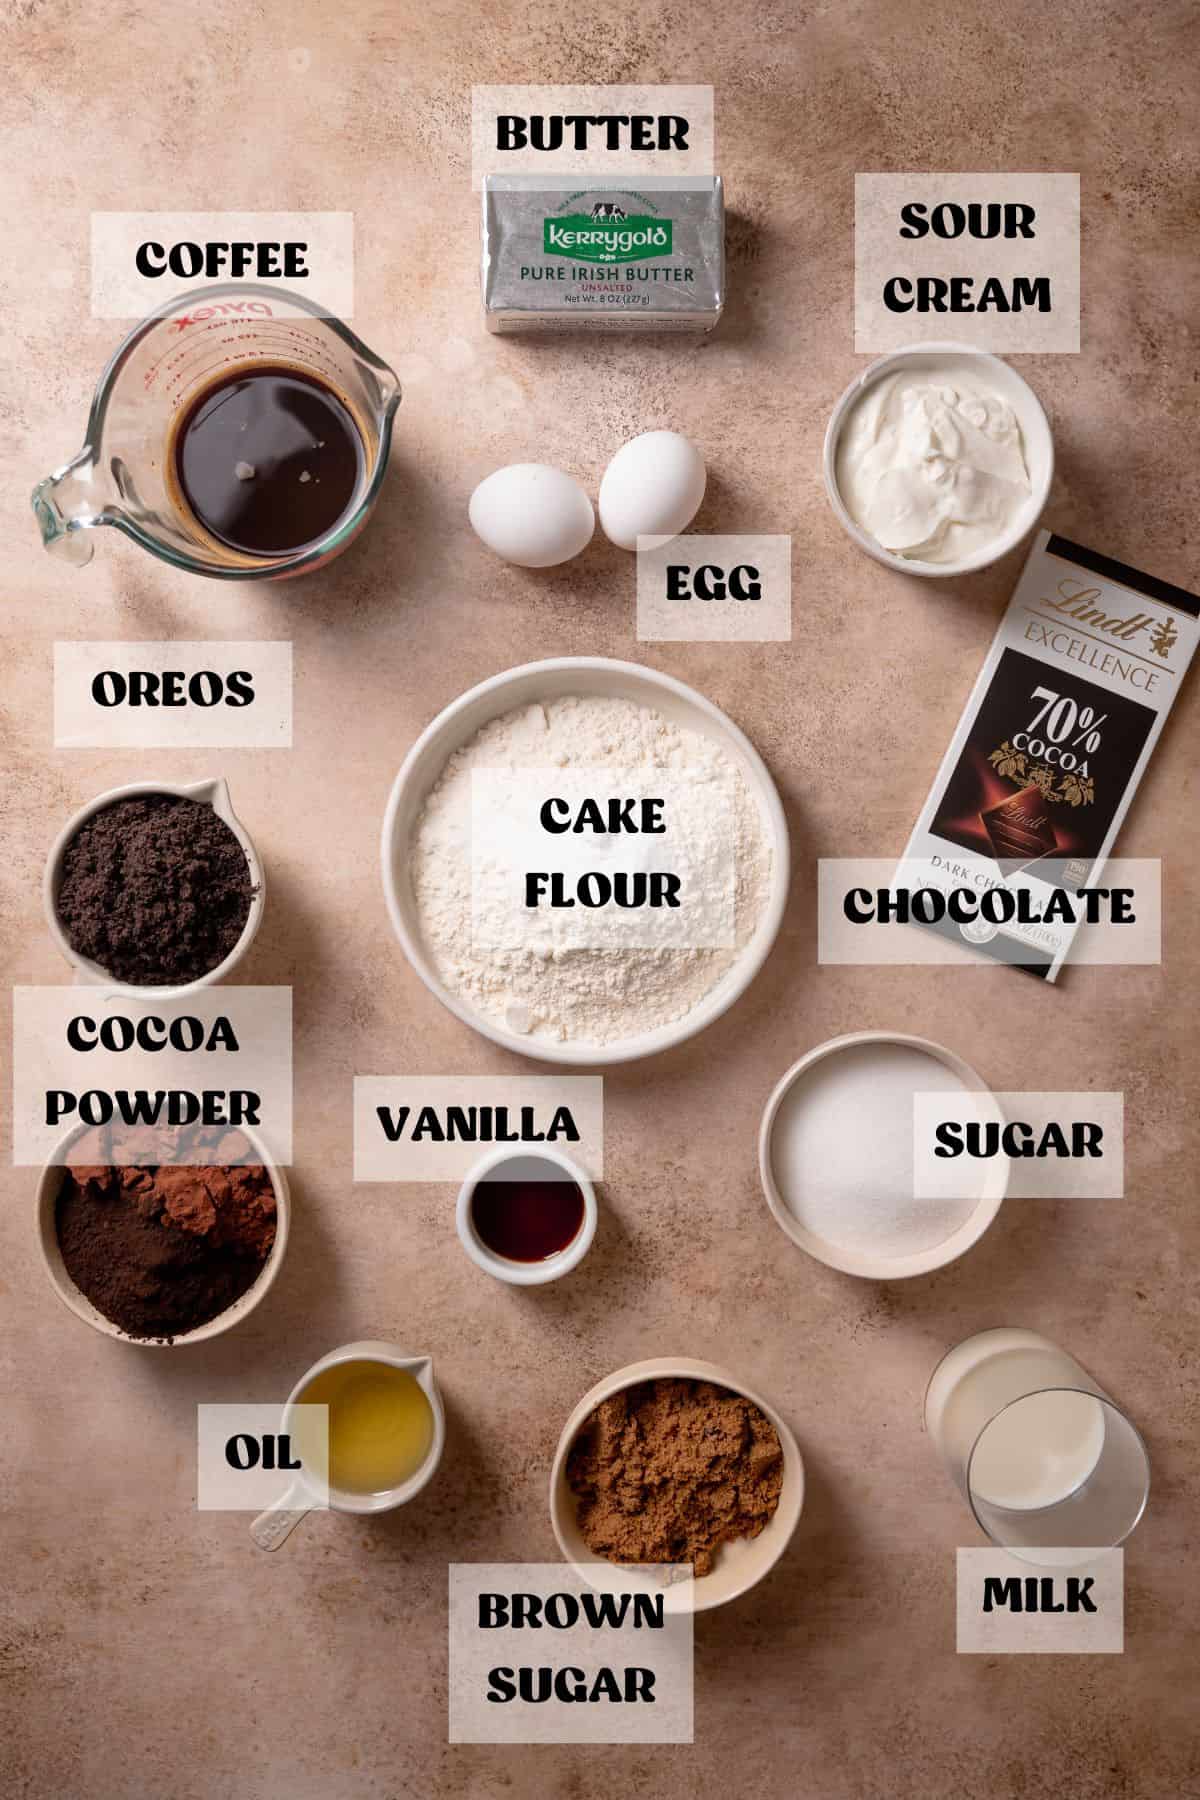
Oreo Cookies: The Star Ingredient
Oreo cookies: Naturally, the heart of this cake! For the best results and to maintain the ideal balance of cookie to cream, I highly recommend using regular Oreos. Double-stuffed varieties can introduce too much extra cream filling, which might make your frosting overly sweet or affect the texture. While other chocolate sandwich cookies can technically work, true Oreos provide that distinct flavor we’re aiming for.
Cake Flour for Ultimate Tenderness
Cake flour: This ingredient is non-negotiable for achieving the incredibly soft, tender crumb that makes this chocolate cake so special. Cake flour has a lower protein content than all-purpose flour, which means less gluten development. Because of the specific reverse creaming mixing method used in this recipe, substituting with all-purpose flour will lead to a tough, dense, and less enjoyable cake. Please avoid this substitution if possible!
Sour Cream for Moisture and Flavor
Sour cream: This powerhouse ingredient is crucial for adding significant moisture and a touch of acidity to the cake batter. The acidity reacts with the leavening agents (baking soda), helping the cake rise beautifully and contributing to its tender texture. For a similar flavor and moistness, you can substitute with an equal amount of full-fat Greek yogurt, ensuring it’s at room temperature for smooth incorporation.
Dutch-Processed Cocoa Powder: Deep Chocolate
Dutch-processed cocoa powder: This type of cocoa powder has been treated with an alkali to neutralize its acidity, resulting in a darker color and a milder, less bitter chocolate flavor. It’s essential not to use natural cocoa powder here, as its higher acidity levels are different and will react differently with the baking soda, potentially affecting both the texture and the rise of your cake. Stick to Dutch-processed for that deep, rich chocolate base.
Black Cocoa Powder: Authentic Oreo Flavor
Black cocoa powder: For that iconic, deep, almost black color and distinctive Oreo flavor (just like in my Oreo brownies), we incorporate a portion of black cocoa powder. This is a highly alkalized cocoa powder, identical to what’s used in actual Oreos. We’re only using a specific amount in the cake batter to enhance the cookies-and-cream profile. Do not be tempted to substitute *all* the cocoa powder with black cocoa powder; it lacks the fat found in regular cocoa powder, which is essential for moistening the cake, and could result in a dry texture. It’s a flavor booster, not a full replacement!
Hot Coffee or Water: Flavor Enhancer
Hot coffee or hot water: This seemingly simple addition is a secret weapon in chocolate baking. Hot liquid “blooms” the cocoa powder, enhancing its flavor and allowing it to dissolve thoroughly, creating a more intense chocolate experience. You’ll notice I use this technique in all my chocolate cake recipes, including my Oreo cookie cupcakes! While hot coffee significantly deepens and darkens the chocolate flavor without making the cake taste like coffee, you can absolutely substitute it with hot water if preferred or if you avoid caffeine.
Step-by-Step Guide to Baking Your Oreo Layer Cake
Follow these detailed steps carefully to ensure your chocolate Oreo cake turns out perfectly moist, flavorful, and beautifully structured.
1
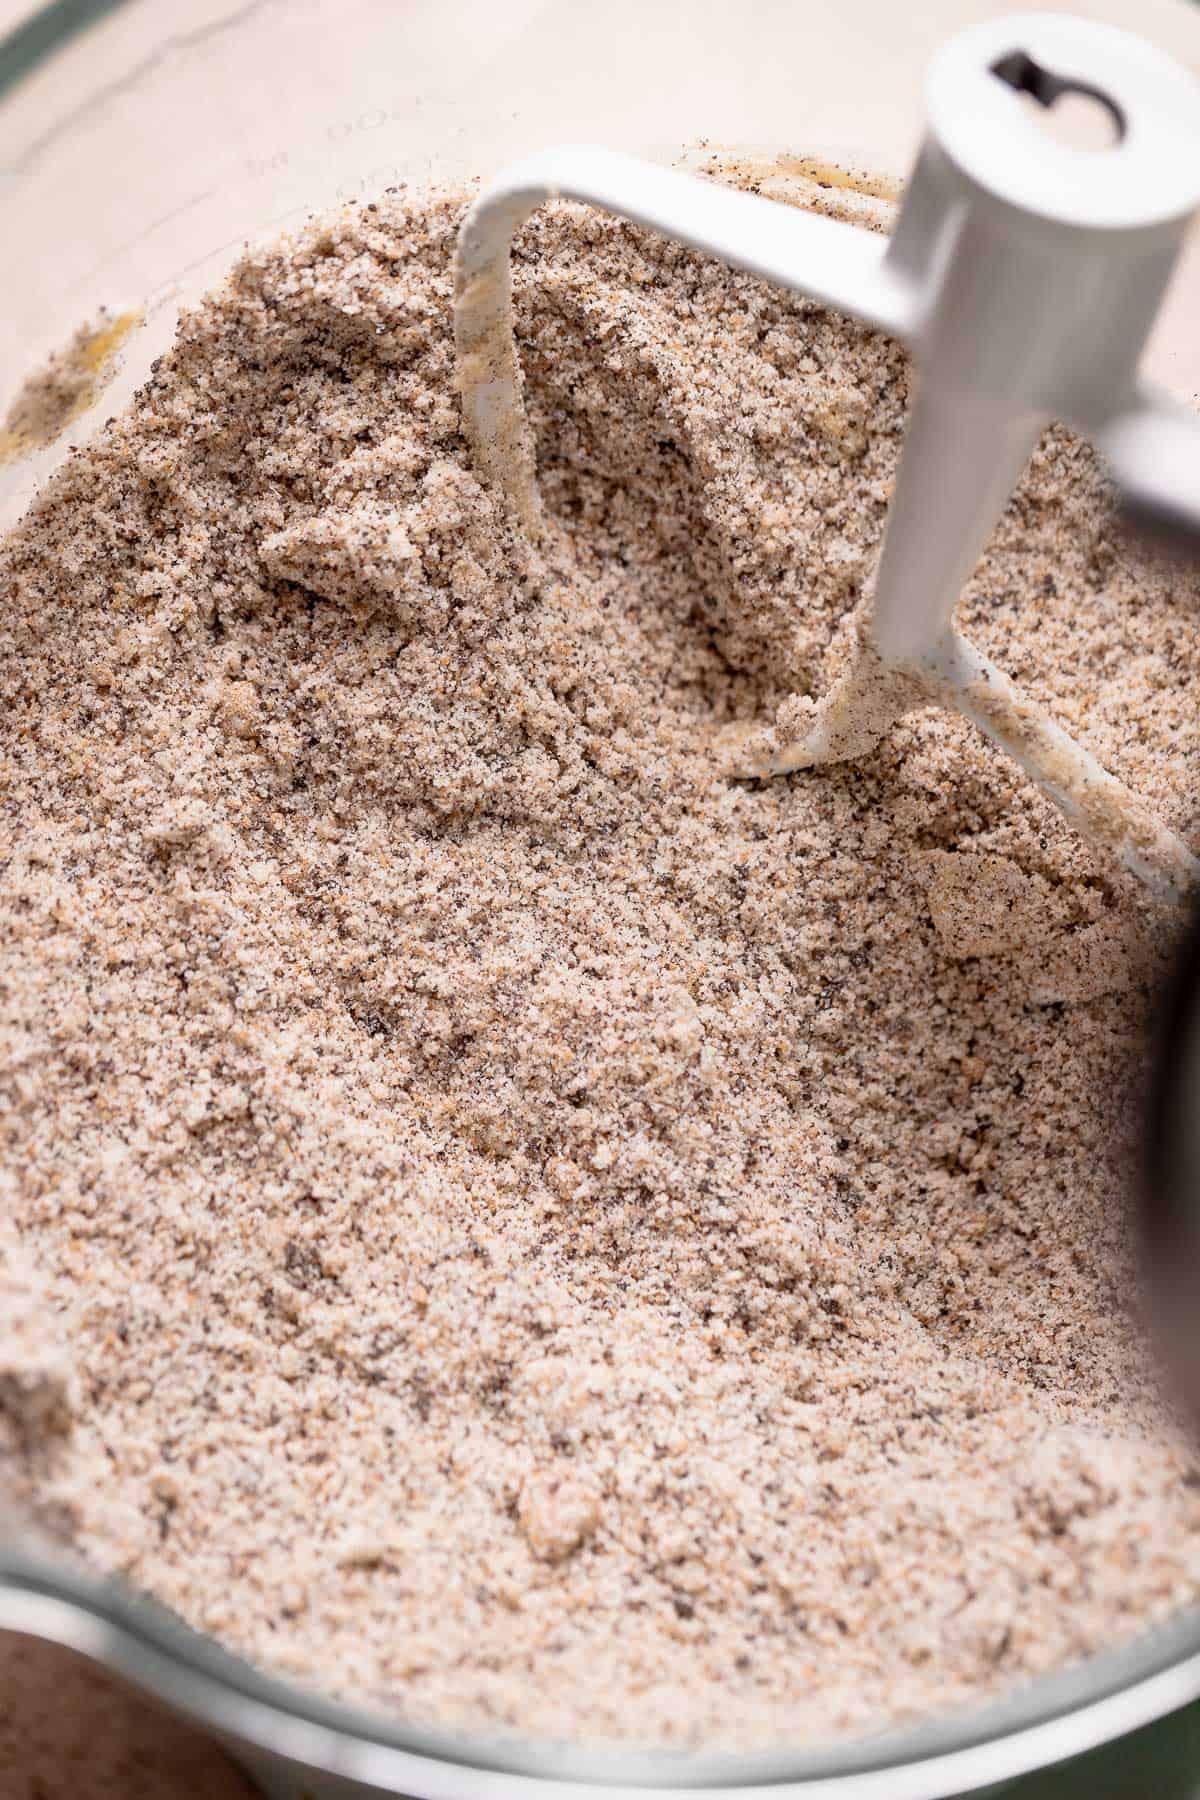
Step 1: Begin by mixing the butter into the dry ingredients. This recipe utilizes the reverse creaming method, where softened butter is first beaten into the dry ingredients. This innovative technique coats the flour in fat, inhibiting gluten development and resulting in an exceptionally super moist and tender cake crumb, much like my popular black velvet cupcakes! Mix until the mixture resembles coarse, wet sand.
2
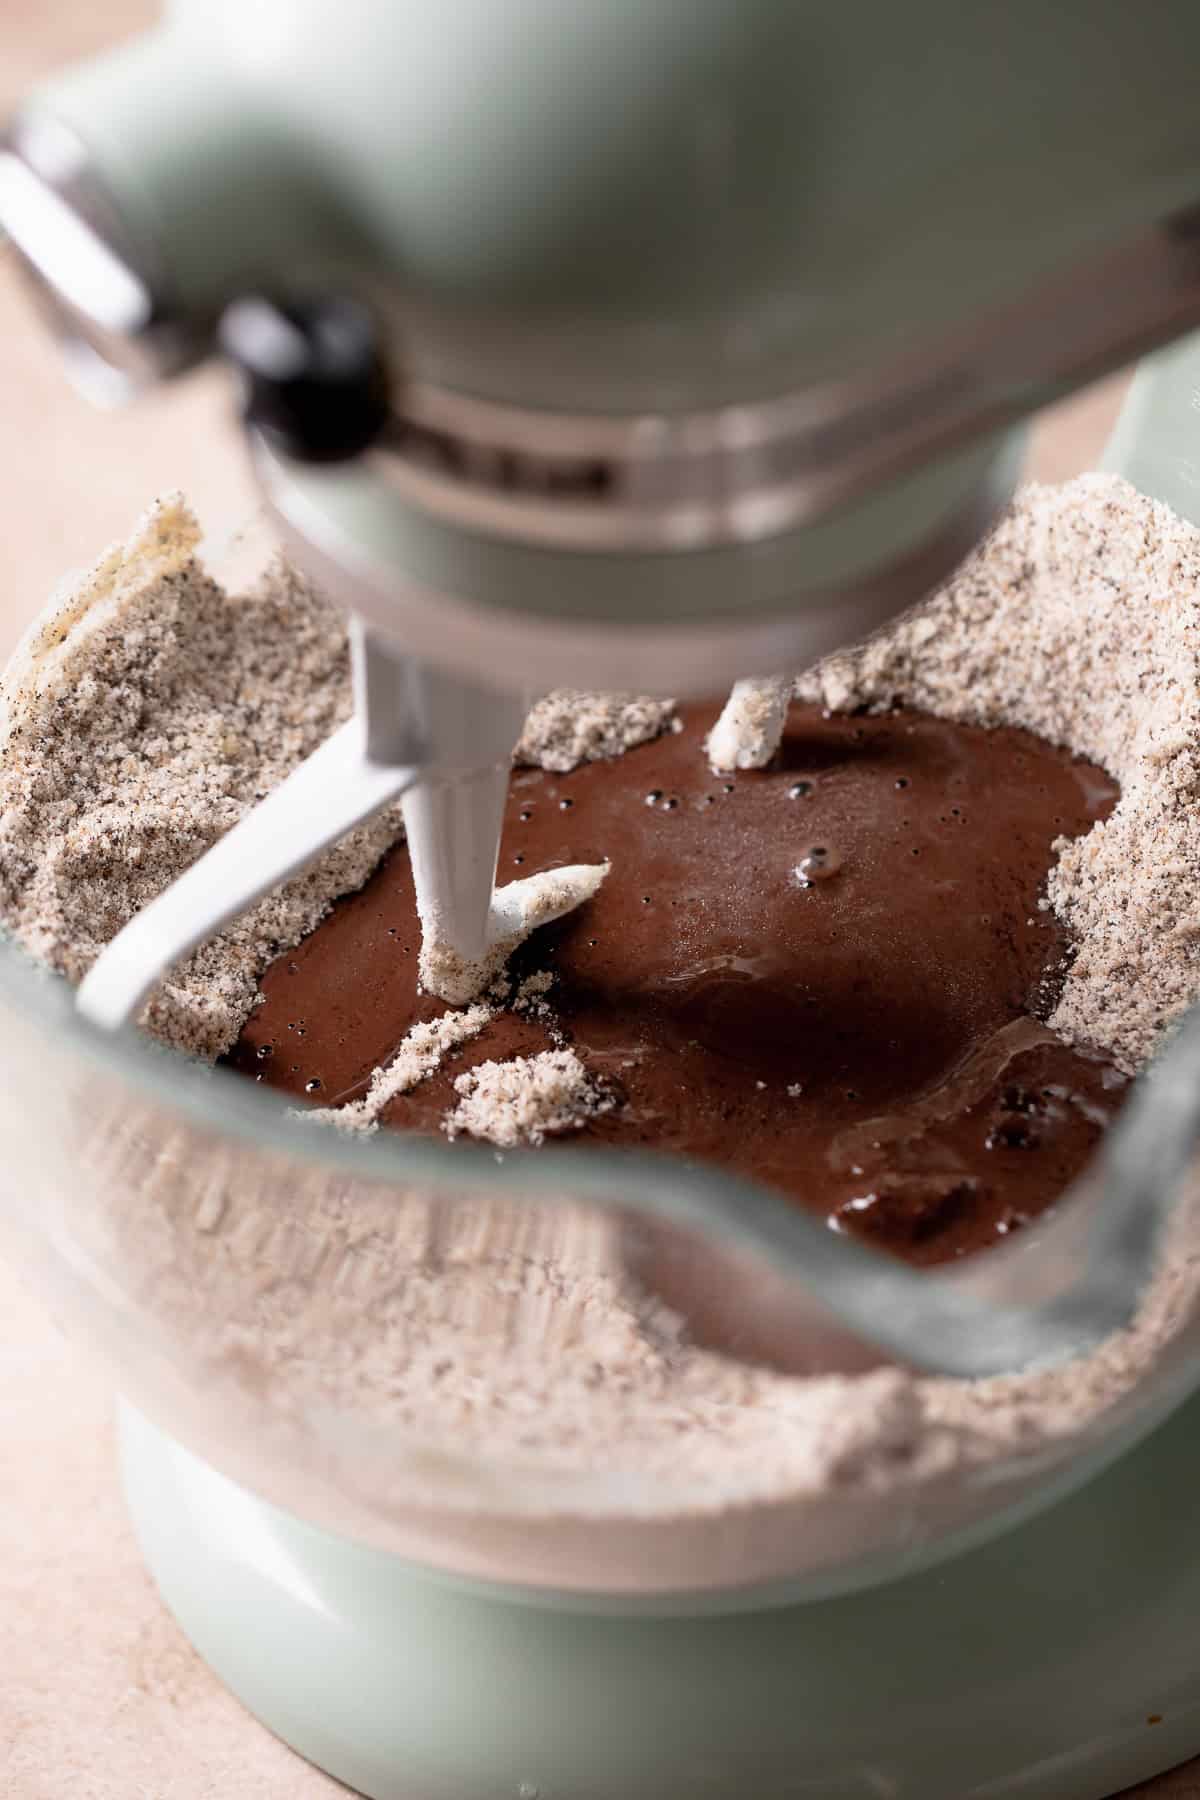
Step 2: Carefully mix in the wet ingredients. After the butter is incorporated, gradually add the combined wet ingredients to the dry mixture. This should be done in three additions, ensuring you scrape down the sides and bottom of the mixing bowl thoroughly between each addition. Mix just until everything is well combined and no streaks of dry ingredients remain. Overmixing at this stage can develop too much gluten and result in a tough cake.
3
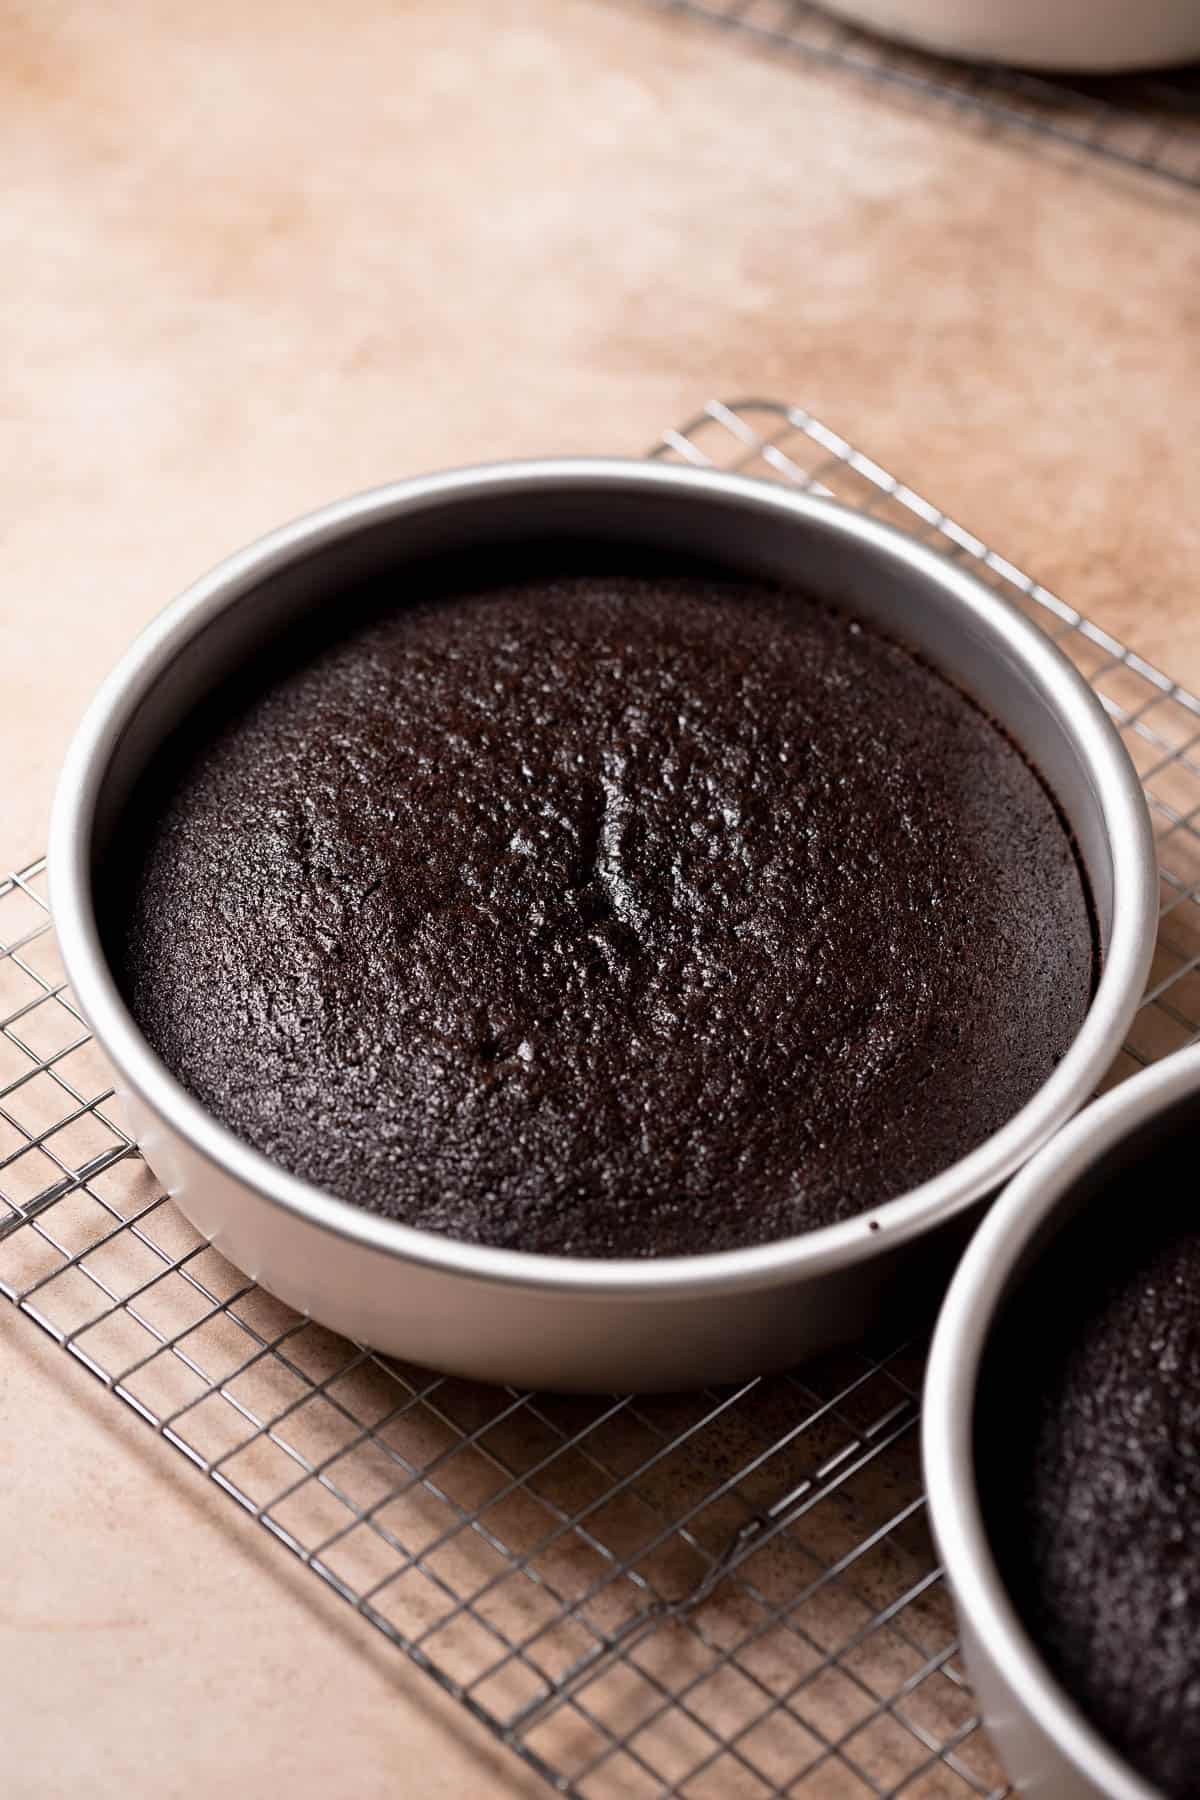
Step 3: Bake and cool the cake layers to perfection. Divide the cake batter evenly among your prepared cake pans. For precise and level layers, I highly recommend using a kitchen scale to ensure each pan receives the exact same amount of batter. Once baked, let the cakes cool in their pans on a wire rack for 20 minutes before inverting them to finish cooling completely. Do not rush this cooling process; frosting warm cakes will cause the buttercream to melt and slide right off!
4
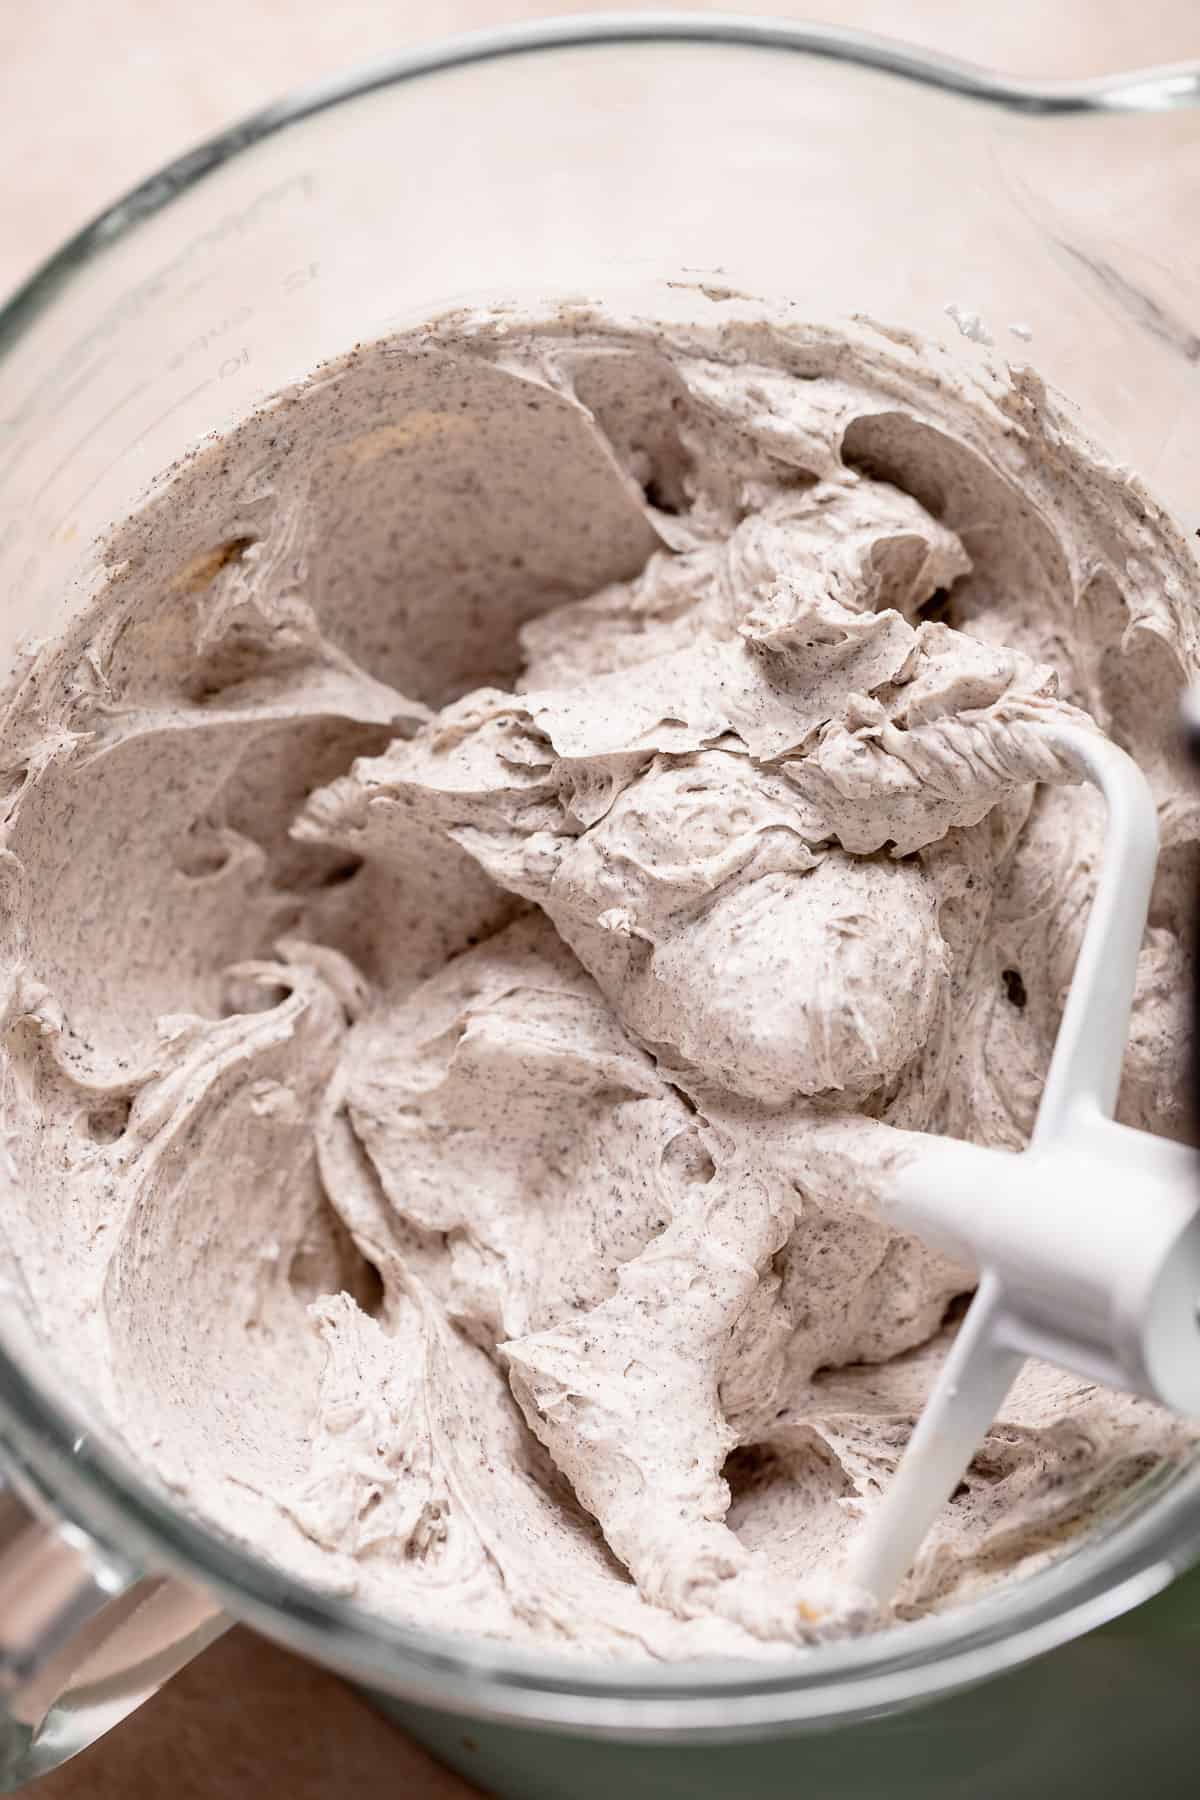
Step 4: Prepare the creamy Oreo frosting. In a stand mixer, beat the room-temperature butter and powdered sugar for at least 5 minutes on a low to medium-low speed. This extended beating time is crucial as it aerates the frosting, making it incredibly light, fluffy, and almost tripling it in volume. If you don’t beat it long enough, you might find you don’t have enough frosting to beautifully cover your entire cake.
5
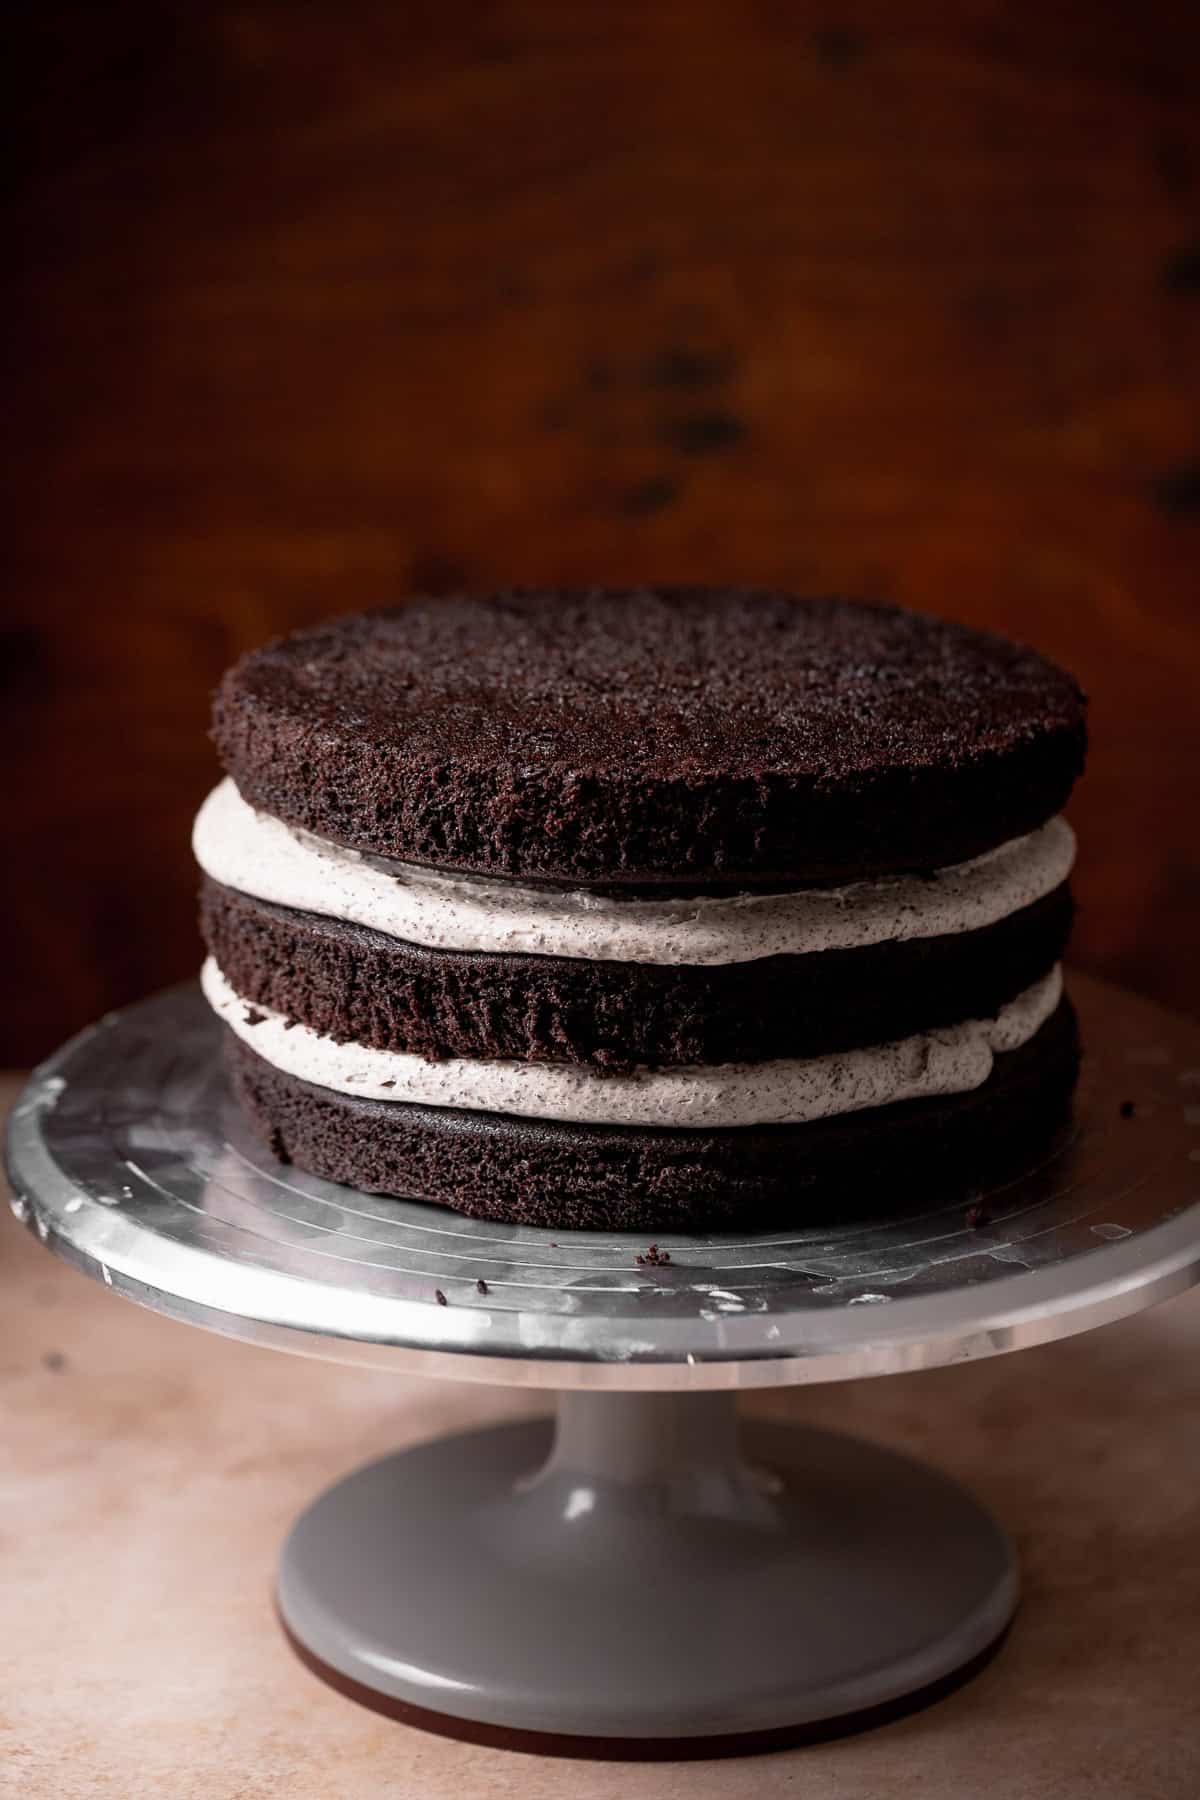
Step 5: Assemble and fill the cake layers. Once your cake layers are completely cooled, use a serrated knife to carefully trim any domed tops, creating flat, even layers. Place your first layer on your serving platter or cake stand. Spread a generous amount of Oreo buttercream frosting over the top. Repeat with the second cake layer. For the third layer, place it upside down; this trick ensures the top of your cake is perfectly flat and professional-looking, ready for frosting and decoration.
6
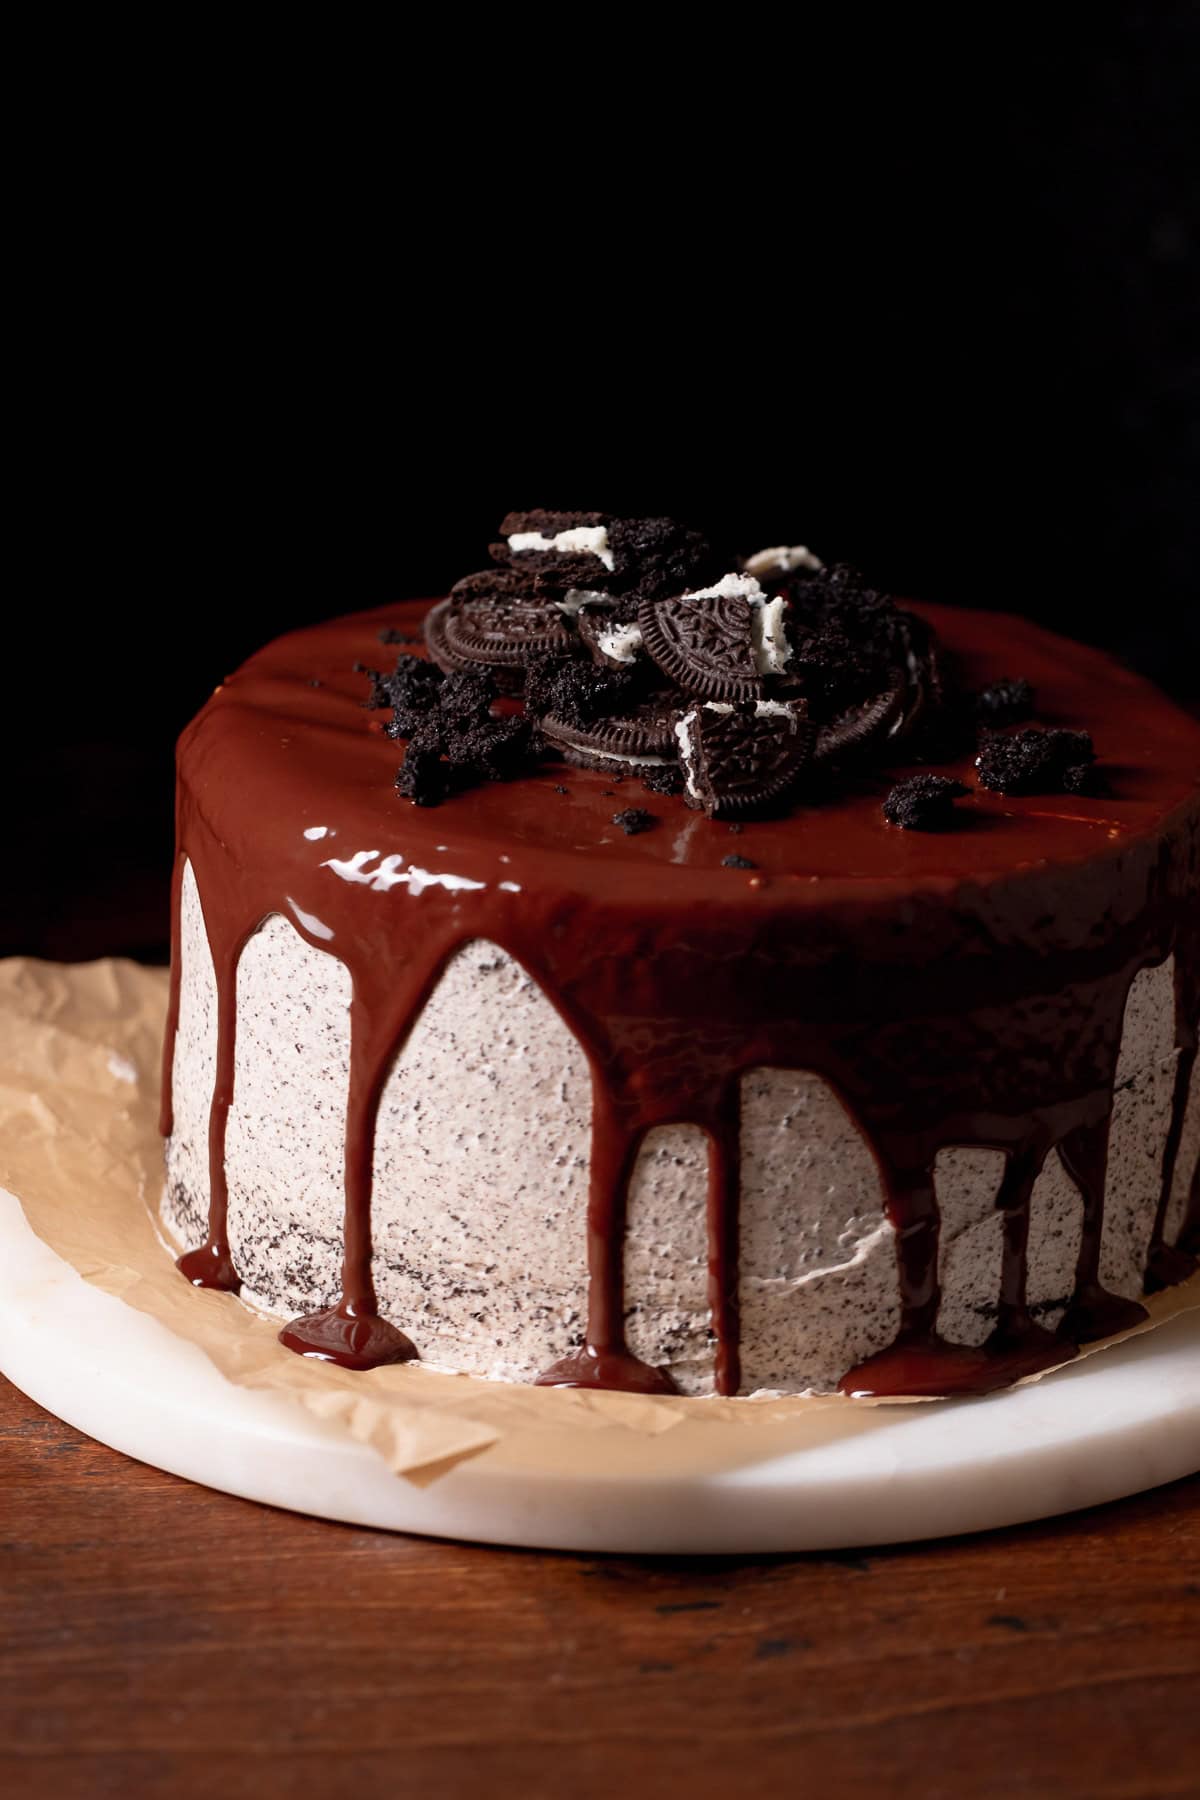
Step 6: Finish with a luxurious chocolate ganache glaze. Once your entire cake has been frosted with the Oreo buttercream, place it in the fridge to chill while your chocolate ganache cools to the proper drizzling consistency. Carefully pour the slightly cooled ganache over the top of the chilled cake, then use an offset spatula to gently push it towards the edges, allowing it to drip beautifully down the sides. Finally, decorate your masterpiece with crushed Oreos, whole Oreos, or any other desired garnishes for that ultimate finish.
Crafting the Perfect Oreo Buttercream Frosting
The Oreo frosting is a star component of this cake, delivering that signature cookies-and-cream flavor and a wonderfully smooth texture. Follow these tips to ensure your buttercream is absolutely perfect:
Finely crush the Oreo cookies: For a truly smooth and creamy buttercream, it’s essential to finely crush your Oreo cookies. Avoid large chunks, as they can create a lumpy texture and make piping difficult. Much like in my Oreo cheesecake cookies, I always rely on a food processor to achieve a consistent, fine crumb that seamlessly blends into the frosting.
Beat it low and slow for aeration: The key to a light and airy buttercream is patience. Beat the butter and powdered sugar at a low to medium-low speed for an extended period (at least 5 minutes). This slow and steady mixing incorporates air gradually, resulting in a frosting that is light, fluffy, and almost tripled in volume. Using high speeds can introduce large air bubbles, which can be noticeable when frosting the cake, making it less smooth and refined. Take your time for a beautifully smooth, creamy, and voluminous finish.
Ensure ingredients are at room temperature: Just like with the cake batter, make sure your butter is perfectly softened to room temperature for the frosting. Cold butter won’t cream properly, leading to a lumpy and dense buttercream. This seemingly small detail makes a significant difference in the final texture of your frosting.
Creative Decorating Ideas for Your Oreo Cake
While the chocolate ganache and crushed Oreos provide a classic finish, there are many ways to personalize and elevate your Oreo cake. Get creative with these decorating ideas to make your cake truly unique:
- Elegant Chocolate Shavings or Curls: For a sophisticated touch that intensifies the chocolate flavor, finely shave or curl some good quality chocolate over the top of the cake. Dark chocolate shavings provide a lovely contrast and rich aroma.
- Festive Colored Sprinkles: Add a pop of fun and color with themed sprinkles. Black and white sprinkles perfectly complement the Oreo theme, making it ideal for birthdays, celebrations, or even Halloween. You can also match sprinkles to a party theme!
- Beautiful Buttercream Swirls and Rosettes: Before applying the ganache, or in lieu of it, use a piping bag fitted with a star tip to create elegant swirls, rosettes, or decorative borders around the edges of the cake. This adds a classic bakery touch.
- Mini Oreo Cookies: Arrange mini Oreo cookies or halved regular Oreos artfully around the top perimeter of the cake or standing upright for an eye-catching display.
- Chocolate Drizzle: Instead of a full ganache pour, create a delicate drizzle pattern over the frosting using melted chocolate or a contrasting white chocolate for a striking effect.
Achieving Layer Cake Perfection: Expert Tips
Baking a show-stopping layer cake doesn’t have to be intimidating. With a few professional tips, you can achieve consistently beautiful and delicious results every time:
Precision is key with measurements: Baking is a science, and accuracy matters, especially for dry ingredients. Invest in a reliable kitchen scale for the most accurate results. Too much flour can lead to dense, dry cake layers, while too little can cause them to collapse. Proper measuring ensures the perfect balance of ingredients for a moist, tender crumb.
Properly line and grease your pans: To prevent your precious cake layers from sticking, always line the bottoms of your cake pans with parchment paper and thoroughly grease the sides. This creates a non-stick barrier, making it incredibly easy to remove the cooled cake layers without any breakage or fuss. A perfectly baked cake deserves to come out of the pan in one piece!
Level the layers for a stable stack: Once your cake layers have cooled completely, use a long serrated knife or a specialized cake leveler to carefully trim any domed tops. This creates flat, even layers that stack beautifully, ensuring your finished cake is stable, visually appealing, and boasts that impressive, bakery-worthy finish. A level cake not only looks better but is also easier to frost and serve.
Room temperature ingredients are a must: Ensure all your cold ingredients like butter, eggs, sour cream, and milk are brought to room temperature before mixing. This allows them to emulsify properly with other ingredients, creating a smooth, uniform batter and resulting in a cake with superior texture.
Storage, Freezing, and Make-Ahead Strategies
Planning ahead or managing leftovers is easy with this delicious Oreo cake. Here’s how to store it to maintain its freshness and flavor:
- Storage: If you have any glorious leftovers, store them in an airtight container to prevent drying out. The cake can be kept at cool room temperature for 2-3 days. For extended freshness, transfer it to the refrigerator, where it will stay delicious for up to 5 days. Remember, if refrigerated, always allow the cake to come to room temperature for about 30-60 minutes before serving to ensure the frosting and cake layers are perfectly soft and flavorful.
- Freezing: This cake freezes beautifully! You can freeze the entire cake (unfrosted or frosted, though unfrosted layers are best) or individual slices for convenience. Wrap tightly in plastic wrap, then an additional layer of aluminum foil, and store in the freezer for up to 1 month. To serve, simply defrost at room temperature until completely thawed.
- Make Ahead: This recipe is perfect for preparing in advance.
- Buttercream: The Oreo buttercream frosting can be made up to 2 weeks ahead of time. Store it in an airtight container in the refrigerator. When you’re ready to use it, let it sit overnight at room temperature until softened, then re-whip it in your stand mixer for a few minutes until it’s light, fluffy, and smooth again.
- Cake Layers: The baked cake layers can also be prepared in advance. Once completely cooled, wrap each layer tightly in plastic wrap and then in aluminum foil. Store them in the freezer for up to 1 month. Thaw at room temperature for a few hours before leveling and assembling.
Frequently Asked Questions (FAQs) About Oreo Cake
Here are answers to some common questions about baking and enjoying this delicious Chocolate Oreo Cake:
Absolutely! In fact, I’ve already perfected a recipe for Oreo cupcakes that uses the very same moist chocolate cake batter and creamy Oreo frosting from this recipe. I highly recommend following that dedicated cupcake recipe for the best results, as it provides specific baking times and instructions tailored for cupcakes.
You can certainly omit the black cocoa powder if it’s not available. However, be aware that without it, your cake will lose some of that distinctive deep, dark color and the authentic, intense Oreo flavor that black cocoa uniquely contributes. The cake will still be delicious, but it won’t have the same depth of flavor or iconic appearance.
Yes, for an even more chocolatey experience, you can gently fold in about 1/2 to 1 cup of chocolate chips or chopped chocolate chunks into the cake batter just before dividing it into pans. This will add delightful pockets of melted chocolate throughout the moist cake layers.
If you don’t have a cake leveler, a long serrated knife (like a bread knife) works wonderfully. Once the cakes are completely cool, place one layer on a flat surface. Hold the knife parallel to the counter and slowly saw through the domed top, rotating the cake as you go. Practice makes perfect for a smooth, even cut!
More Irresistible Chocolate Cake Recipes
If you’re a fan of rich, decadent chocolate cakes, you’ll love exploring these other delightful recipes from my collection:
- Chocolate Ganache Cake: A true celebration of chocolate with a glossy ganache finish.
- Chocolate Coffee Cake: The perfect marriage of rich chocolate and aromatic coffee for a sophisticated flavor.
- Strawberry Chocolate Cake: A delightful combination of sweet strawberries and deep chocolate, perfect for spring or summer.
- Black Velvet Cake: A dramatic and delicious cake with a unique cocoa flavor and stunning dark hue.
If you tried this or any other recipe on my website, please let me know how it went in the comments; I love hearing from you! Also, please leave a star rating while you’re there! You can also tag me on Instagram or Facebook so I can check it out!

Chocolate Oreo Cake
Rating: 5 from 2 votes
– by Cambrea Gordon
Print Recipe
Save Recipe
Saved!
Pin Recipe
3 hours
20 minutes
3 hours
20 minutes
Dessert
American
12 servings
Prevent your screen from going dark
Equipment
-
three 8 inch cake pans -
kitchen scale -
wire rack -
food processor -
offset spatula
Need Metric Measurements?
Use the button options below to toggle between US cups and Metric grams!
Ingredients
Cake Batter
-
1 3/4 cups cake flour, *See notes below for measuring* -
1 1/2 cups granulated sugar -
1/2 cup dark brown sugar, packed -
1 cup finely ground Oreo cookies -
1 1/2 teaspoons baking powder -
3/4 teaspoon baking soda -
1 teaspoon fine sea salt -
7 tablespoons unsalted butter, cubed, room temperature -
1 cup hot brewed coffee -
3/4 cup Dutch-processed cocoa powder -
1/4 cup black cocoa powder -
1 cup sour cream, room temperature -
1/2 cup whole milk, room temperature -
2 large eggs, room temperature -
1/3 cup vegetable oil -
1 tablespoon vanilla extract
Oreo Frosting
-
1 1/2 cups unsalted butter, room temperature -
2 cups powdered sugar -
3/4 cup finely ground Oreo cookies -
3 tablespoons heavy cream -
1 teaspoon vanilla extract -
Pinch fine sea salt
Chocolate Ganache Glaze
-
1/3 cup heavy whipping cream -
1.5 ounce semisweet or dark chocolate bar, chopped -
Oreo cookies, for decorating
Instructions
-
Grease the sides of three 8-inch cake pans and line the bottoms with parchment paper. This preparation ensures your cakes don’t stick. Preheat your oven to 350°F (180°C) to be ready for baking.
-
Combine the cake flour, granulated sugar, dark brown sugar, finely ground Oreo crumbs, baking powder, baking soda, and fine sea salt in a large mixing bowl. Add the cubed, room-temperature unsalted butter. Mix on low speed until the butter is fully incorporated into the dry ingredients and the mixture resembles coarse, wet sand. This reverse creaming method creates a tender crumb.1 3/4 cups (230 g) cake flour,
1 1/2 cups (300 g) granulated sugar,
1/2 cup (100 g) dark brown sugar,
1 cup (110 g) finely ground Oreo cookies,
1 1/2 teaspoons baking powder,
3/4 teaspoon baking soda,
1 teaspoon fine sea salt,
7 tablespoons (98 g) unsalted butter -
In a separate bowl, whisk together the hot brewed coffee and both Dutch-processed and black cocoa powders until smooth. Then, whisk in the room-temperature sour cream, whole milk, large eggs, vegetable oil, and vanilla extract until fully combined. This mixture forms your liquid ingredients.1 cup (210 g) hot brewed coffee,
3/4 cup (75 g) Dutch-processed cocoa powder,
1/4 cup (25 g) black cocoa powder,
1 cup (228 g) sour cream,
1/2 cup (113 g) whole milk,
1/3 cup (80 g) vegetable oil,
2 (100 g) large eggs,
1 tablespoon vanilla extract -
Gradually add the wet ingredients to the dry mixture in the mixing bowl. Incorporate them in three equal additions, mixing gently on low speed. Be sure to scrape down the sides and bottom of the bowl thoroughly between each addition to ensure a homogenous batter. Mix just until combined; avoid overmixing.
-
Evenly distribute the cake batter into the three prepared cake pans. For consistent layers, use a kitchen scale to ensure each pan contains roughly 565g of batter. Bake for 20-30 minutes, or until a wooden toothpick inserted into the center of a cake layer comes out with a few moist crumbs attached. Allow the cakes to cool in their pans on a wire rack for 20 minutes before gently inverting them onto the rack to finish cooling completely. It’s crucial they are completely cool before frosting.
Make the Oreo Frosting
-
In the bowl of a stand mixer fitted with the paddle attachment, cream the room-temperature unsalted butter until it is smooth and light. Gradually add the powdered sugar, mixing on low speed until combined. Increase the speed to medium-low and beat for at least 5 minutes. This aerates the frosting, making it incredibly light, white, and nearly tripled in volume. Finally, mix in the finely ground Oreo crumbs, heavy cream, vanilla extract, and a pinch of fine sea salt until just combined.1 1/2 cups (340 g) unsalted butter,
2 cups (240 g) powdered sugar,
3/4 cup (90 g) finely ground Oreo cookies,
3 tablespoons heavy cream,
1 teaspoon vanilla extract,
Pinch fine sea salt
Assembly
-
Once the cake layers are completely cool, use a serrated knife to slice a thin layer off the top of each cake layer to create flat surfaces. Place your first cake layer on your chosen serving board or cake stand. Spread about one-third of the prepared Oreo frosting evenly over this layer. Place the second cake layer on top and repeat with another layer of frosting. Finally, place the third cake layer upside down, which ensures the top of your cake is perfectly flat and level for a professional finish.
-
Use the remaining Oreo buttercream to generously cover the entire top and sides of the assembled cake. Aim for a smooth and even coat. Once frosted, transfer the cake to the fridge to chill for at least 30 minutes while you prepare the chocolate ganache. Chilling the cake helps to set the frosting and makes the ganache application much smoother.
-
To make the chocolate ganache glaze, heat the heavy whipping cream in a microwave-safe bowl or in a small pot on the stove until it is almost boiling. Pour the hot cream over the finely chopped semisweet or dark chocolate bar. Let it sit undisturbed for 1-2 minutes, then stir gently until the chocolate is fully melted and the mixture is smooth and emulsified. Set the ganache aside for about 5 minutes to cool slightly. It’s crucial that it’s not too warm, as hot ganache will melt your beautifully frosted cake!1/3 cup (75 g) heavy whipping cream,
1.5 ounce (44 g) semisweet or dark chocolate bar -
Once the ganache has cooled to a pourable but not hot temperature, pour it over the top of the chilled cake. Use an offset spatula to gently push the ganache to the edges, allowing it to drip attractively down the sides. For the grand finale, garnish your magnificent cake with extra Oreo cookies – crushed, whole, or halved – for that ultimate decorative touch. Slice, serve, and enjoy your homemade Chocolate Oreo Cake!Oreo cookies
Video
Notes
Storage: Leftovers of this delicious Oreo cake can be kept at room temperature in an airtight container for 2-3 days. For maximum freshness, store it in the fridge for up to 5 days. You can also freeze the cake (whole or in slices) for up to 1 month!
Temperature: For optimal flavor and texture, always serve refrigerated cake at room temperature. Let it sit out for 30-60 minutes before cutting.
Serving: 1serving
|
Calories: 827kcal
|
Carbohydrates: 92g
|
Protein: 7g
|
Fat: 51g
|
Saturated Fat: 27g
|
Polyunsaturated Fat: 6g
|
Monounsaturated Fat: 14g
|
Trans Fat: 1g
|
Cholesterol: 130mg
|
Sodium: 421mg
|
Potassium: 285mg
|
Fiber: 4g
|
Sugar: 67g
|
Vitamin A: 1242IU
|
Vitamin C: 0.2mg
|
Calcium: 98mg
|
Iron: 4mg
The calorie information provided for the recipe is an estimate. The accuracy of the calories listed is not guaranteed.
Tried this recipe?
Leave a comment below & tag @cambreabakes on social!
